Table of contents
- Overview
- Subdomain vs. domain
- Using a custom subdomain
- Troubleshooting for configuration
- Deleting an existing configuration
- Using custom subdomain
- Using a custom domain
- Next steps
Overview
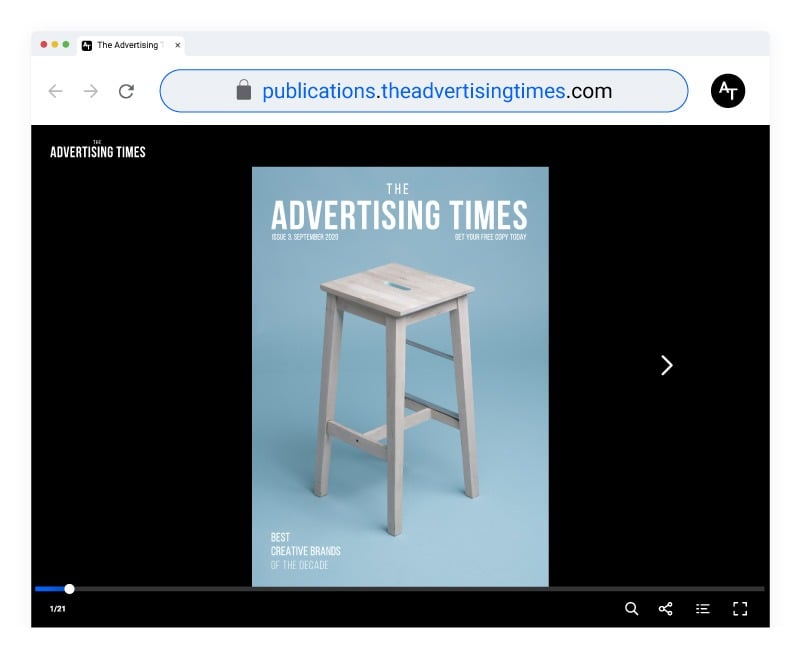
Branding your flipbooks with a custom domain or subdomain ensures a professional and seamless experience for your audience. Flipsnack allows you to remove Flipsnack branding, customize your URL, and enhance brand consistency across all publications. This branding now extends to all flipbooks, including those shared privately via Single Sign-On (SSO) or One-Time Passcode (OTP). Your viewers will see your professional domain in the address bar regardless of the flipbook's visibility settings.
Key benefits
- Consistent branding: Align URLs with your company’s digital presence by replacing Flipsnack branding.
- Improved audience trust: A custom domain reinforces credibility and strengthens brand recognition.
- Seamless integration: Ensure a smooth experience by matching flipbook URLs with your website structure.
- Enhanced SEO: Boost visibility and discoverability by using a domain that aligns with your online strategy.
Requirements
- Plan: Available for Business, Team and Enterprise plans.
- Target audience: marketing teams, sales departments, and customer support teams in B2B organizations.
Customers using a custom domain/subdomain
Here are some examples of domains connected to Flipsnack:
- Habits Magazine Inc: https://habits-magazine.com
- William Pitt Sotheby's International Realty: https://www.virtualpreview.com
- Jeff Martin Auctioneers: https://library.jeffmartinauctioneers.com
- Asus Product Guides: https://asusproductguide.asus.com/
Flipsnack also allows you to use a custom domain (instead of a subdomain). This setup requires additional technical support, and configuration varies based on your domain provider.
 Subdomain vs. domain
When setting up a custom URL, you can choose between two options:
- Subdomain (Recommended): A subdomain (e.g., catalogs.yourwebsite.com) keeps your publications connected to your main website while ensuring a fully branded experience. This is the most common choice for businesses.
- Custom domain: A separate domain (e.g., habits-magazine.com) offers more independence but requires additional configuration. This setup is more complex and may require support from Flipsnack’s technical team.
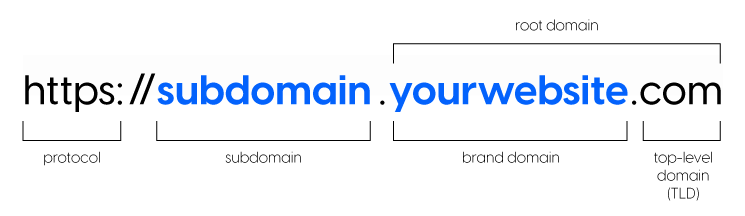
The image below shows the components of a website URL. If you're reading this article, you probably already have a website, so you can easily identify your brand domain
Using a custom subdomain
A custom subdomain allows you to host your Flipsnack flipbooks under your company’s domain while keeping the original Flipsnack functionality. Examples of companies using subdomains:
- Winsupply: https://publications.winsupply.com
- Ingram Micro Digital Publications: https://playbooks.ingrammicro.com
- Jameson Sotheby's International Realty: https://presentation.jamesonps.com
Setting up a custom subdomain
To configure your CNAME in Flipsnack:
1. Navigate to Branding > Brand profile > Settings > Custom domain in your Flipsnack dashboard.

2. Click on Configure domain and the Connect your subdomain popup will open.
3. Enter your subdomain just like in the example below and click on Next.
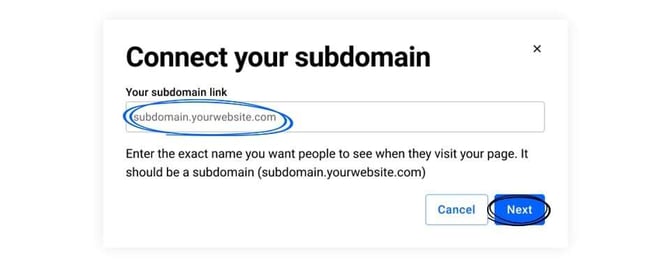
Warning: When you’re entering your subdomain, please make sure the domain you’re using is IANA-compliant. Otherwise, the setup will not work
4. Choose between Flipsnack’s SSL certificate or import your own.
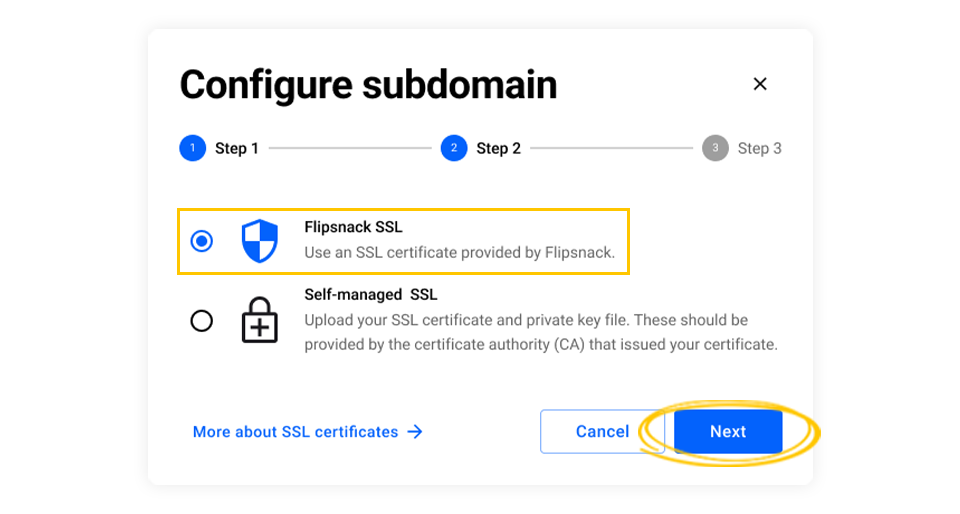
The following scenario is when you choose the SSL provided by Flipsnack. If you want to import a custom certificate, click the above link and follow the steps from that article.
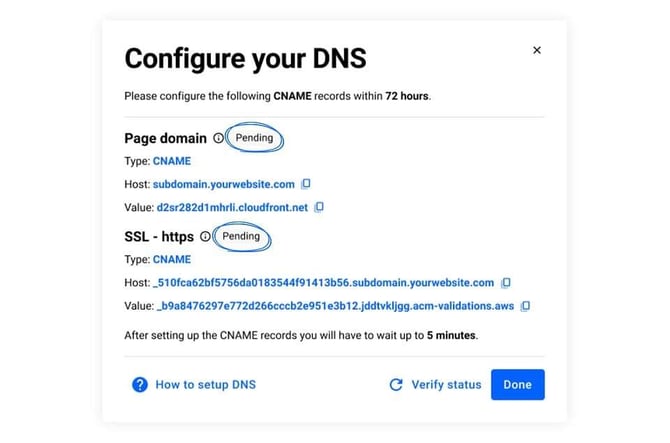
5. The Configure your DNS popup will appear.
6. Open your DNS provider (e.g., GoDaddy, Cloudflare, Namecheap) and create a CNAME record with the following configuration: Host: subdomain.yourwebsite.com and Value: custom.cloudfront.net (our platform will generate this).
7. Disable proxy settings if your DNS provider has a Proxy option and save the configuration.
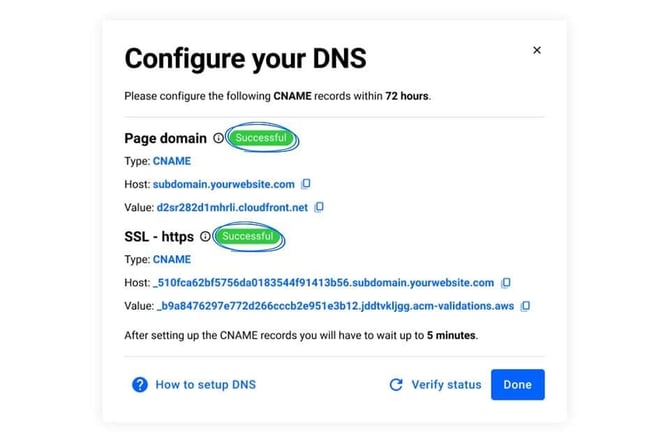
8. Return to Flipsnack and click Verify status. It might take approximately 5 minutes for the status to change from Pending to Successful.
9. Once verification is successful, your flipbooks will be accessible under your branded URL.
Update: The custom CName you have installed will now apply to private publications as well.
Troubleshooting for configuration
If your domain is not working, check the following:
- Misspelled or unregistered domain: Ensure the subdomain exists and is correctly typed.
-
CAA record conflict: If you have configured a CAA record on your domain, additionally you will have to whitelist the following CA providers by adding the following CAA records to your DNS configuration:
0 issue "pki.goog; cansignhttpexchanges=yes"
0 issue "letsencrypt.org"
0 issue "ssl.com"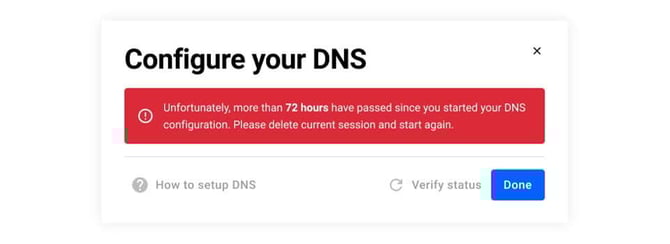
0 issue "sectigo.com" - Validation timeout: If DNS settings aren’t updated within 72 hours, delete the setup and start over.
- Contact support: If none of the above solutions work, contact Flipsnack’s live chat support for further assistance.
Deleting an existing configuration
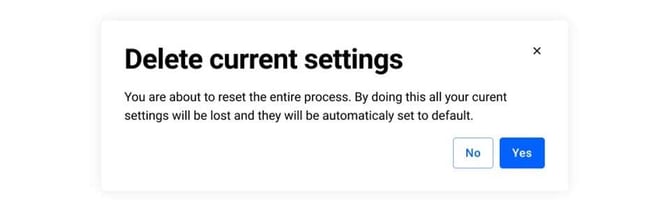
If you need to remove your custom subdomain:
- Go to Branding > Brand profile > Settings > Custom domain.
- Click Delete to remove the current setup.
- Confirm the deletion in the popup that appears.
Below you have a list of the most common domain providers and links to their guidelines on how to change the DNS settings by using their platforms:
Using a custom domain
Here are some examples of domains connected to Flipsnack:
- https://habits-magazine.com
- https://www.virtualpreview.com/
Flipsnack also allows you to use a custom domain (instead of a subdomain). This setup requires additional technical support, and configuration varies based on your domain provider.
- If you prefer a full custom domain, contact Flipsnack’s support team via live chat.
- Our tech team will assist in setting up your domain for hosting Flipsnack flipbooks.
Next steps
Explore related branding guides
- How to set up workspace branding
- How to customize flipbook URLs
- How to troubleshoot custom domain issues
- Troubleshooting custom domain issues with Flipsnack and Cloudflare
Note: A Flipsnack account (workspace) can only have one subdomain. You cannot set different subdomains for different flipbooks.
Need expert support?
Our team is here to help. Connect with our team experts or message us via the in-app chat for a personalized demo.
See what other users are saying about this on our Flipsnack community page.