
Overview
Connect Mailgun to Flipsnack, and the emails your flipbooks send come from your own domain instead of no-reply@flipsnackmail.com. This covers Shopping list order emails and the emails you send from the Send email page. You set it up under Branding, Email provider, on the Enterprise plan, with a verified Mailgun domain and a Mailgun API key.
To change what those emails say and how they look, see How to customize the emails Flipsnack sends to readers.
Prepare your Mailgun account
Each step links to Mailgun's own instructions, which follow the current Mailgun dashboard.
- Add the domain you will send from to Mailgun. See Custom Domains.
- Verify it with the DNS records Mailgun gives you. See Domain Verification.
- Create an API key and copy it. See Mailgun API key management.
Requirements
- Plan: Enterprise: contact sales
- A Mailgun account: go to Mailgun
Connect Mailgun in Flipsnack
- Go to Branding, then Email provider.
- Under Select email provider, click Mailgun.
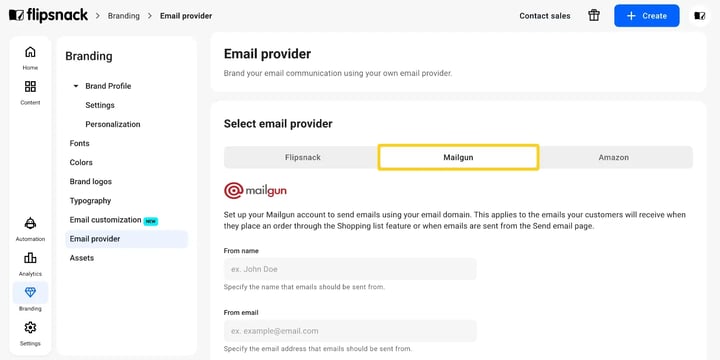
Fill in the four fields:
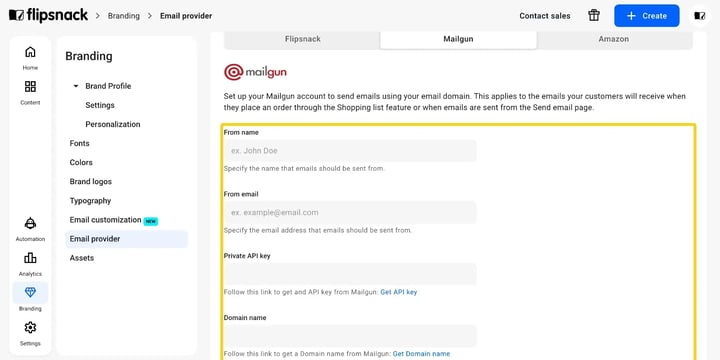
- From name: the sender name recipients see, such as your company name.
- From email: the address emails come from, on your own domain.
- Private API key: the API key you created in Mailgun.
- Domain name: your sending domain exactly as Mailgun lists it, such as mg.example.com.
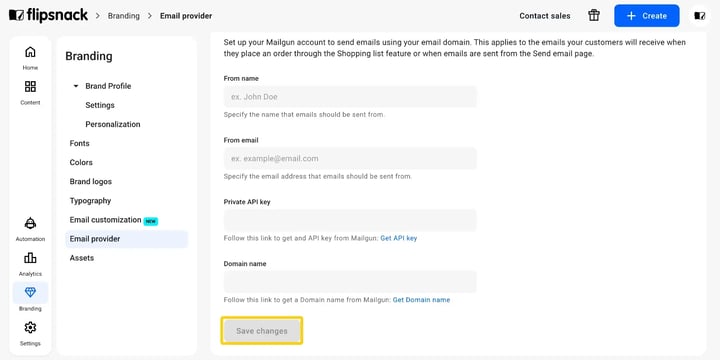
Then click Save changes.
Switch back to Flipsnack
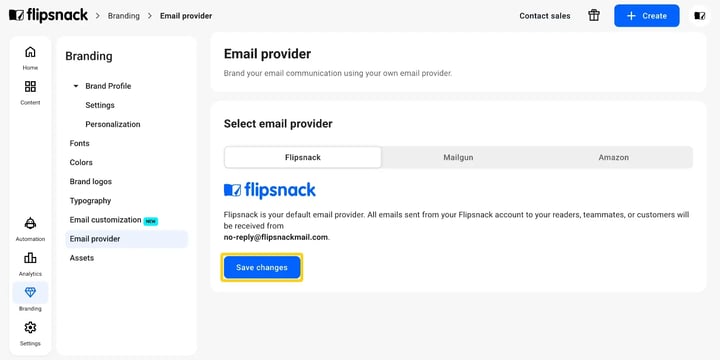
- On the Email provider page, click Flipsnack.
- Click Save changes. Emails come from no-reply@flipsnackmail.com again.
Troubleshooting
- Emails do not arrive: check that the domain shows as verified in Mailgun, and that Domain name in Flipsnack matches it exactly.
Next steps
- How to set up Amazon SES as your Flipsnack email provider
- How to send a flipbook by email or embed it into an email
- How to brand your emails when sharing flipbooks via email
Need expert support?
Our team is here to help. Connect with our team experts or message us via the live chat for personalized assistance.