Sending custom emails just got a whole lot easier. If you're sending an email through Flipsnack, our Enterprise users have the option to customize their email from top to bottom.
How to customize your email
There are 2 ways you can easily get to the custom email settings. In each step, you will always start from My Flipbooks.
-
For the first option, simply go to Details and then Send Email in the side menu. From here, you will have all of your customization options.
-
The second option is if you're on the list view in My Flipbooks. If your flipbook is published, saved as a draft, or part of a shelf, you will have the Send Email option again and all the customization options. Just click on Share, and then on Send Email.
Here's what you can do next:

Starting from top to bottom you can see that there are now quite a few options:
-
Add email addresses or upload a CSV file
-
Subject
-
Logo
-
Title
-
Description
-
Label
-
Footer description
-
Background color
-
Accent color
Keep in mind that you can click on Save these settings for further emails so next time you won't have to do it all from scratch.
Changing the accent (button/title) colors as well as the background color is as simple as putting in your favorite color's hex code.
From this page, you can also add the email recipients - up to 1000, if you are an Enterprise user. You can even upload a CSV file containing the email list if you don't want to input them manually.
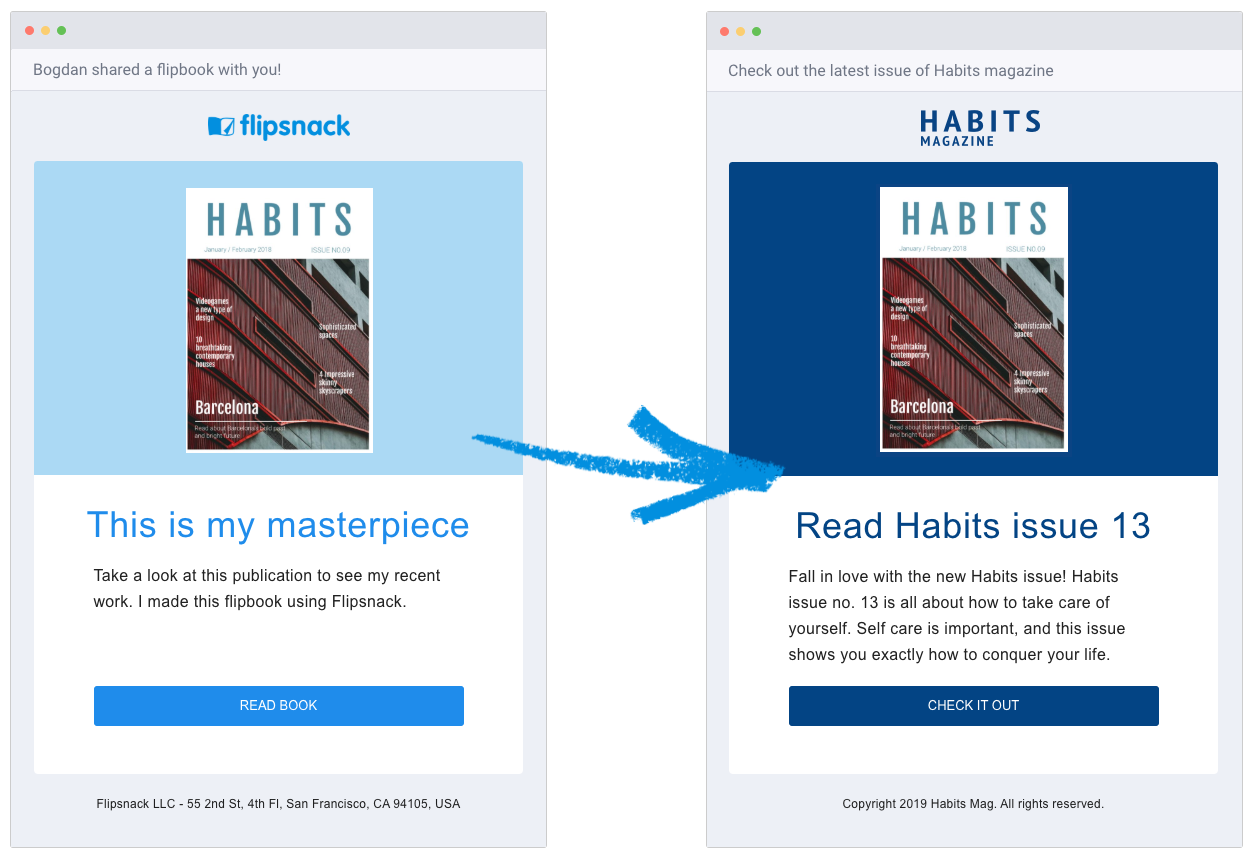
Now that all is said and done, here's the final product:
Connect your email provider
You can even connect Amazon Web Services or Mailgun and send fully branded emails through your email provider.
Tip: Here's a great way to personalize the sender's email and replace the "noreply@flipsnack" with your own:
-
Edit / personalize the email in Flipsnack.
-
Send it to yourself by entering your email address.
-
Open the email, click forward.
-
Remove the From, To and Subject lines plus anything else sitting above the email created in Flipsnack.
-
Enter the email addresses of the recipients and send the email.
Tip: As an admin, if you are an Enterprise or Organization user, you can use Feature Management to block this feature, so that members in your workspace are not allowed to use it.