Requirements:
- Business and Enterprise plans
Overview
Interactive quizzes are a powerful way to engage your audience, test their knowledge, and collect feedback—all while keeping them inside your flipbook. Whether you're building an educational publication, internal training material, or an interactive catalog, quizzes can add value and improve learning outcomes.
Table of contents
How to add a quiz to your flipbook
Adding and editing quiz questions
Quiz settings and customization
Key benefits
-
Boost engagement: Encourage active participation from your readers.
-
Support learning: Provide feedback, show correct answers, and allow quiz retakes.
-
Track results: Access detailed analytics for each response.
-
Stay compliant: Collect emails and manage privacy policies easily.
How to add a quiz to your flipbook
Step 1: Log in to your Flipsnack account and create a flipbook by uploading a PDF or creating it from scratch.
Step 2: The Interactions tab can be found on the left side of the Design Studio. Go to the Engagement section, and then click the Quiz element to add it to your page.
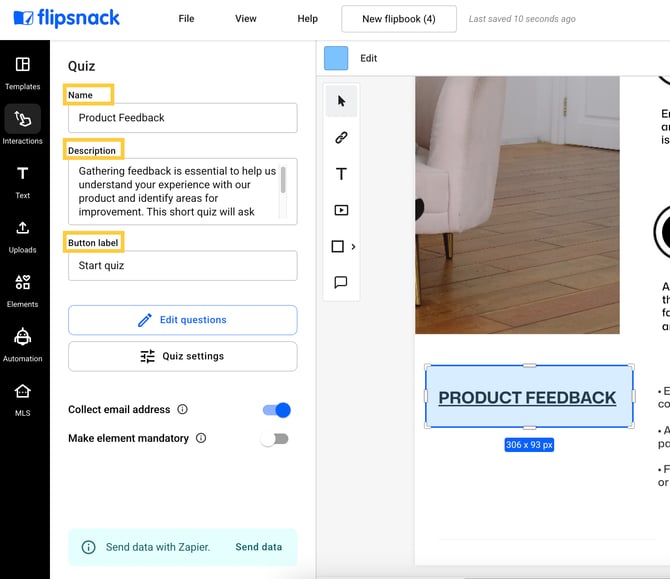
 Step 3: In the left panel, fill in the Name, Description and Button label with information about your Quiz.
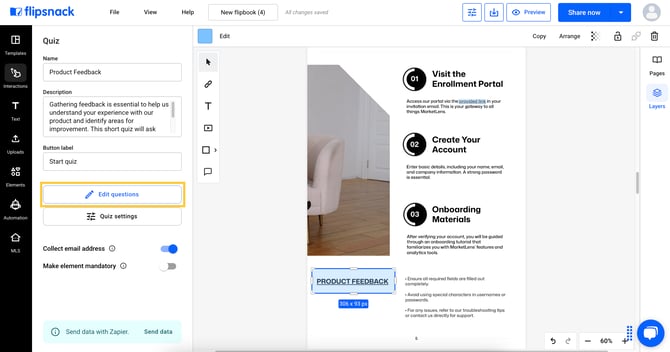
Adding and editing quiz questions
Click on Edit questions to customize your quiz. You can add up to 20 questions and up to 6 option answers for every question within one quiz pop-up, making it suitable for more comprehensive assessments.
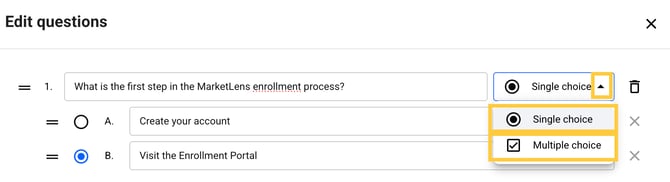
You can choose from two types of answers, based on your needs:
- Single choice: if you have only one correct answer your readers can select;
- Multiple choice: if there are multiple correct answers your reader can select.
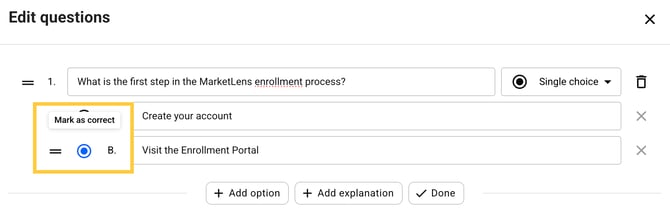
Under every question you’ll find three buttons:
- Add option: use it to add more answers to your question
- Add explanation: use it to add explanation for each correct or wrong answer, to improve the learning experience of your reader
- Done: click it to save your progress
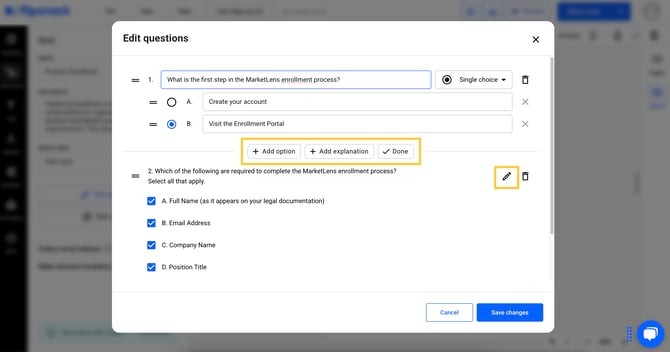
Note: If you need to edit your questions or answers, click the Edit button (pencil) located on the right side of each question and then click on Done again.
After you set up your questions and answers, make sure you mark the correct answer to your questions by checking the box next to the correct option. Then simply click Save changes and that's it.
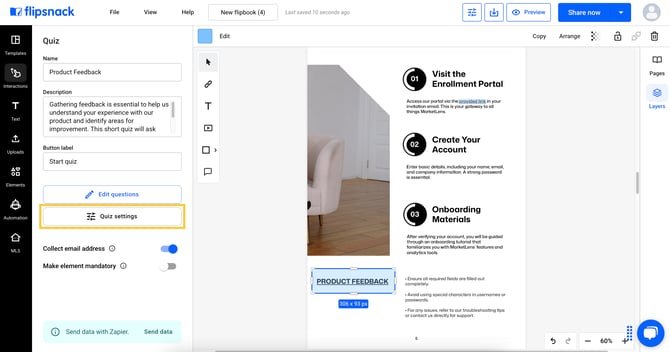
Quiz settings and customization
To further customize your quiz, click on the Quiz settings tab in the newly opened window, under the Edit Questions tab, where you set up your questions and answers.
Here, you can set up the following:
- Display questions as: One question per page or Multiple questions per page
- Show correct answer: Option to display the correct answer to the user after they complete the quiz.
If you choose to display one question per page, the correct answer will appear after you answer each question. If you choose to show all questions on one page, the answers will be revealed at the end of the quiz when you click "View results."
- Allow users to take quiz multiple times: You allow users to retake the quiz, supporting learning and content retention by enabling multiple attempts.
- Add privacy policy: The name of the company associated with the quiz and the URL link to the company’s privacy policy.
- Add GDPR compliancy check: Allow a GDPR compliance checkbox and a customized message.
- Thank you message: You can customize the message your readers see after completing the quiz. Scroll down to edit the messages for passed and failed quiz.
Note: If you don’t customize the privacy policy link, company name, or thank you and consent message, default text will be used. This is designed to meet general privacy and consent standards, but we recommend personalising these fields to match your policies.
Click on save changes to make after customizing the settings based on your needs.

As you can see, under Quiz settings section you can find two more options that can be disabled or enabled.
- Collect email address: Enable or disable the requirement for respondents to enter their email address to submit their answers.
Note: For flipbooks shared privately with Readers or SSO viewers, we automatically record the list of readers and their email addresses on the statistics page. In these cases, there's no need to collect email addresses separately.
- Make element mandatory: Enable this option to make sure readers cannot proceed with viewing the rest of the flipbook without completing the quiz first.
Additionally, you can set an instructional message for readers. This message will appear if they attempt to navigate through the flipbook before completing the quiz. The Instructional message will only be visible in the live version of the flipbook. It won’t appear in the Design Studio preview. The mandatory Quizzes will be highlighted by a yellow border.

Use the Preview button in the upper right corner to see how your quiz will look and function in the flipbook.
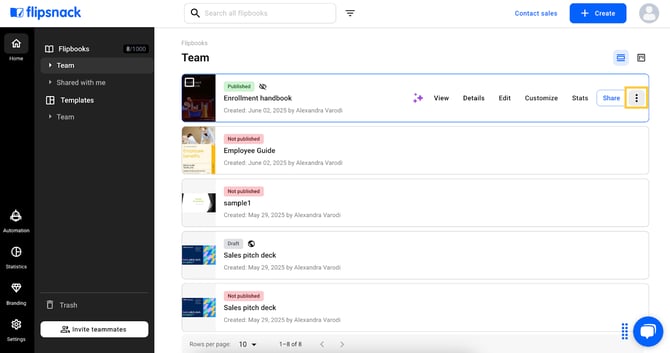
View quiz statistics
To access these reports, search for the flipbook you added the quiz feature, click on the three dots, and then Stats. If you don't see that option, your flipbook wasn't published.
Important: To share a flipbook and collect data about it, you must publish it first.
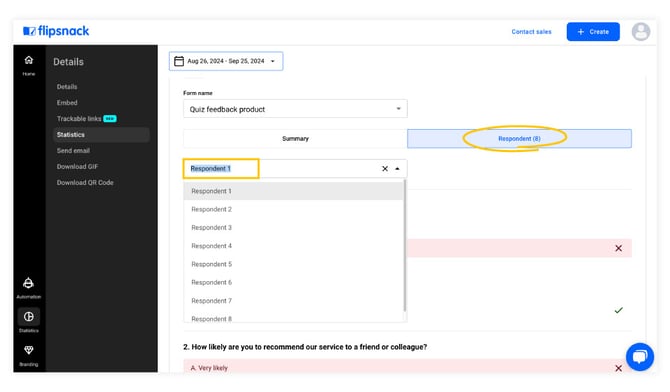
Then, scroll down to the Form responses section to get an overall summary of how effectively your quiz is engaging users.
 Click the dropdown Respondent, next to the Summary to see individual responses. Here, you can view each respondent’s answers.
Warning: When you delete a quiz feature from the flipbook, the associated statistics will no longer appear on the statistics page.
Next steps
Explore more engagement tools:
- How to add a question to your flipbook
- How to add interactions and elements to your flipbooks
- How to add a product tag
- How to add music and videos to flipbooks
- How to create shoppable catalogs
If you have any questions about this new feature, please contact us via live chat, or share your feedback with us.