
Overview
Flipsnack’s Create from Scratch flow gives you full creative control to design flipbooks your way. Whether you start with a blank page or a ready-made template, you can customize everything directly in the Design Studio, with drag-and-drop editing and real-time updates.
Compared to uploading a PDF, this flow is more flexible and interactive. It’s perfect if you want to build something unique, reuse your own templates, or take full advantage of Flipsnack’s design and branding tools.
💡 Benefits of designing a flipbook from scratch
- No InDesign, no Canva: you make the whole thing in Design Studio.
- A4 by default, or your own width and height in pixels: the size is set once, when you create the design.
- Things a PDF cannot hold: videos, slideshows, product tags, link buttons and social icons, from the Interaction tab.
- Your layout becomes a template: save it once and it waits under My templates for the next issue.
- The link survives every edit: readers keep the address you gave them.
Step-by-step guide
1. From Content, click the Create button in the top right corner. Select Create from scratch from the dropdown menu.
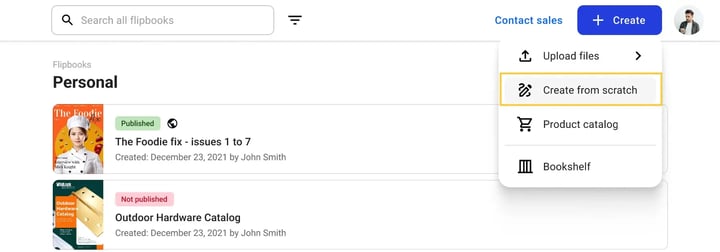
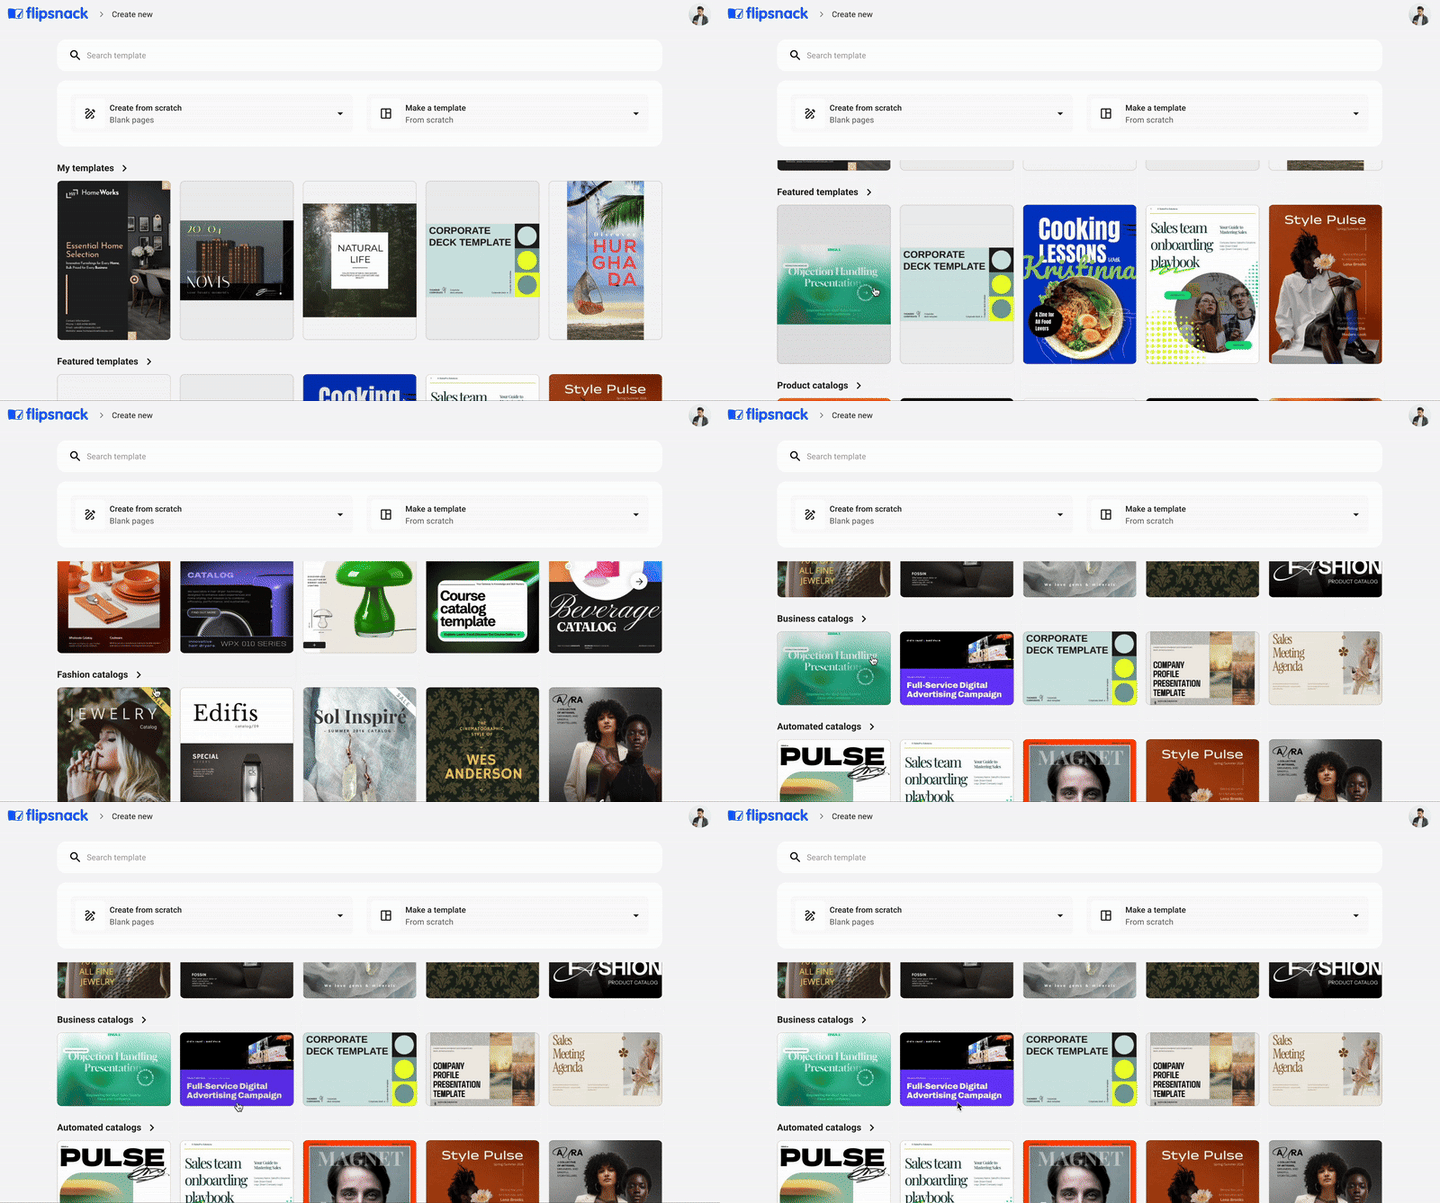
After, you’ll land on a screen that showcases several things you can do from here:
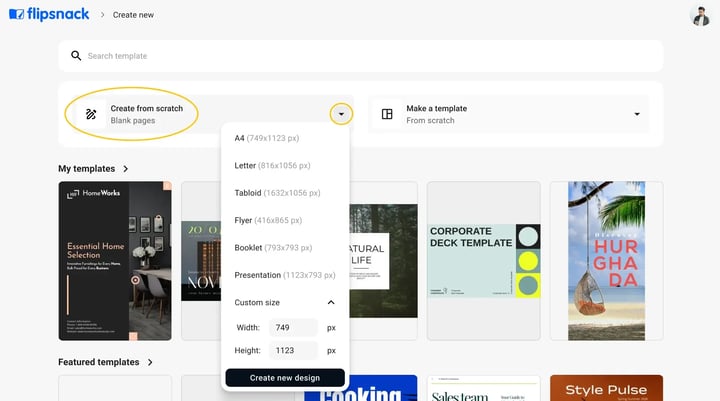
1. Create from scratch
This option automatically creates an A4-sized flipbook by default. However, if you click the dropdown arrow, you’ll see a list of other preset sizes.
Tip: You can also select Custom size to input your own width and height in pixels, then click Create new design to launch the editor with those dimensions.
Important: You can’t add PDFs to flipbooks created from scratch. However, you can upload a PDF first and then add new pages if you want to use a pre-made design page from a template.
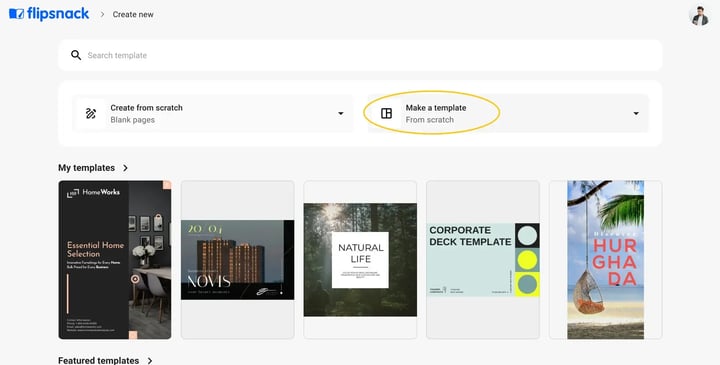
2. Make a template (from scratch)
Next to the Create from scratch card, there is a Make a template card, which allows you to create a reusable template for future projects. This opens the Design Studio with a blank A4 canvas (or a size of your choice) if you click the dropdown arrow (just like with Create from scratch).
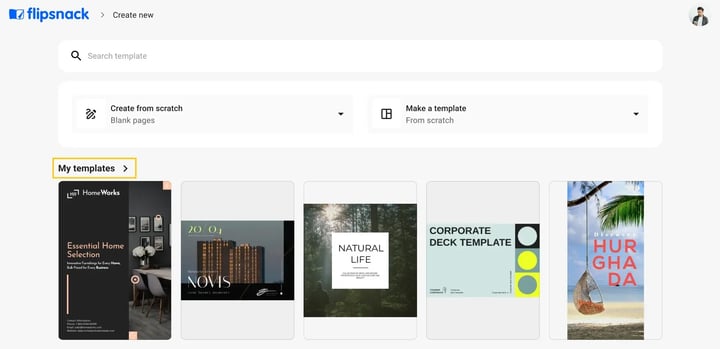
Note: If you’ve previously created templates, you’ll find them neatly organized under the My templates section, located just below. This area displays your most recently created templates.
3. Choose an existing template
Or you can start from one of our pre-made templates. You can also scroll down to explore template categories. Each template can be visually previewed before you select it, so you can see its design, structure, and interactivity in detail.
Note: Looking for a professionally designed flipbook that matches your brand? Flipsnack’s in-house design team offers end-to-end flipbook design services. Please read more about the requirements and what to expect from this design services information pack.
Design your flipbook layout
Once you've selected a template or started from scratch, you're taken to the Design Studio, where you can begin customizing your flipbook page by page.
- Edit templates with ease: You can update text, replace images, change fonts or colors, and move or delete elements using simple drag-and-drop actions. The layout stays intact, so you won’t break the design by replacing content.
- Start from a blank canvas: If you're working without a template, add elements like text, shapes, images, buttons, videos, and more using the left-side panels.
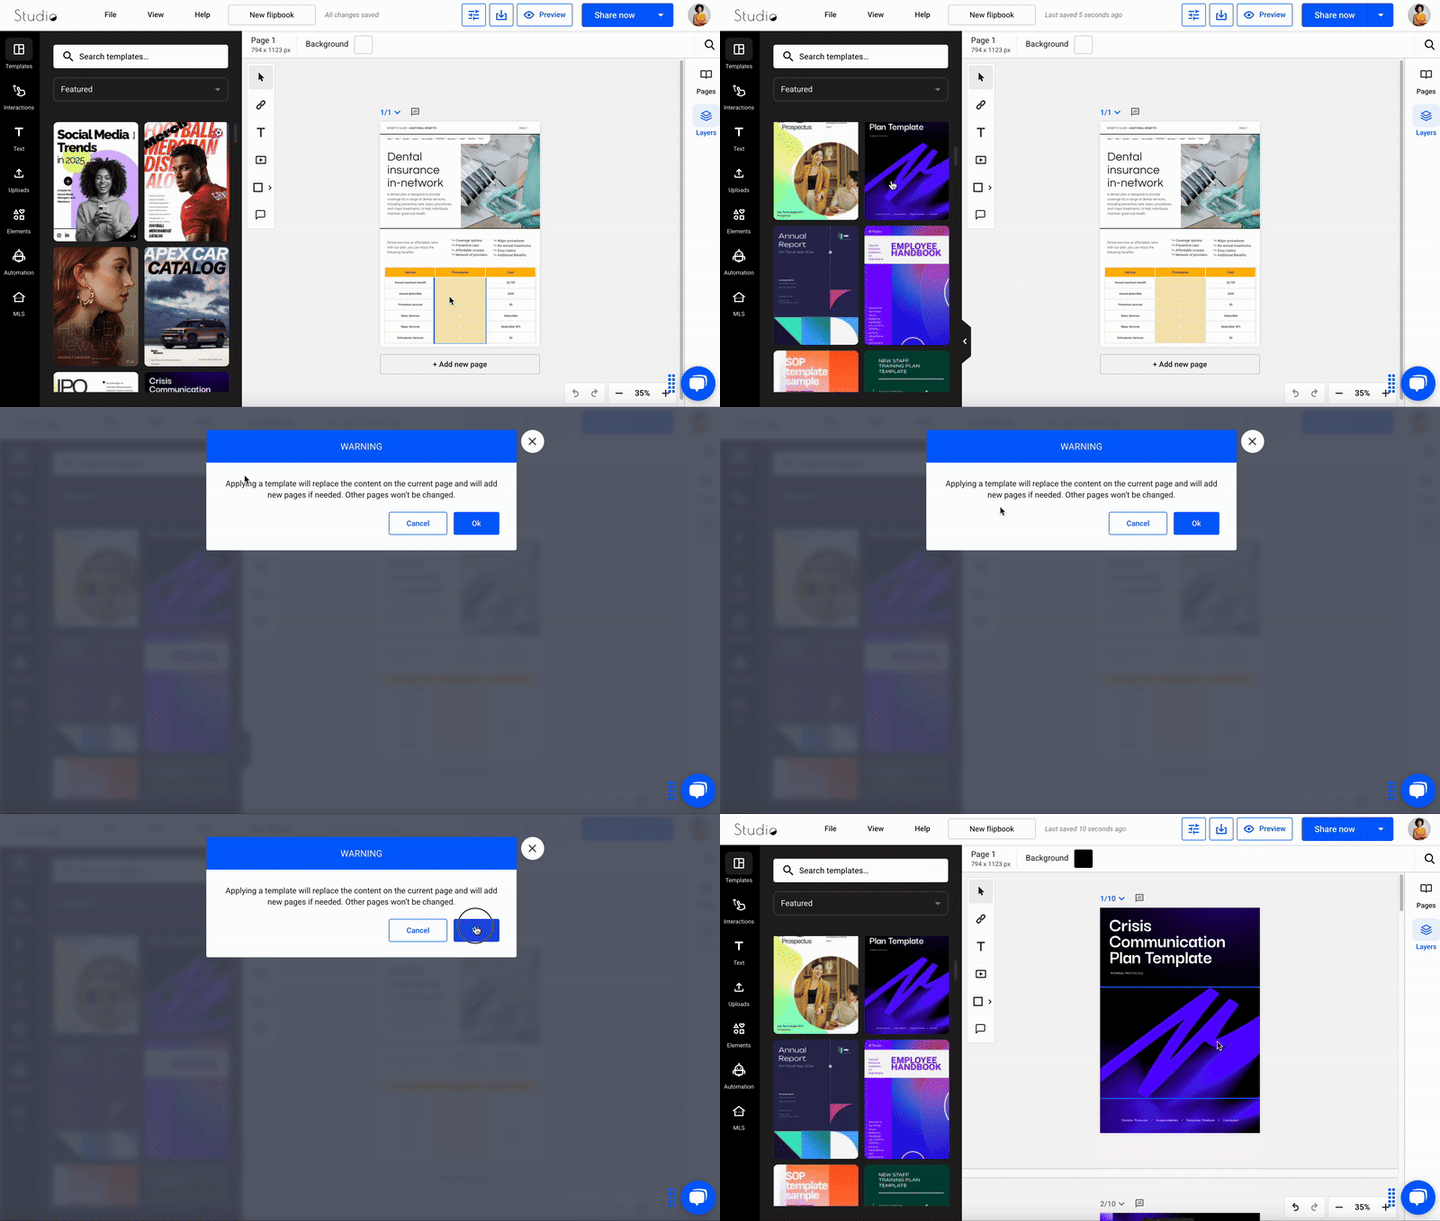
- Add new pages anytime: To insert a new page, click the Add page button above the canvas. Pages are always added after the currently selected one. If you want to use a template for that new page, choose one from the Templates panel.
Important: If you create a personal design for a page in your flipbook, you must add a new page before adding a template. Otherwise, your previous work will be overwritten by the template.
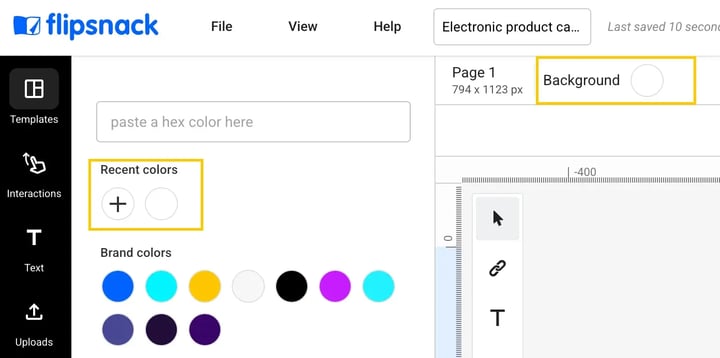
For a consistent design, use the same colors for the front and back cover. The Design Studio “remembers” the custom colors you use the most, so you don’t have to search for them every time. Click on the Background button and select the color of your cover from the Recent colors list.
When you add a new page to your flipbook, it is placed after the selected page. You can work on a blank canvas and arrange images and texts to your liking. However, it is a lot easier to work with Flipsnack's templates.
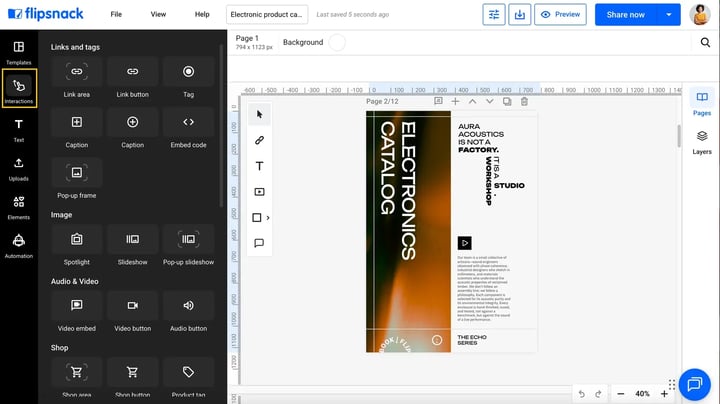
Make your publication more engaging with videos, photo slideshows, (product) tags, and social media buttons, from the Interaction tab.
It’s time to check the preview. Select a page of your flipbook and click on the Preview button on the top right.
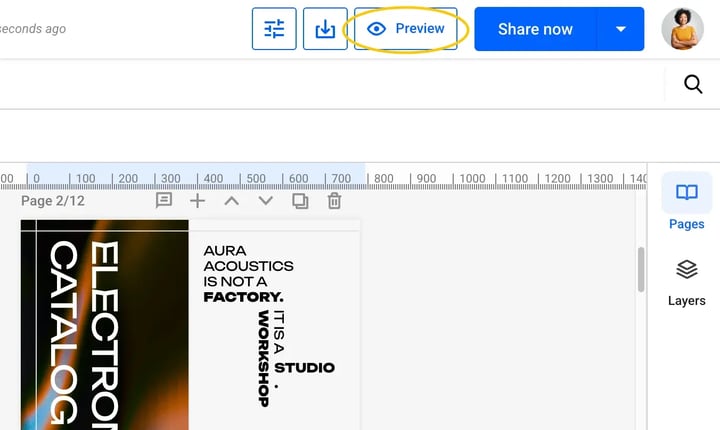
Once you’re happy with the results, click the Share button. After publishing, your flipbook is ready to share via link, embed, or social media. You can always return to edit or update it at any time.
Next steps
- Learn how to edit a template
- Interactions and elements for your flipbooks
- How to create shoppable catalogs
- How to publish your flipbook
Need expert support?
Our team is here to help. Connect with our team experts or message us via the live chat for personalized assistance.