
Overview
To add a contact form to a flipbook, open it in the Design Studio, go to Interactions > Engagement and click Contact form. Readers fill in the form on the page without leaving the flipbook. You read their submissions in Analytics > Contact form and download them as a CSV file. Contact forms are available on the Business and Enterprise plans.
- Step 1: Add the form to a page and place it over the button readers will click.
- Step 2: Choose the fields on the Details tab.
- Step 3: Set the button, the thank-you message and consent on the Settings tab.
- Step 4: Publish the flipbook, then read and download submissions in Analytics.
💡 Benefits of a contact form inside your flipbook
- You choose the fields: email address, name, phone number, country, website, a dropdown or a question of your own.
- Consent is built in: add your privacy policy and a GDPR checkbox, and the CSV records each reader's consent.
- Submissions can reach your other tools: send them to a CRM through webhooks or Zapier.
Each form sits on one page. Add a second form on another page when readers need it in more than one place.
👥 Where a contact form is helpful
- Hospitality: stay and event requests from a hotel or venue brochure.
- Sales: quote requests from a product catalog or price list.
- Real estate: viewing requests from a property brochure.
- Marketing: inquiries from a campaign magazine or lookbook.
- Education: information requests from a course prospectus.
You can build the form in any flipbook. Readers can submit it once you publish the flipbook.
Requirements
- Plan: Business or above: check your plan or compare plans
How to add a contact form to a page
- Open the flipbook in the Design Studio and scroll to the page where the form belongs.
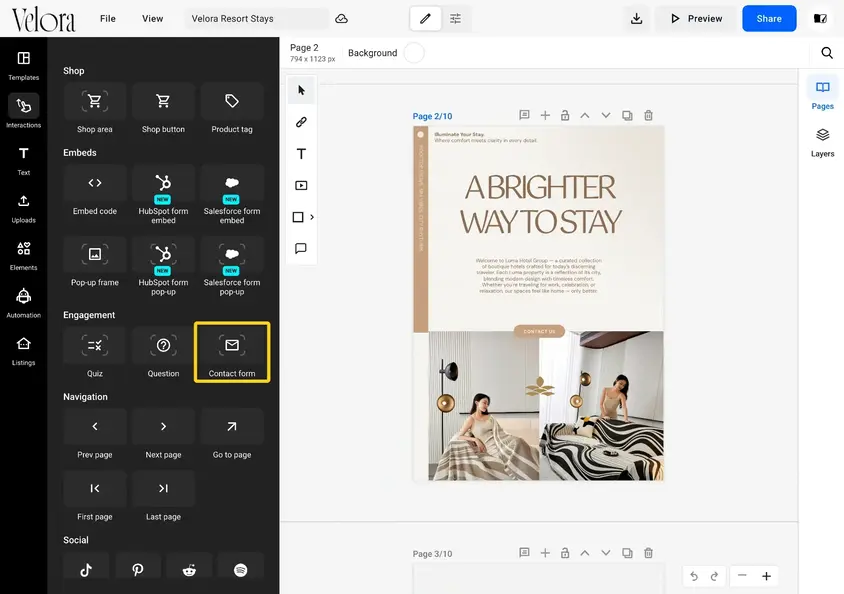
- Click Interactions in the left menu, scroll to Engagement and click Contact form.
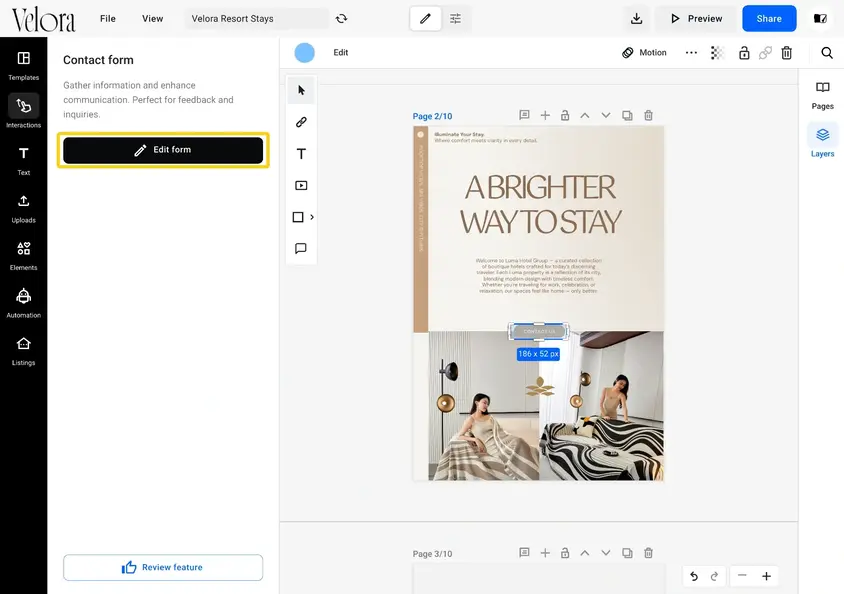
- The form lands in the middle of the page as a blue area. Drag it over the button or text readers should click, and resize it from its corners.
- With the form selected, click Edit form in the left panel.
How to choose the form fields
The Details tab sets what readers see and fill in.
- In Form title, enter the title shown at the top of the form.
- In Description, say what happens after readers submit. It takes up to 128 characters.
- Under Customer details, click + Add field to add First name, Last name, Full name, Phone number, Country/region, Website, Dropdown field, Paragraph or Custom input. Email address is there by default.
- Click the bin next to a field to remove it.
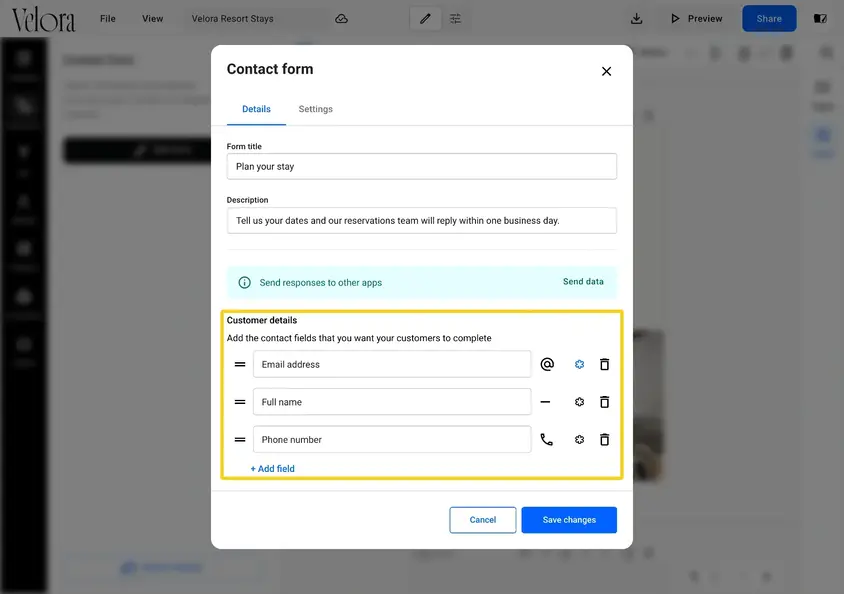
To send submissions to another app as well, click Send data. It opens Settings > Integrations, where you set up the connection. See Using webhooks for contact forms submitted on your flipbook.
How to set the button, the thank-you message and consent
- Click the Settings tab.
- In Tooltip, enter the text readers see when they point at the form area. It starts as Click to view contact form.
- In Button label, enter the text on the submit button. It starts as Submit form.
- In Message text, enter what readers see after they submit. It starts as Your response has been submitted.
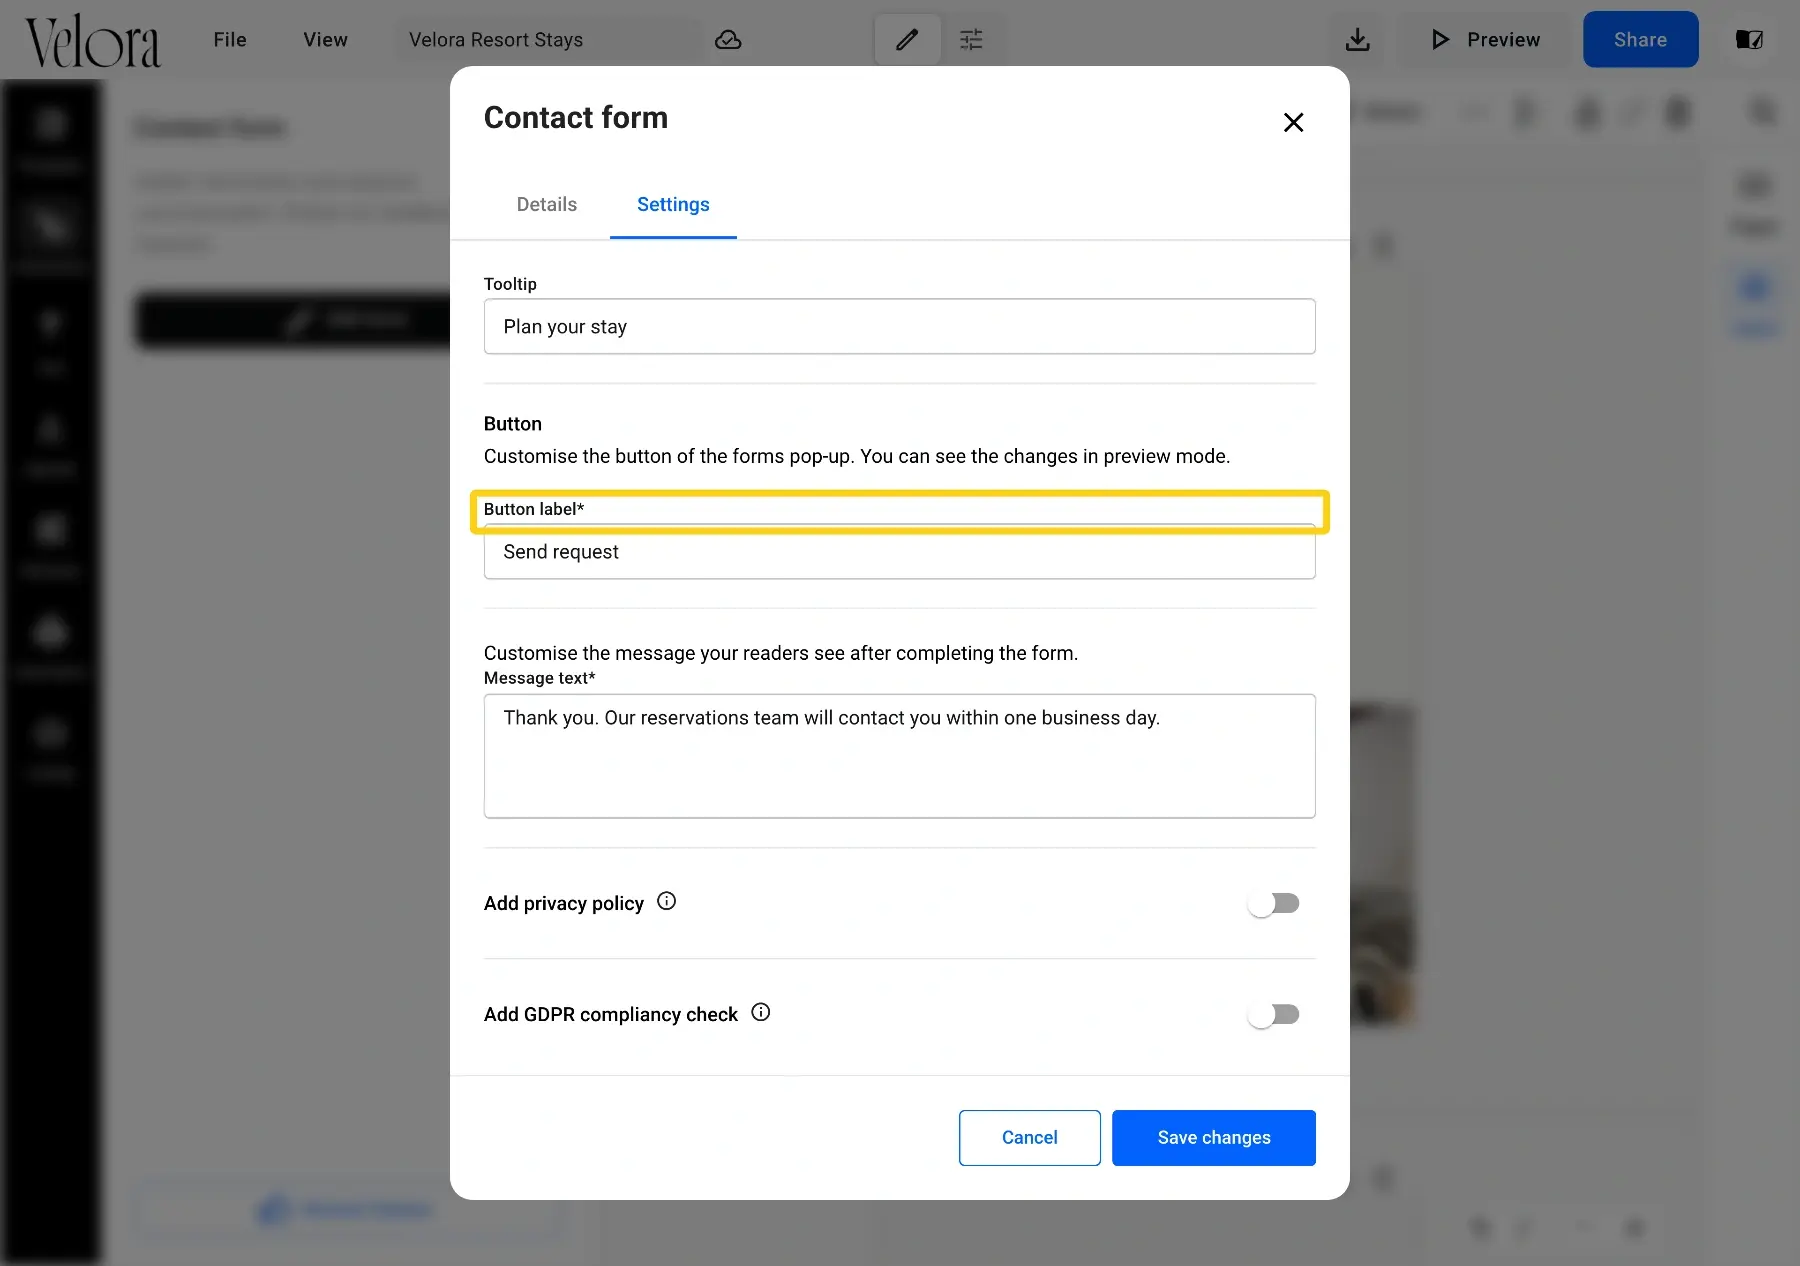
- Turn on Add privacy policy, then replace Flipsnack's name and link in Company name and Privacy and policy link with yours. Readers then tick a box to accept your privacy policy.
- Turn on Add GDPR compliancy check and write the consent sentence in Formulate message. Readers see it as a second box to tick.
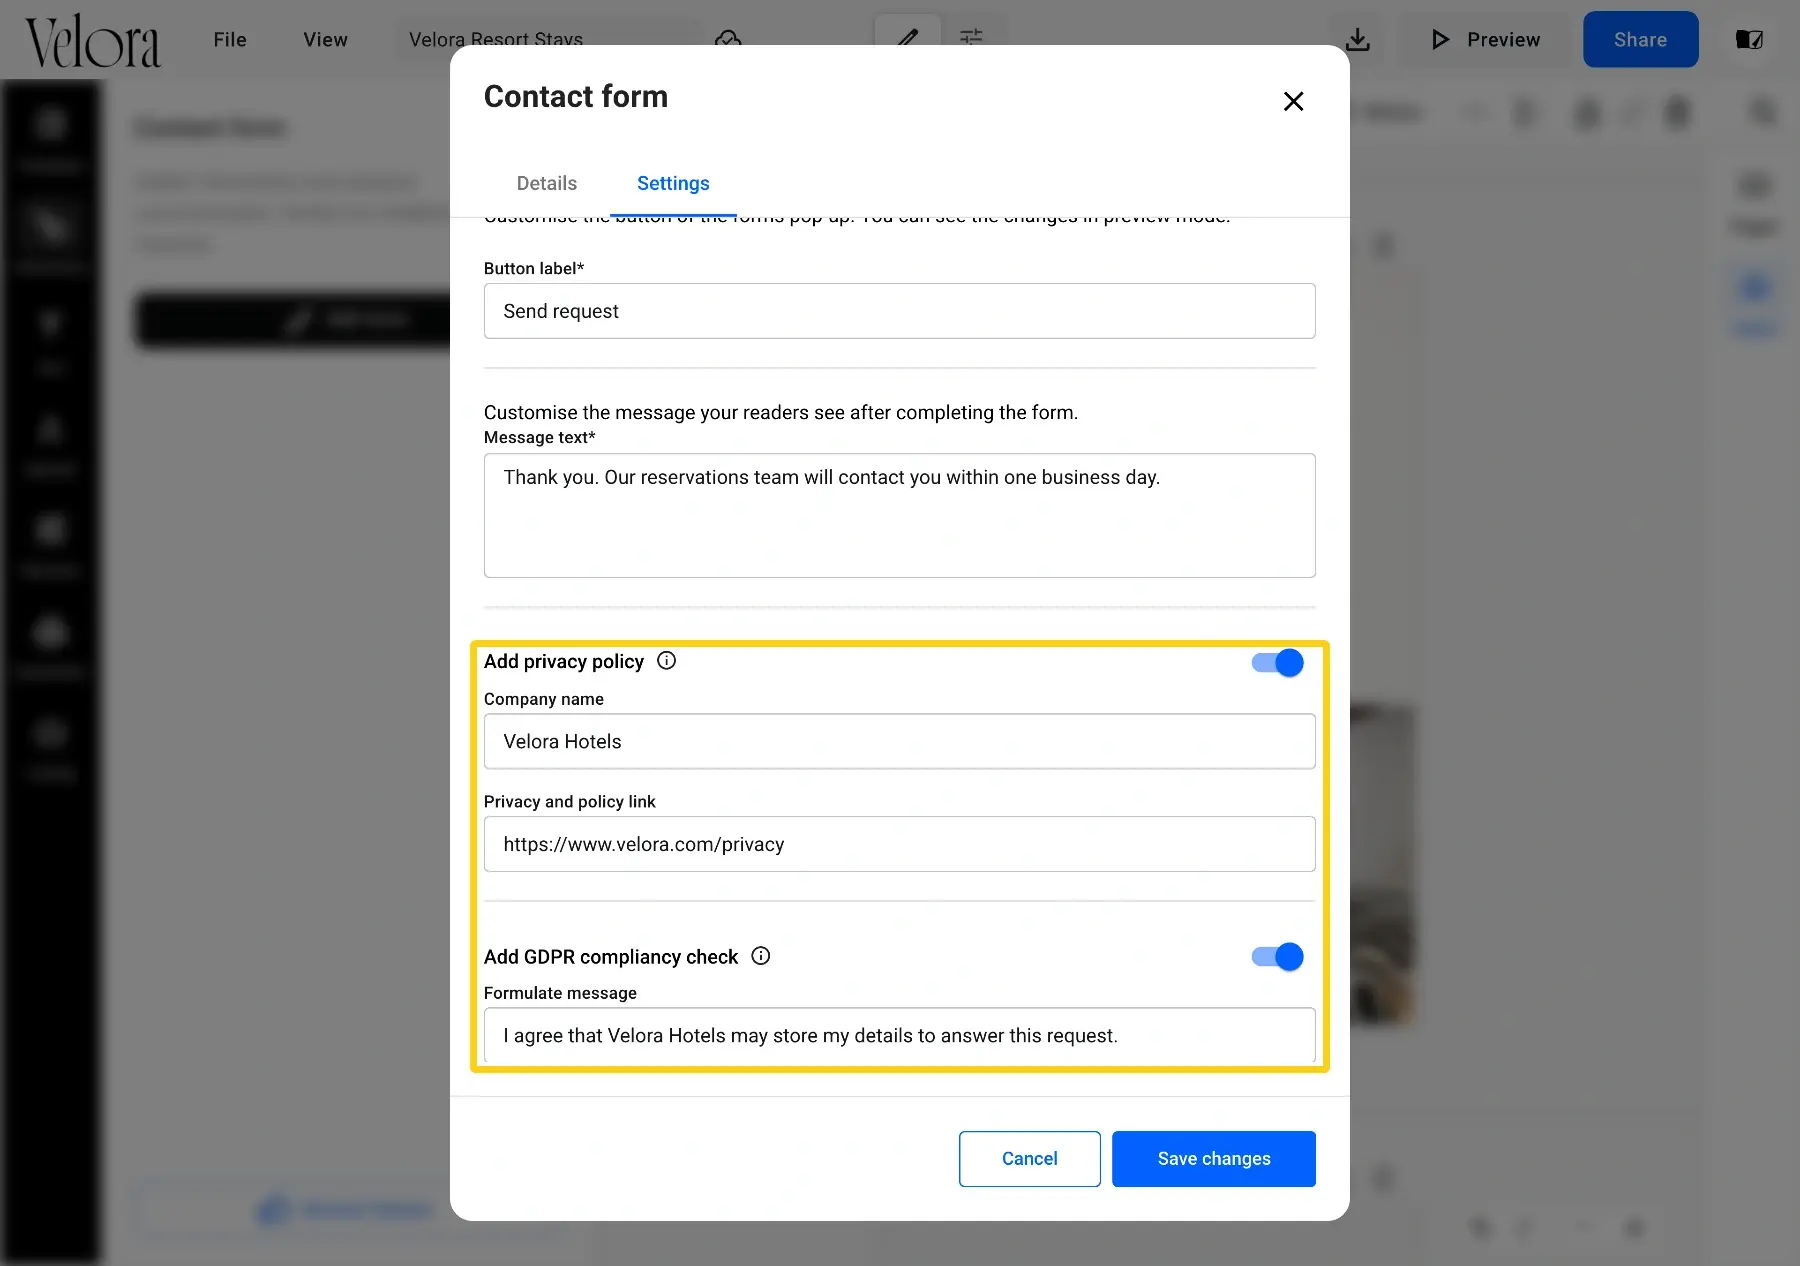
- Click Save changes, then click Preview in the top bar to see the form as readers will.
What readers see
In the published flipbook, readers click the form area, fill in the fields, tick the consent boxes and click the submit button. Your thank-you message then replaces the form.
How to view contact form submissions
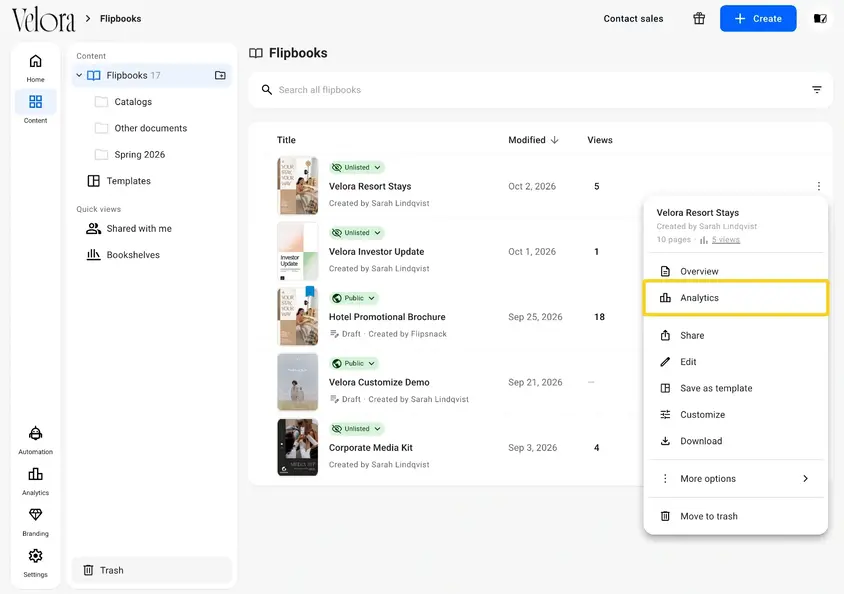
- In Content, click the three dots on the flipbook, or right-click it, and select Analytics.
- In the left menu, under Responses, click Contact form.
- If the flipbook has more than one form, pick yours in Form name. Form submissions counts the submissions in the dates selected at the top of the page, with a chart by day.
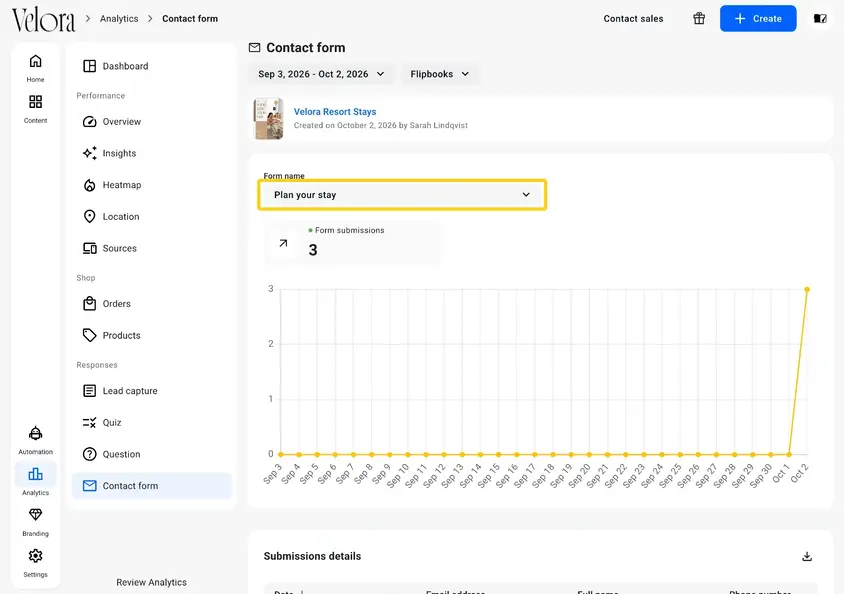
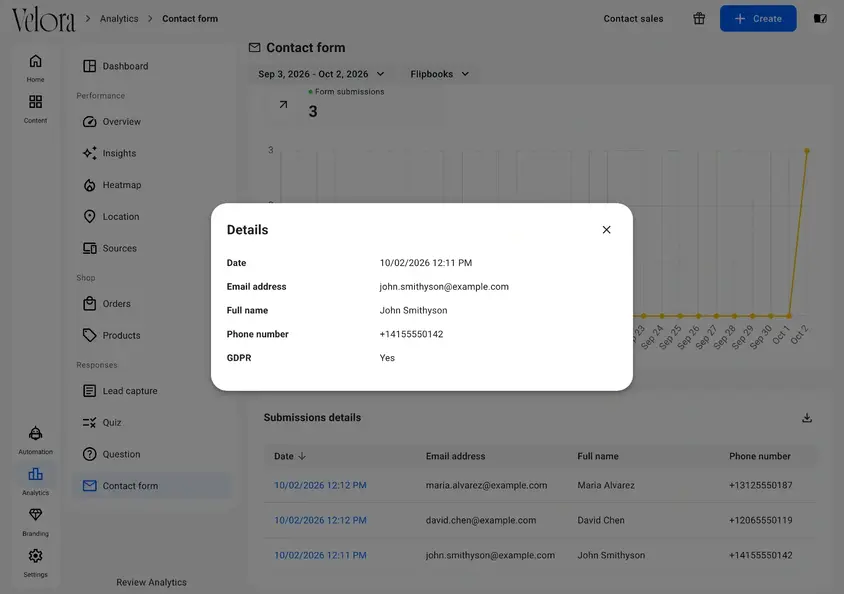
- Scroll to Submissions details: one row per submission, with its date and the reader's answer in each field. Click a date to open the Details of that submission.
Caution: When you delete a contact form from the flipbook, its submissions no longer appear in Analytics. Download them first.
How to download submissions as a CSV file
- Set the date range at the top of the Contact form page to the period you need.
- In Submissions details, click the download icon.
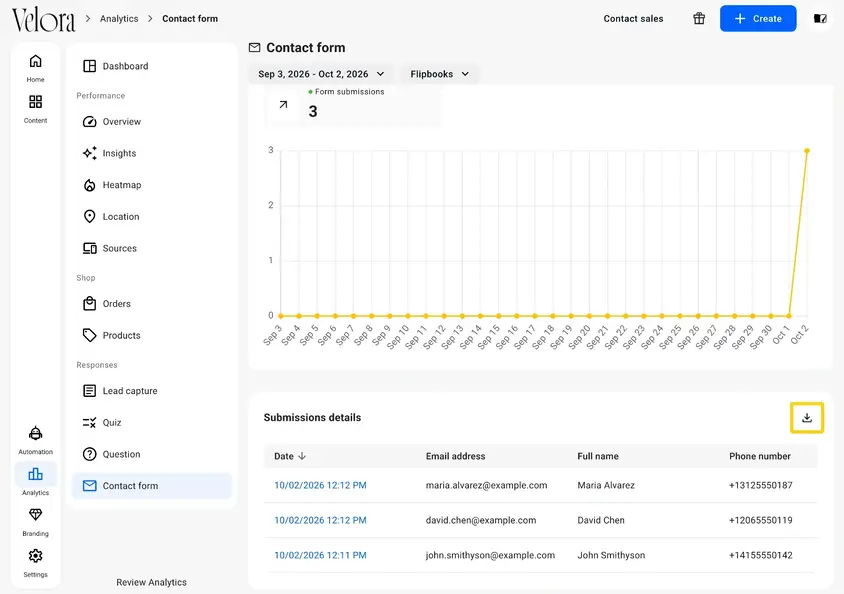
Flipsnack names the file after the flipbook, the form and the dates. It has one column for the date, one for each field and one for Consent. Phone numbers start with an apostrophe, so spreadsheet apps keep them as text. Open it in Excel or Google Sheets, or import it into your CRM.
Troubleshooting
- Analytics is missing from the flipbook's menu: You have not published the flipbook yet. Publish it, then open the menu again.
- Form submissions shows 0, but readers have submitted: Check Form name. Some templates already carry contact forms of their own, and Analytics may open on one of those. Also check the date range.
- Readers see "Input must be a phone number": The phone field rejects numbers written with brackets, such as +1 (415) 555-0142. It accepts digits with the country code, such as +14155550142.
- Readers see Flipsnack's name next to the privacy policy box: Replace Flipsnack's name and link in Company name and Privacy and policy link on the Settings tab, click Save changes, and update the flipbook.
Additional tips / FAQs
- Do readers need a Flipsnack account to submit the form? No. A reader who can open the published flipbook can submit it.
- Can I send submissions to my CRM without exporting them? Yes. Click Send data on the Details tab to set up a webhook, or use Zapier: How to send contact submissions to HubSpot via Zapier.
- Does the CSV show who gave consent? Yes. The Consent column shows Yes for each reader who ticked the GDPR box.
Next steps
- Using webhooks for contact forms submitted on your flipbook
- How to send contact submissions to HubSpot via Zapier
- How to add an interactive quiz to your flipbook pages
- Flipsnack Analytics: next-level tracking with a fresh design
Need expert support?
Our team is here to help. Connect with our team experts or message us via the live chat for personalized assistance.