Table of contents:
- Overview
- Adding a new relying party trust
- Creating Claim Issuance Policy
- Configure SAML in Flipsnack
- Next Steps
Overview
ADFS is a service provided by Microsoft as a standard role for Windows Server that provides a web login using existing Active Directory credentials. We provide other SSO integration solutions, such as Azure OpenId and Azure SAML, which are also Microsoft solutions.
Key Benefits:
That being said, here are some of the many benefits of integrating Flipsnack with ADFS SAML:
-
You can control who has access to Flipsnack through ADFS
-
You can enforce the SSO access for all your company's accounts registered on Flipsnack
-
You get a more secure authentication for your employees so that you can control and manage all accounts through the SSO.
Requirements
To configure ADFS SAML integration with Flipsnack, you’ll first need:
-
Admin-level access on Flipsnack to be able to access the SSO settings
-
An Active Directory instance where all the users that will use Flipsnack have an account with an email address. We don’t create user accounts under SSO.
Let's discuss your SSO sharing needs
Adding a new relying party trust
The connection between ADFS and Flipsnack is defined using a relying party trust.
1. Log in to the server where ADFS is installed.
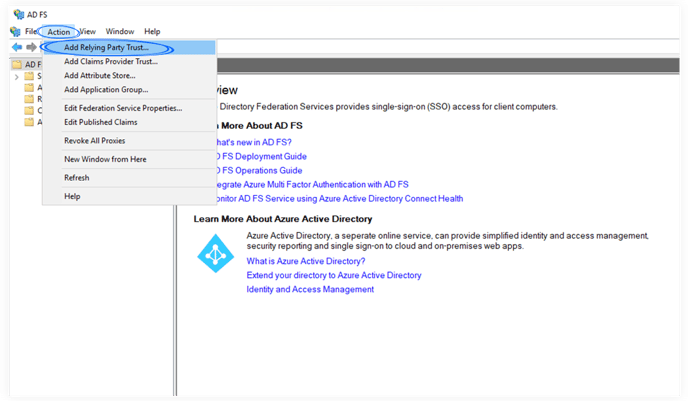
2. Launch the ADFS Management application and click Add Relying Party Trust.
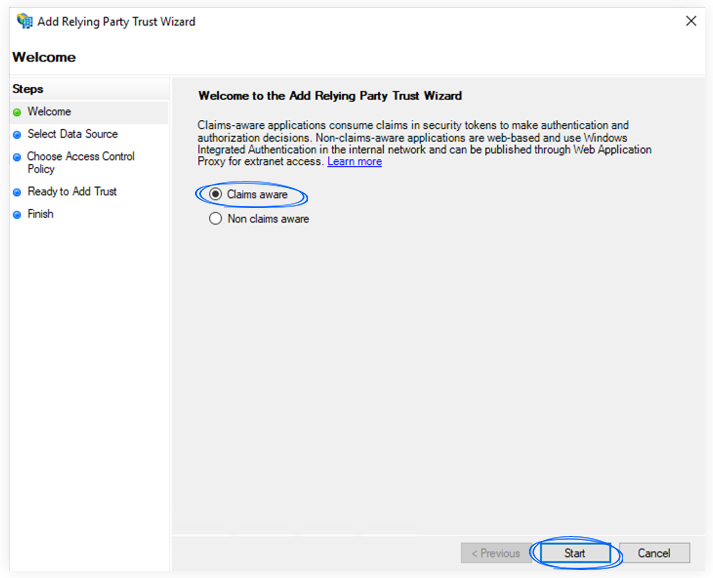
3. Select the Claims aware option and click Start.
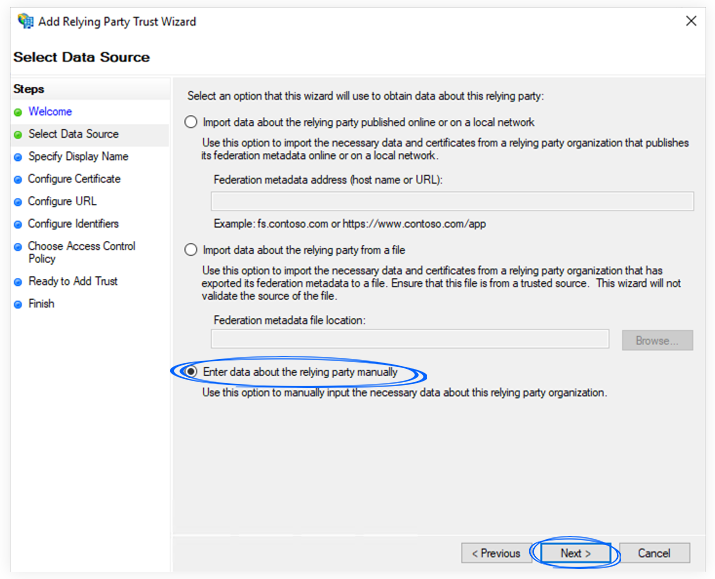
4. On the Select Data Source screen, click Enter data about the relying party manually and click Next.
5. Provide information for each screen in the Add Relying Party Trust Wizard.
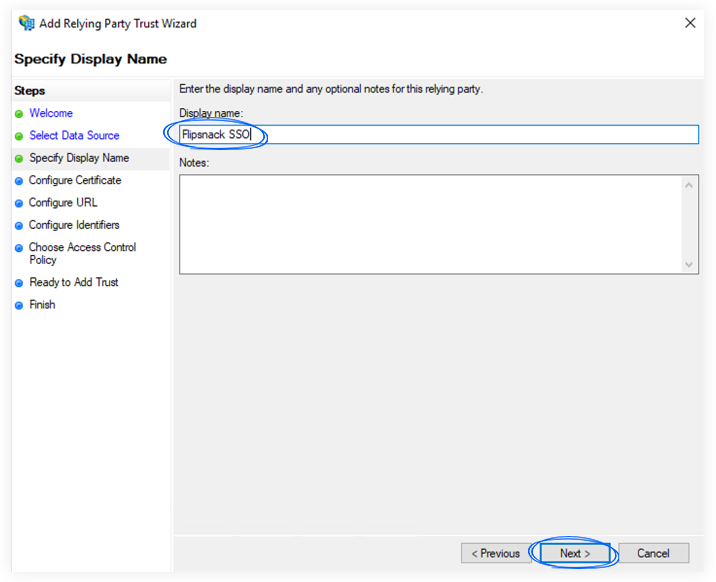
a. On the Specify Display Name screen, enter a Display name (e.g. Flipsnack SSO) and some notes, if you wish.
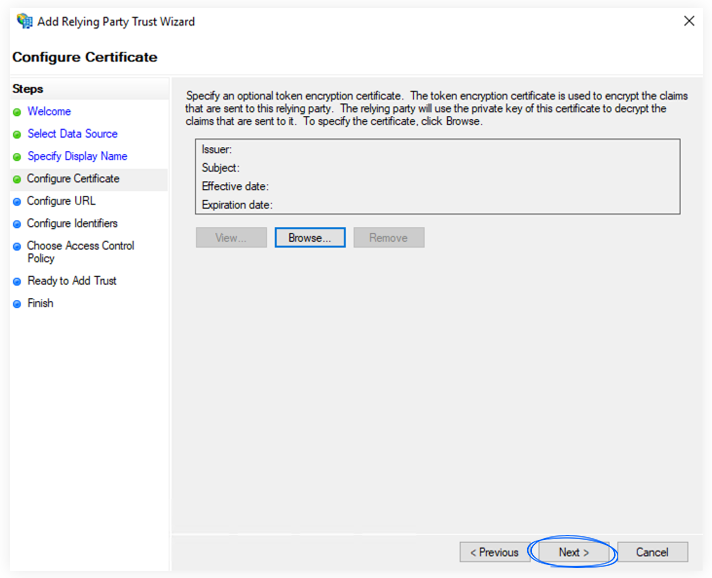
b. Skip the Configure Certificate screen by clicking Next.
c. On the Configure URL, select the checkbox labeled Enable Support for the SAML 2.0 WebSSO protocol.
Please enter this URL in the corresponding field, as seen in the screenshot below:
https://auth.flipsnack.io/login/callback
After you have completed the URL, click Next.

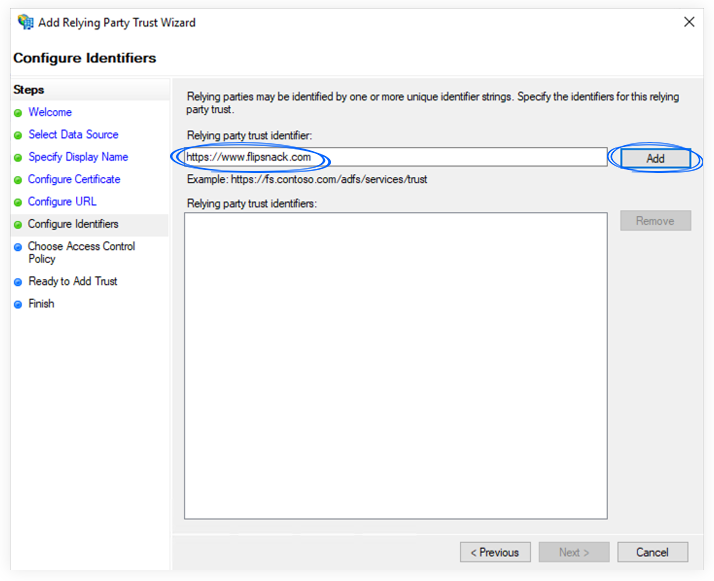
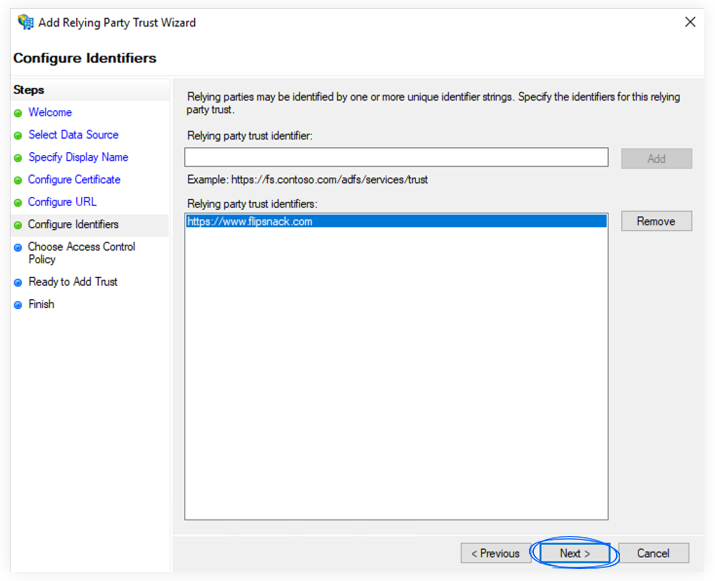
d. On the Configure Identifiers screen, enter the Relying party trust identifier. To obtain that identifier, you should copy it from the Flipsnack Single Sign-On page. See more details under the “Configure SAML in Flipsnack” section.
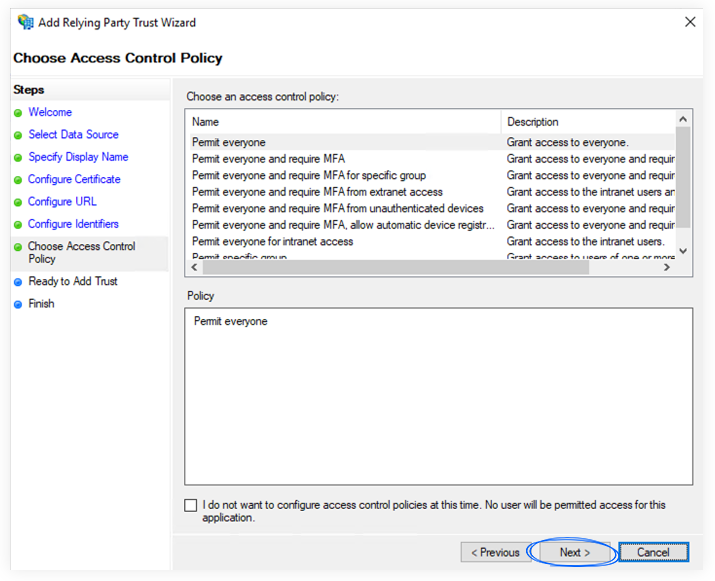
e. On the Choose access control policy screen, you have a list of access control options and a short description for each option. Choose the right option for you, depending on how and who will use Flipsnack from your company.
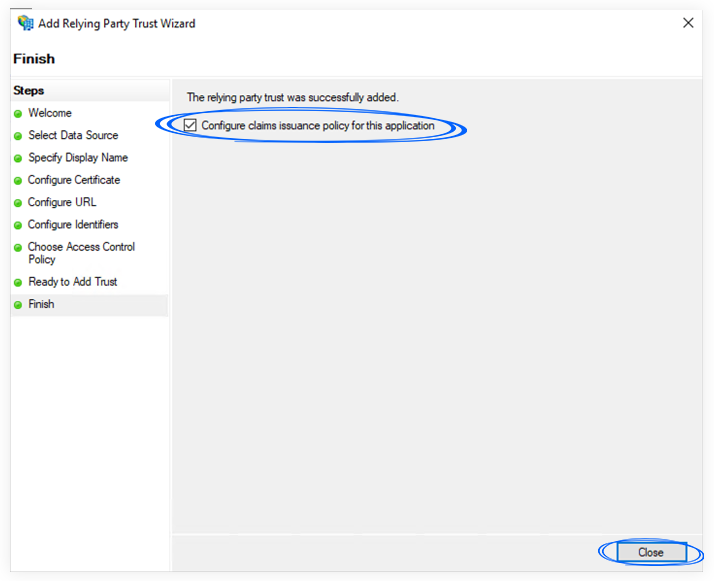
f. On the Ready to Add Trust screen, click Next.
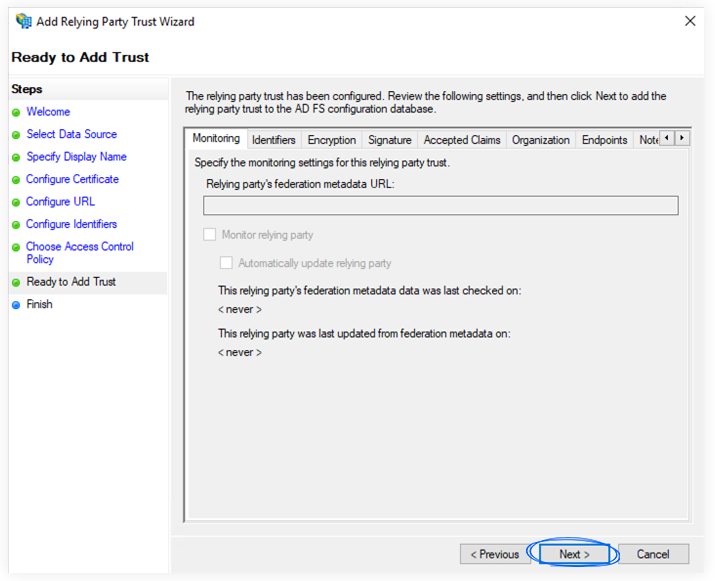
g. You can check the Configure claims issuance policy for this application or add it later.
Creating Claim Issuance Policy
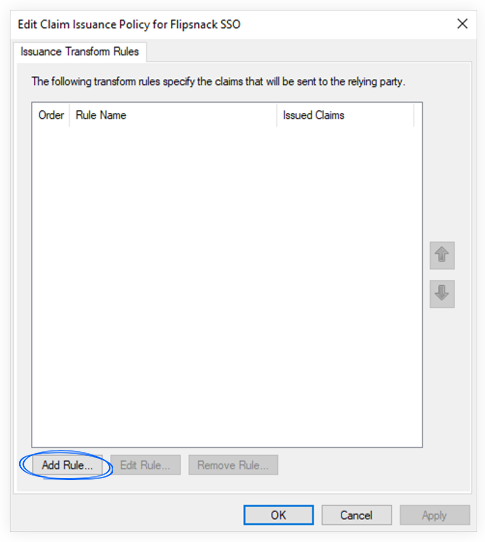
When a relying party trust has been created, you can define Issuance Transform Rules to customize settings.
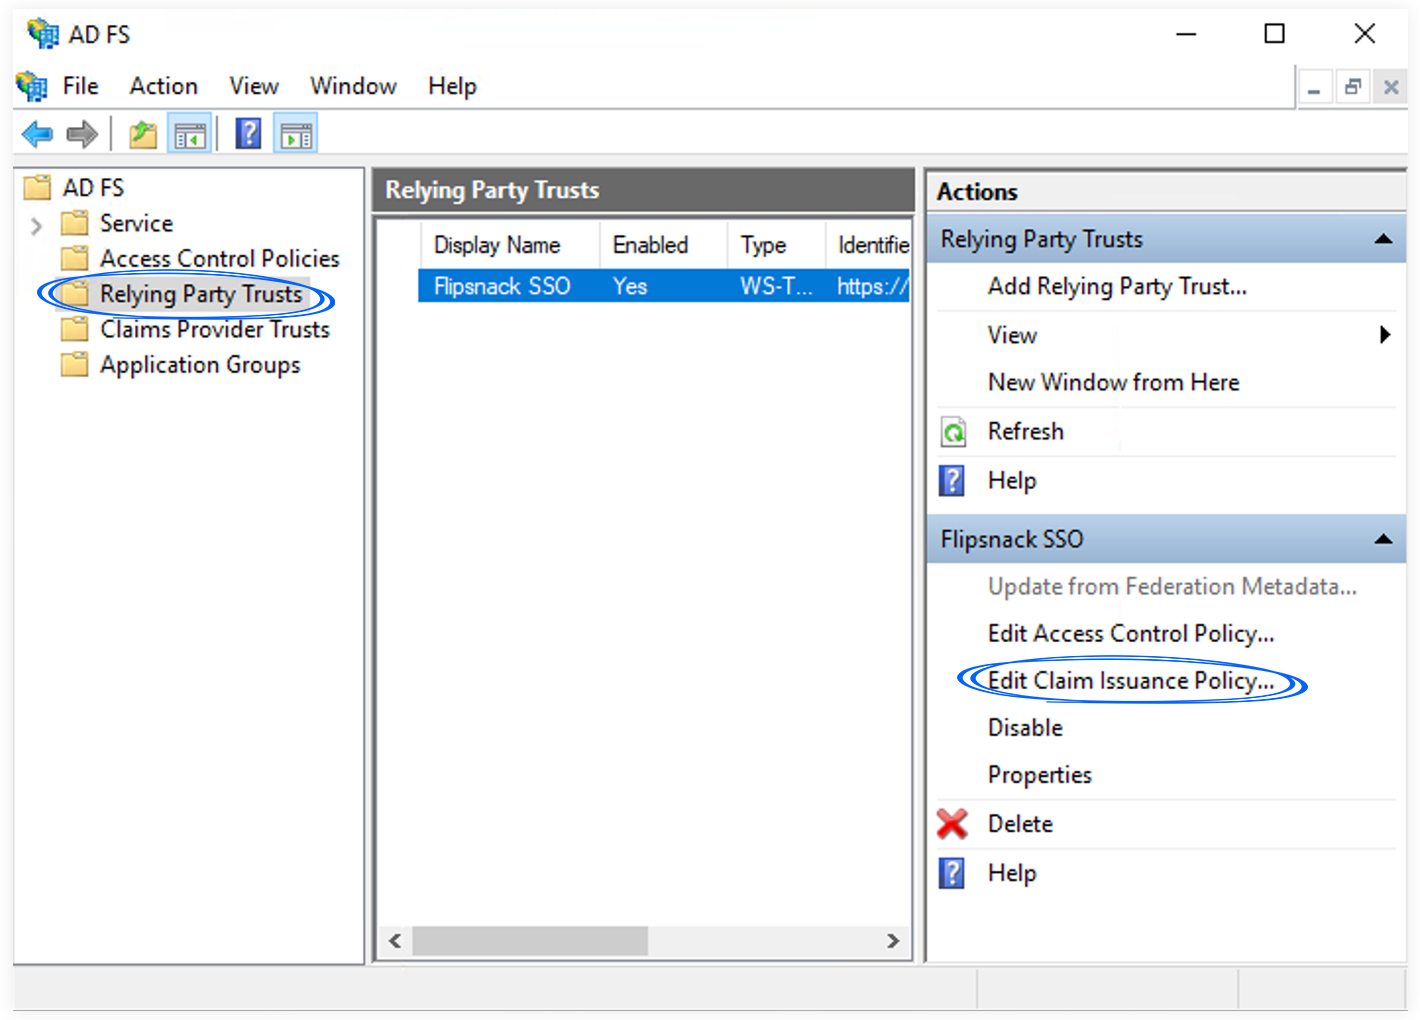
1. If the Claim Issuance Policy editor appears, click Add Rule. Otherwise, in the Relying Party Trusts list, select the relying party object that you created, click Edit Claim Issuance Policy, and then click Add Rule in the Issuance Transform Rules tab.
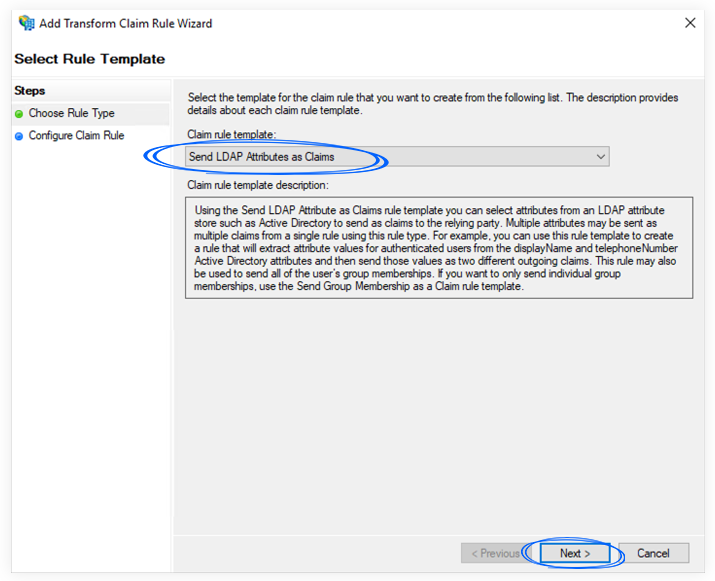
2. Select Send LDAP Attributes as Claims template in the Claim rule template list, and click Next.
3. In the Configure Rule section, set the following:
a. Claim rule name: write a descriptive name
b. Attribute store: Active Directory
c. Add the following mapping:
d. LDAP Attribute: E-Mail-Address
e. Outgoing Claim Type: Name ID
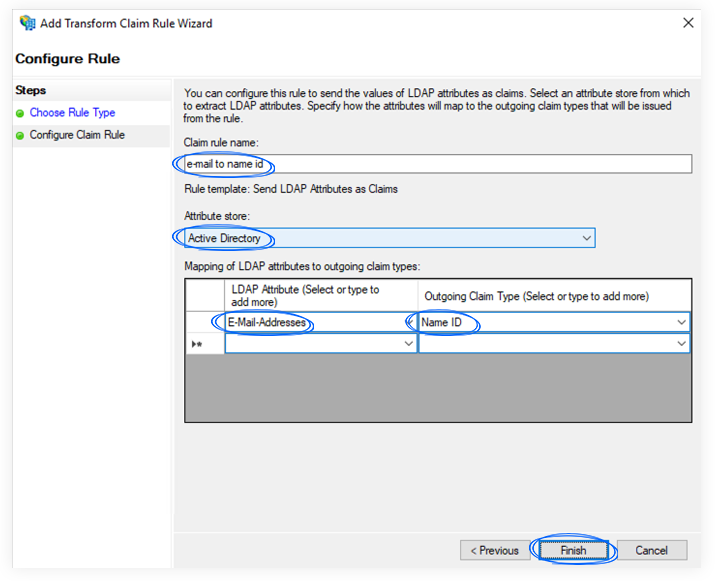
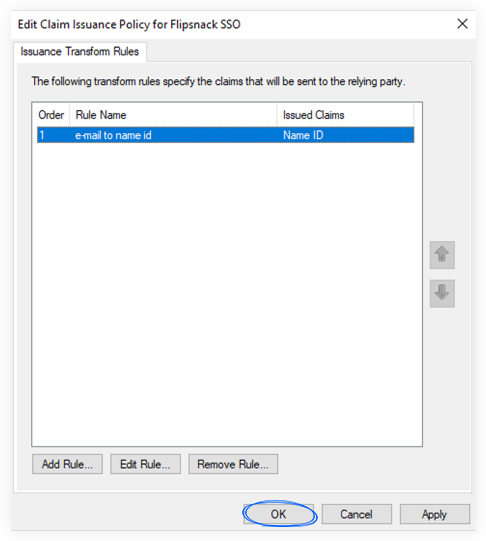
4. Click Finish, and then OK to finalize the settings.
This setup was tested with Windows Server 2019. Depending on your Windows version, you may have to adjust a few settings for your relying party trust (e.g., use the Secure hash algorithm to SHA-256, choose POST for Binding in Endpoints, etc.). If that is the case, please contact our support team, and we will try to help you with the proper setup.
Configuring the ADFS SAML in Flipsnack
1. Go to Flipsnack SSO settings and click Create an SSO connection.

2. Name your connection and set the protocol to SAML.

3. Copy/paste the Login URL and Identifier information from ADFS:
- Login URL -> Single Sign-On URL from provider: https://example.com/adfs/ls/idpinitiatedSignOn.aspx
- Identifier -> Identity Provider Issuer:
http://example.com/adfs/services/trust
Important: Please use HTTP, not HTTPS, when adding the identifier. Otherwise, you will receive an "Invalid user" error message.
- Get your ADFS certificate by going to your Relying Party Trusts, right-clicking on it, and selecting Properties. Click on Encryption or Signatures to view your certificates and export Certificates (certlm.msc) under Personal → Certificates.

5. Click Save Changes. Now, your integration between Flipsnack and ADFS SAML SSO is complete.
Next steps:
Discover more efficient ways to keep your documents secure:
Need expert support?
Our team is here to help. Connect with our team experts or message us via the in-app chat for a personalized demo.