Table of contents
- Overview
- How to add tables in Design Studio
- How to edit and change tables
- Table customization options
- How to combine and split cells
- How to move rows and columns
- How to copy and paste tables from other tools
- Troubleshooting
- Frequently asked questions
- Next steps
Overview
Tables are a great way to show info neatly. They are perfect for catalogs, reports, pricing pages, or comparison charts. Instead of filling your page with messy text boxes, tables help you share details, options, and specs in a clean layout that matches your brand. In Flipsnack, you can easily build, change, and style tables right inside our Design Studio. This saves you time and keeps your designs looking good.
Requirements
- Flipsnack Plan: Available on the Starter plan and up.
- Permissions: Workspace Owners, Administrators, and Editors can add and change tables.
- Supported Formats: You can easily copy and paste data from tools like Microsoft Excel and Google Sheets.
Use Cases
How different teams use tables in Flipsnack:
- Product Catalogs: Show pricing, SKU numbers, sizes, and product options side by side to make buying easier.
- Reports: Share key numbers, balance sheets, and performance charts in a clear layout that is easy to read.
- Comparison Sheets: Highlight features, services, and plan differences to help customers choose.
How to add tables in Design Studio
Adding a table to your flipbook takes just a few clicks. Follow these steps to get started:
- Open your flipbook or template in the Design Studio.
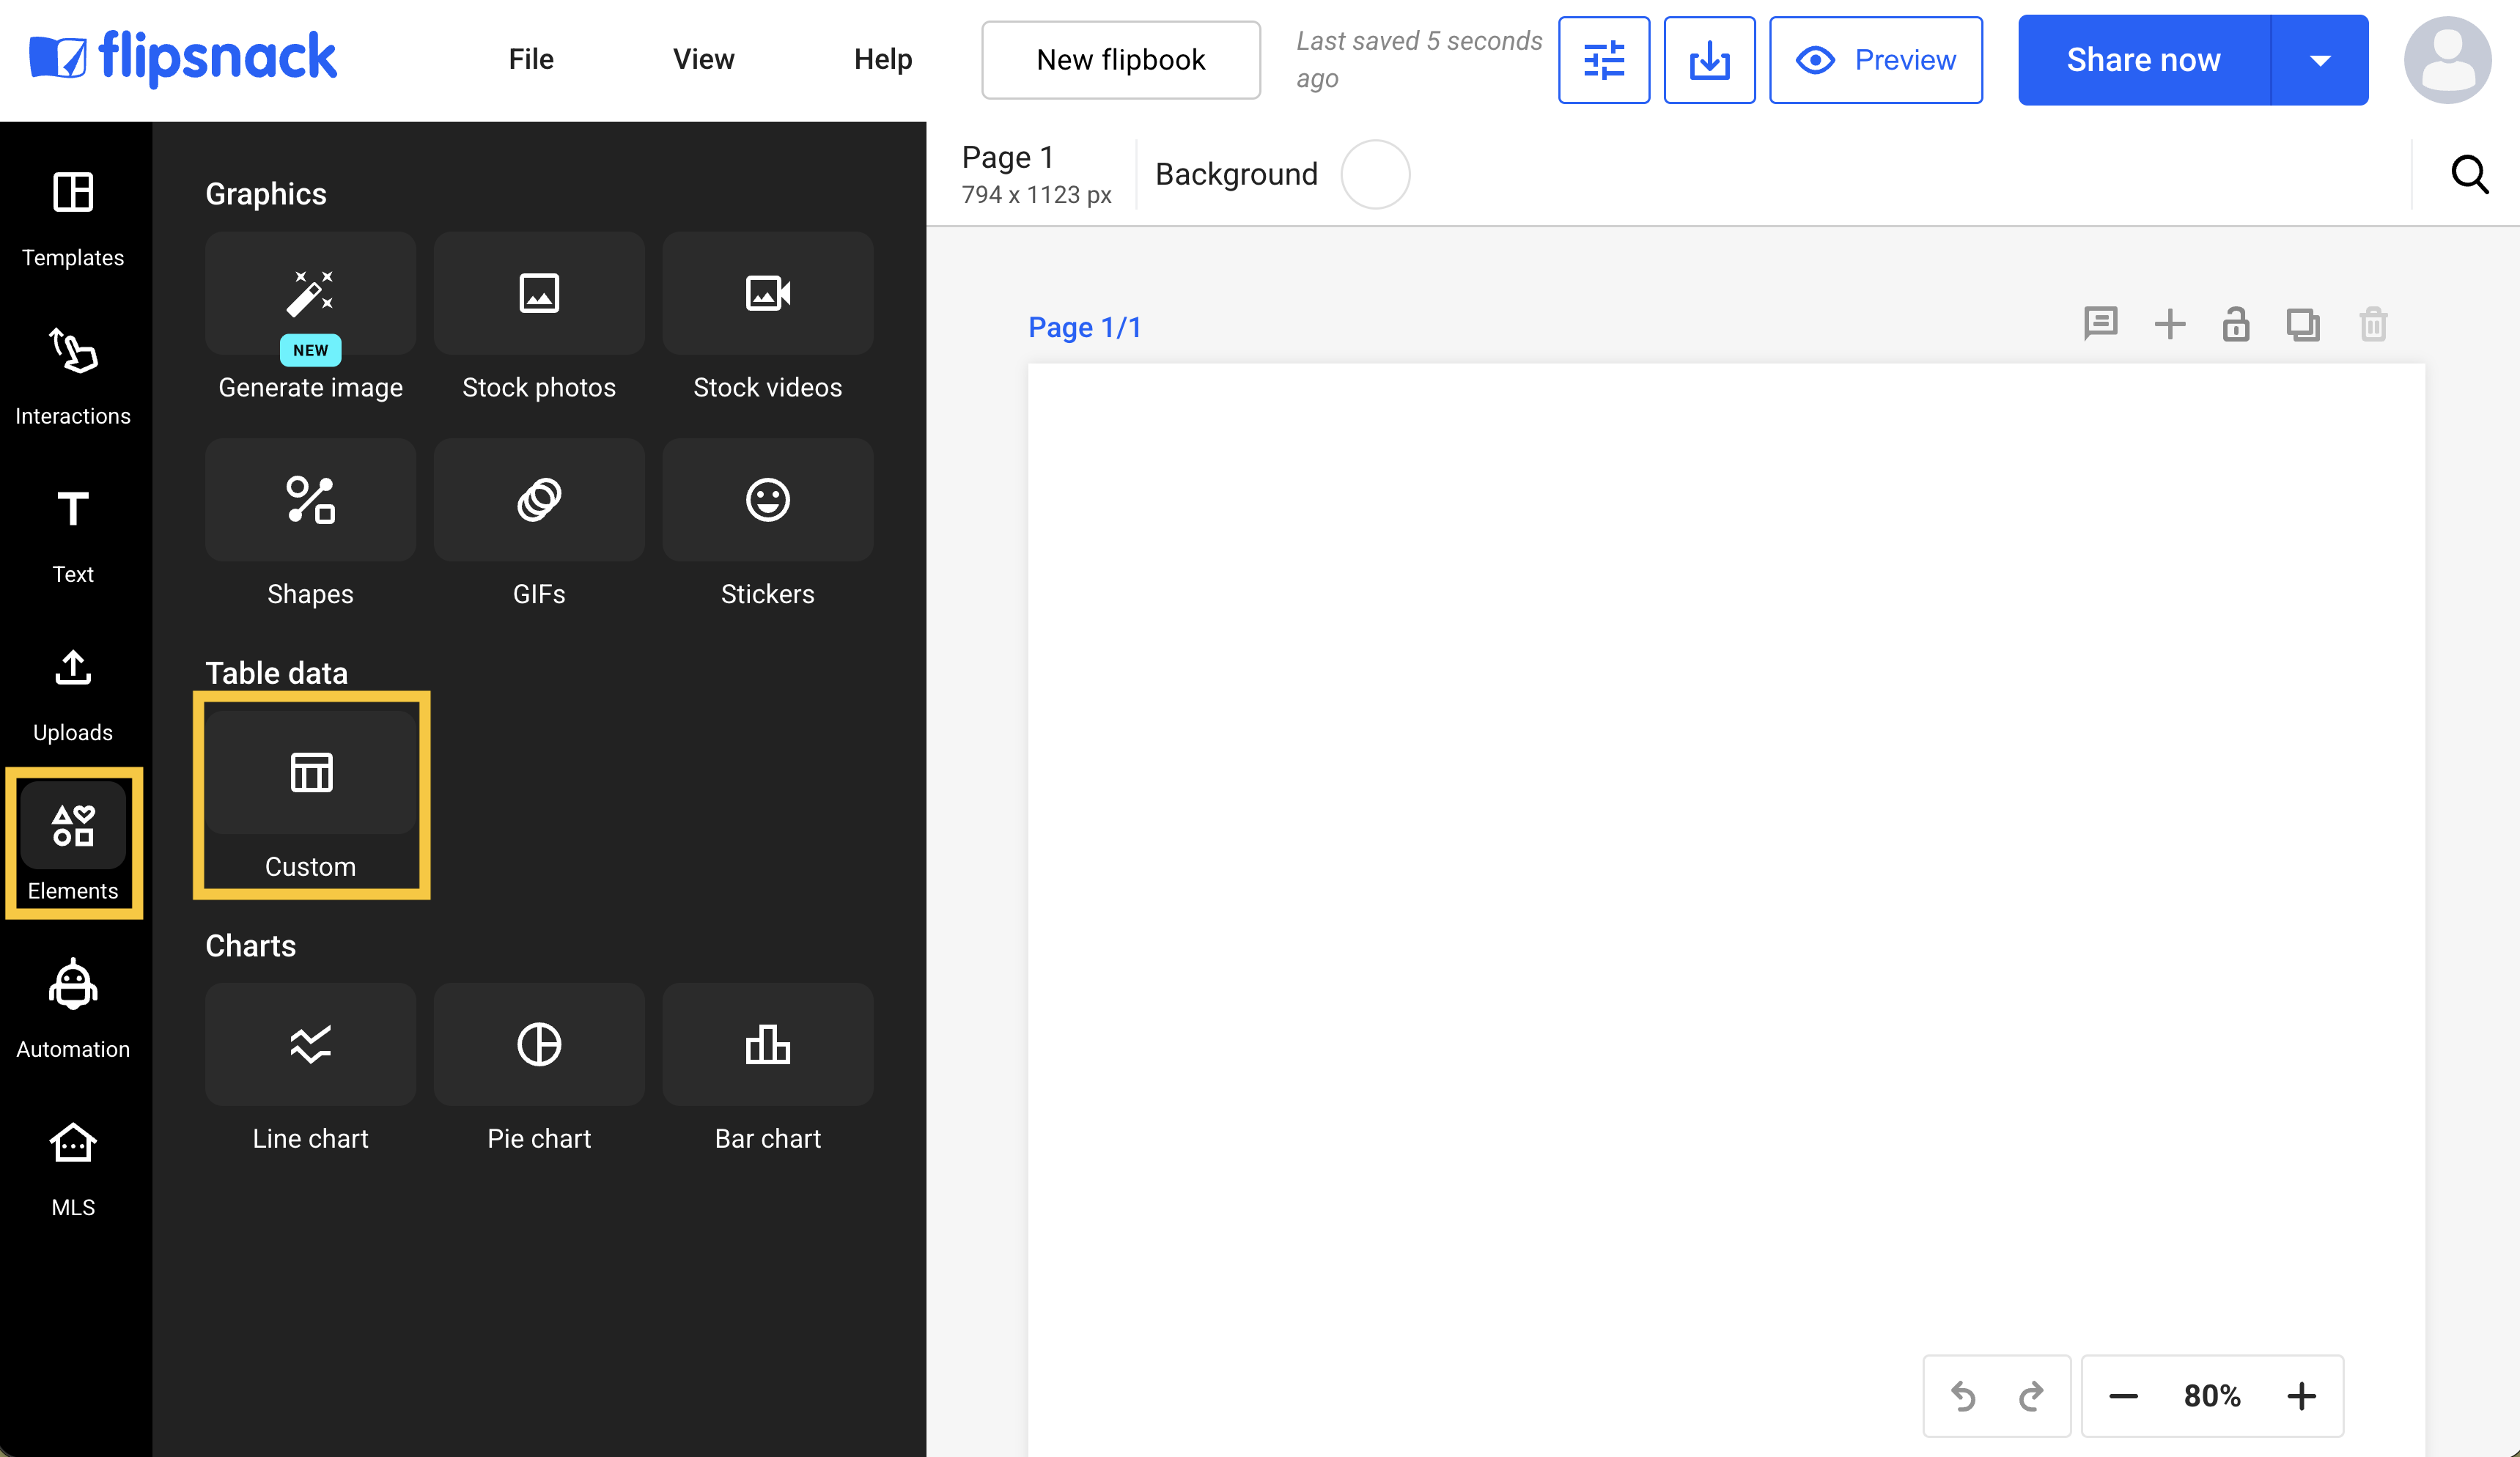
- On the left sidebar, click the Elements button.
- Scroll to find the Tables section.
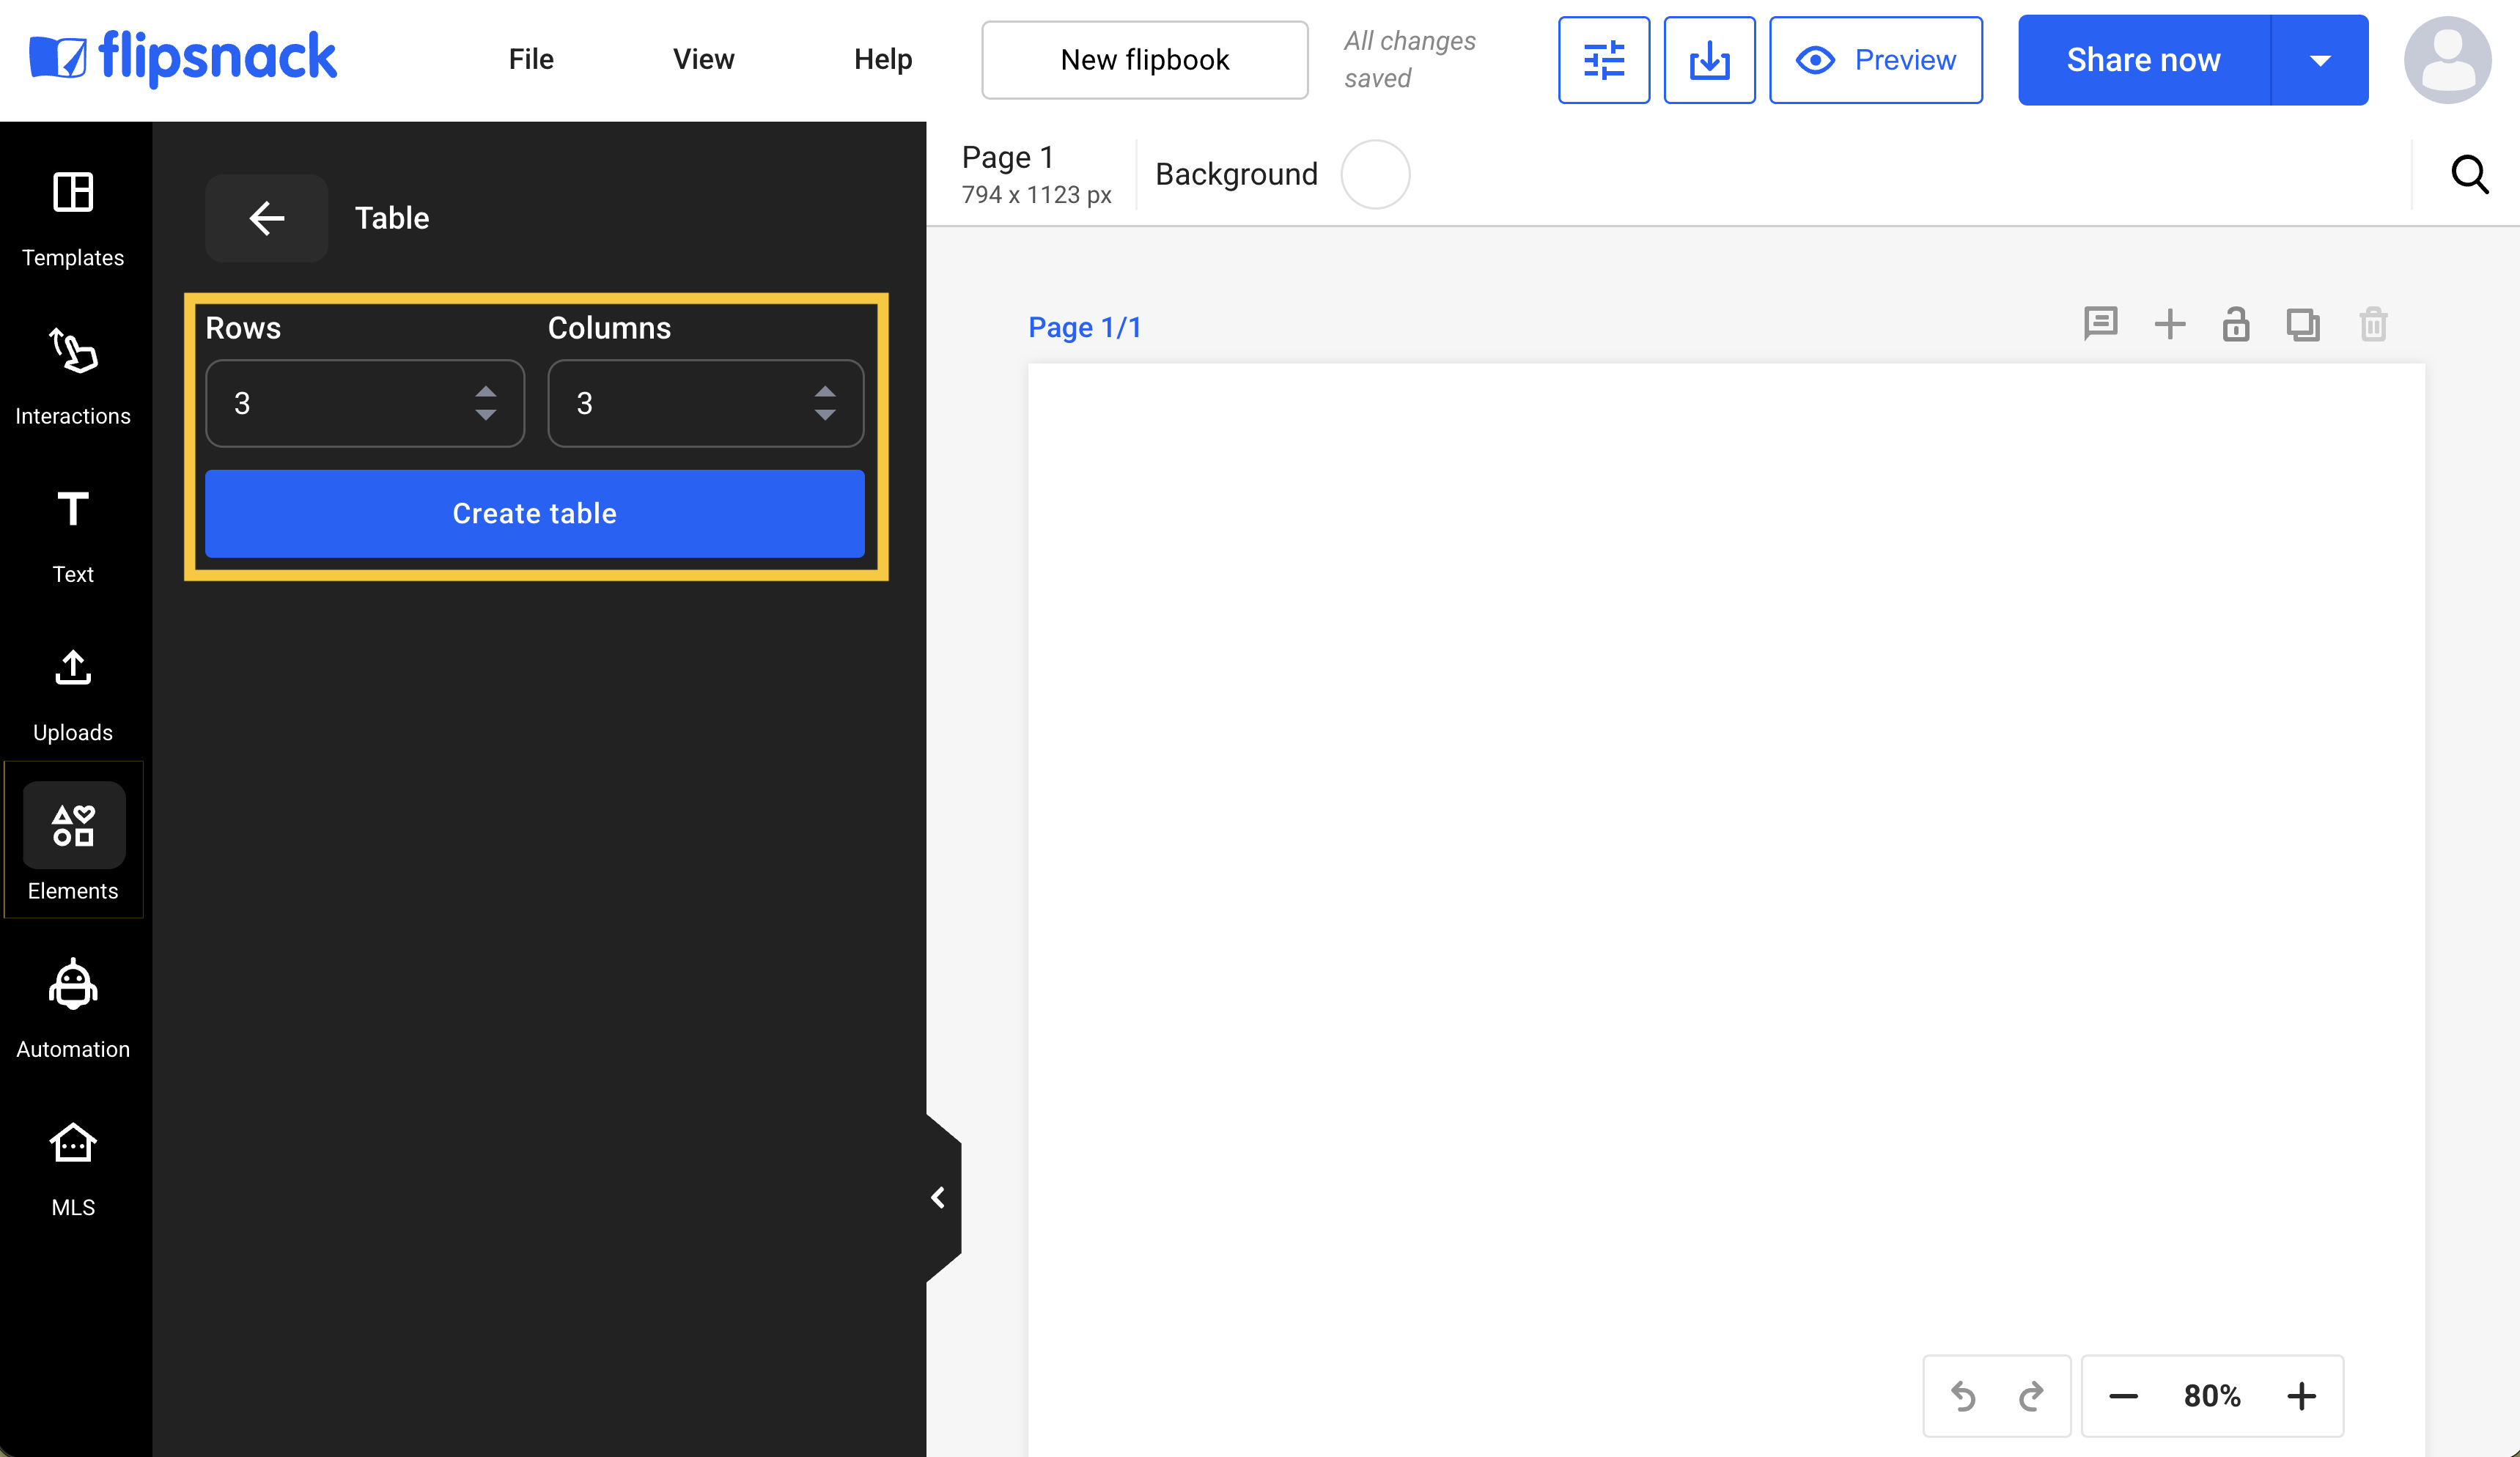
- Pick the number of rows and columns you need, then click Create table to add it to your Canvas.
- Double-click inside any box (cell) to start typing. You can move between boxes easily using the Tab key or your arrow keys.
How to edit and change tables
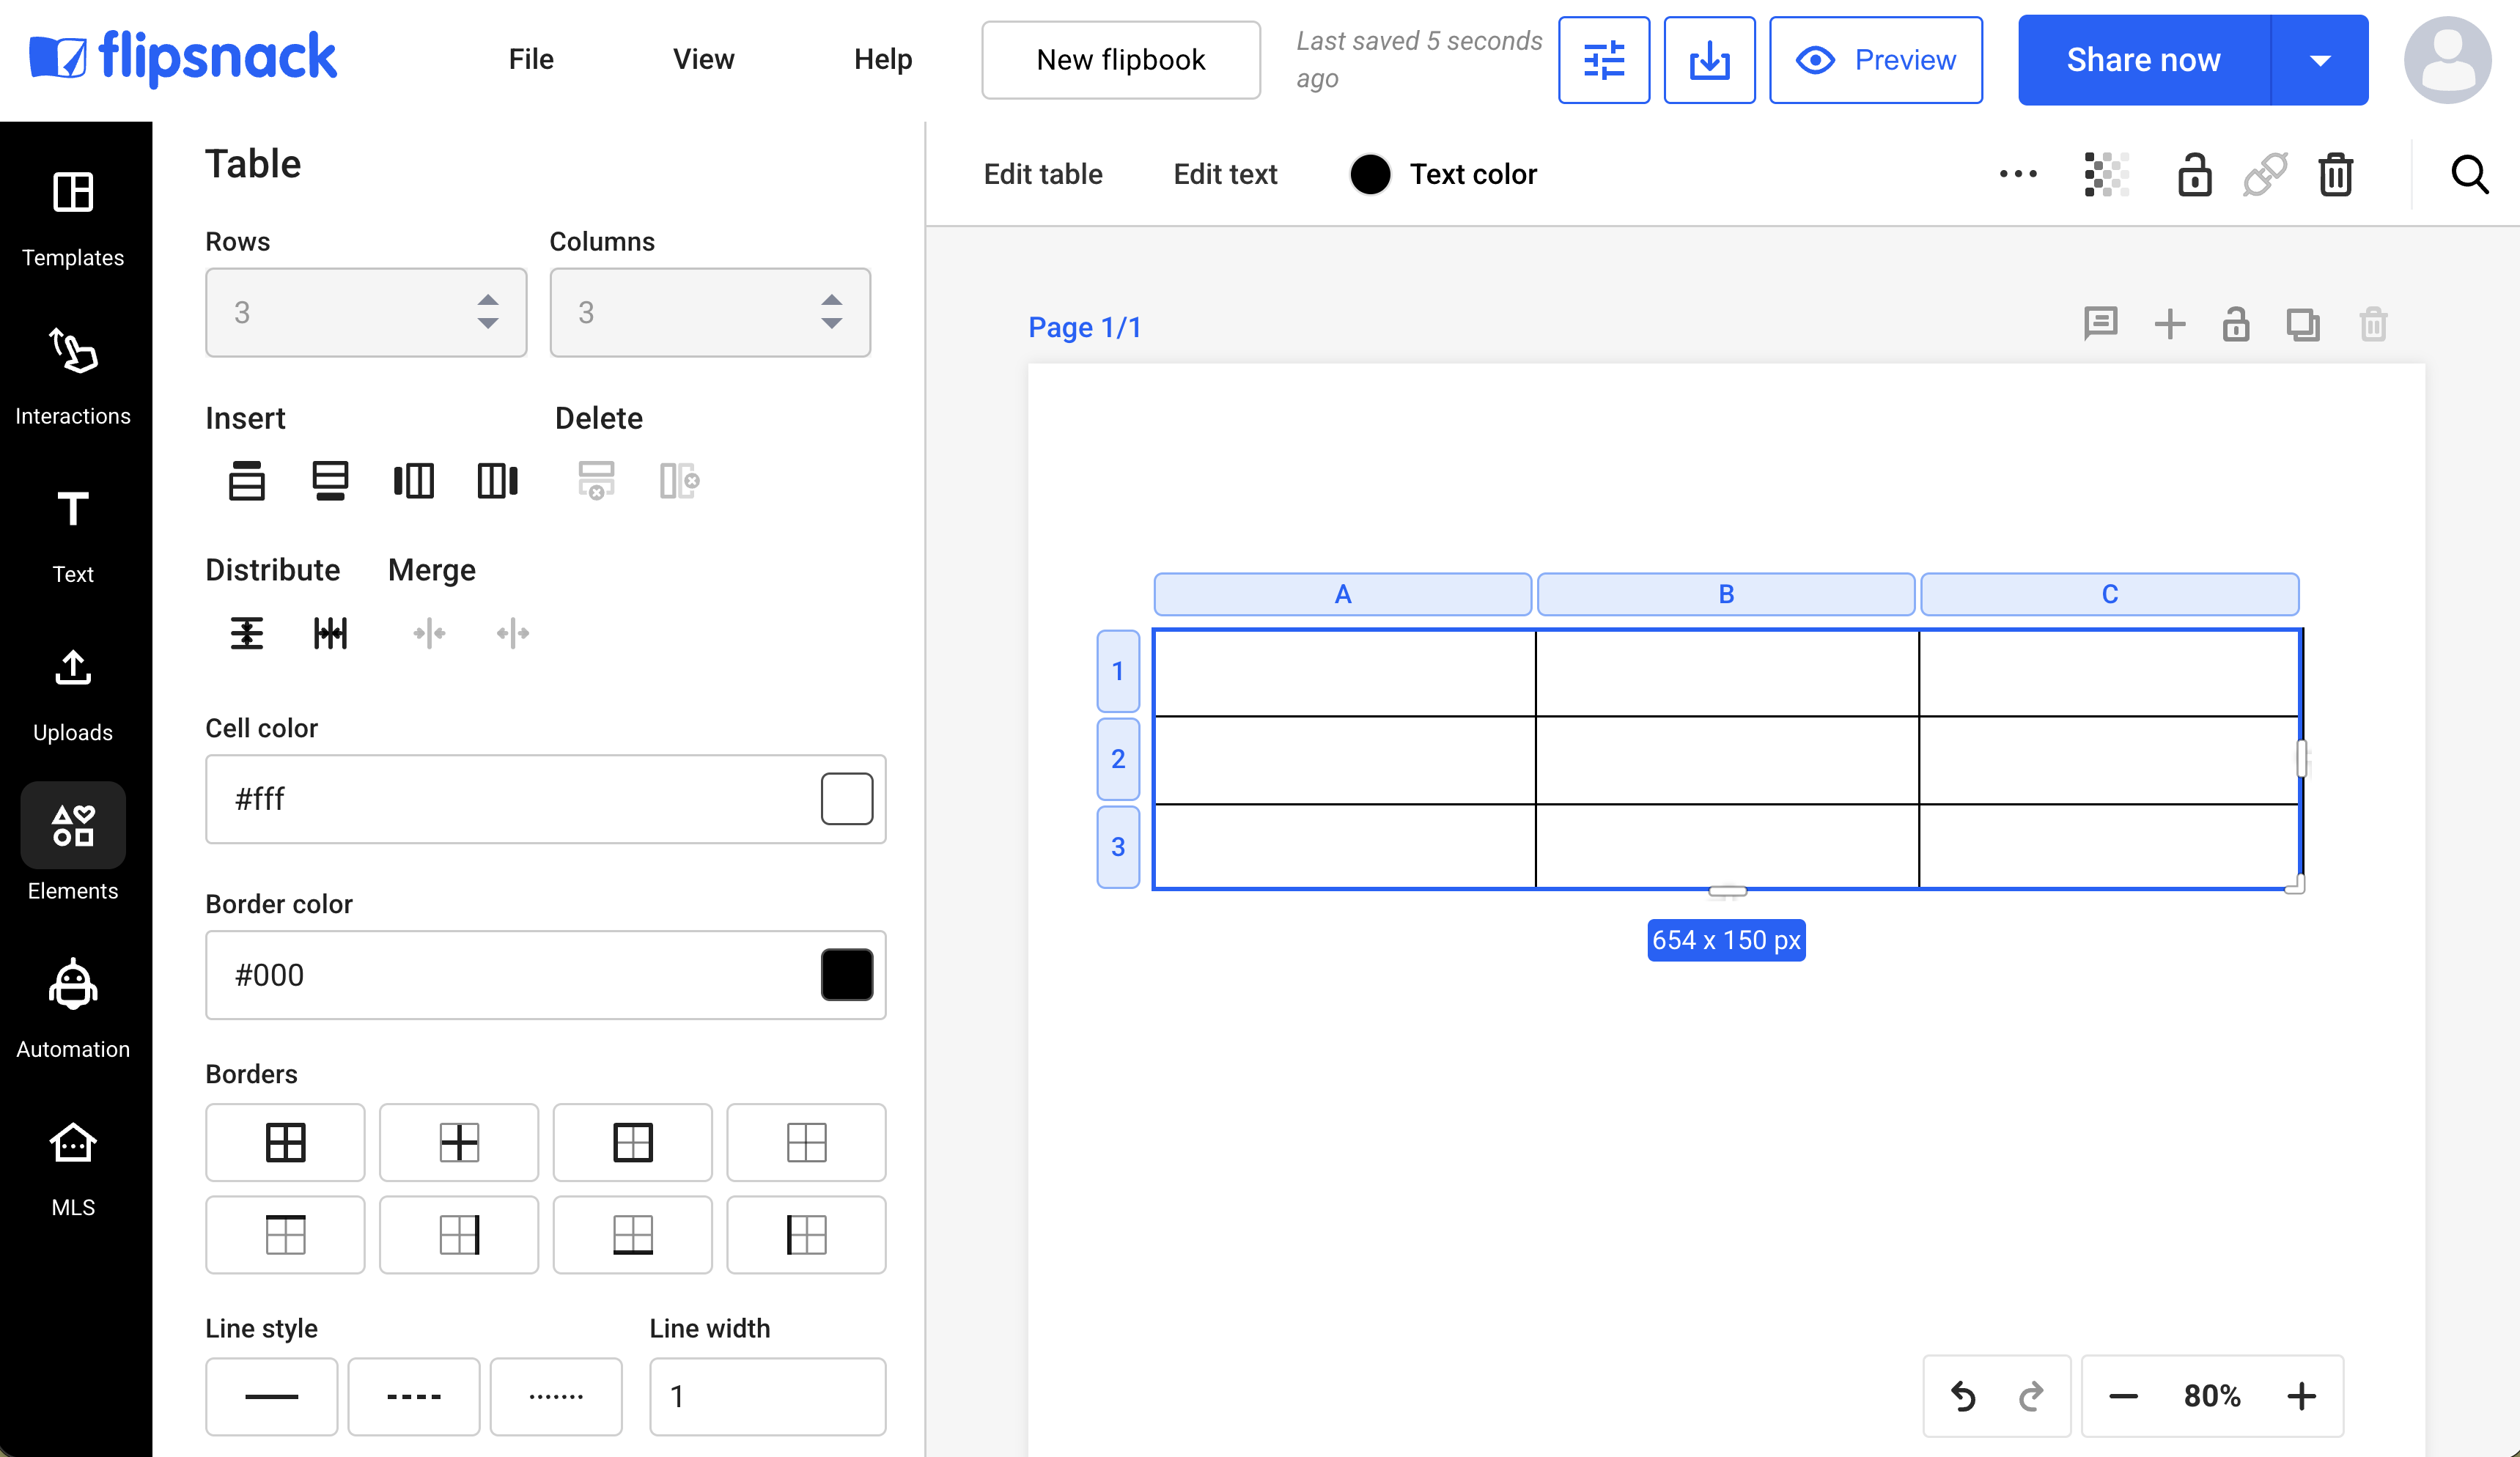
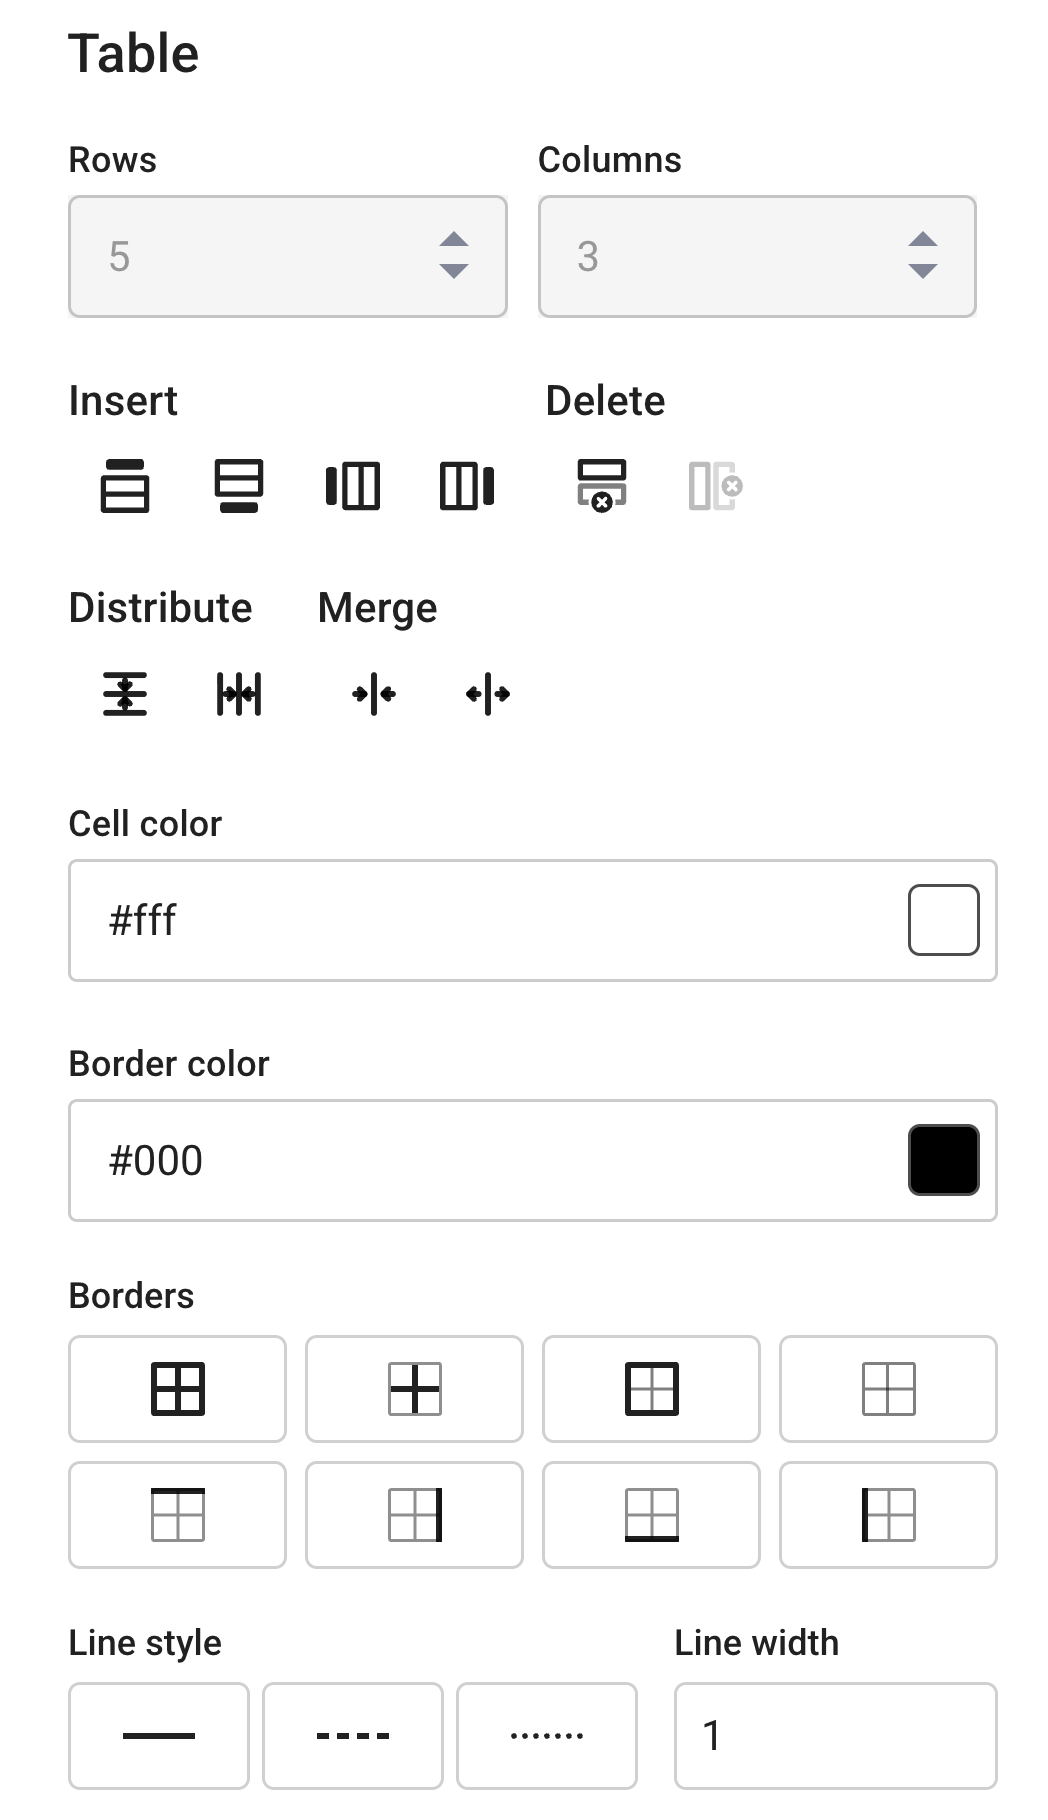
Once your table is on the Canvas, you can easily grow, shrink, or change its setup using the table settings in the Properties bar on the right side of the screen.
- Add rows: Click on a box in the table, then look at the right-side Properties bar. Under the Insert section, click the Insert row above or Insert row below icon.

- Add columns: Click on a box, then go to the Insert section in the Properties bar. Click the Insert column left or Insert column right icon.

- Remove rows and columns: Click the row or column you want to remove. Then, click the Delete row or Delete column icon in the right-side Properties bar.

-
Even out rows and columns: Make sure your table spacing is even by clicking your table and then choosing the Distribute horizontally or Distribute vertically button in the properties panel.

Table customization options
You can easily change how your table looks to match your brand.
- Change box sizes: You can drag columns and rows to make them bigger or smaller:
- To change column width, place your mouse between the column letters (like A and B) at the top of the table. Click and drag to resize.
- To change row height, place your mouse between the row numbers (like 3 and 4) on the side. Click and drag to resize.
- Change background color: Add color to headers, totals, or single boxes to make them stand out:
- Click the whole table or the specific boxes you want to color.
- In the Properties bar, click on the Cell color input box.
- Type in a color code (like
#fff) or pick a color from your brand kit.

- Change borders: Choose how your table lines look:
- Change border color: Type in a new color code to change the line color.

-
- Use border presets: In the Borders section, you can quickly turn on or off the inner lines, outer lines, or lines for a single box.

-
- Line style: In the Line style section in the Properties bar, pick a solid, dashed, or dotted line.

-
- Line thickness: Change the number in the Line width box to make lines thicker or thinner.

- Change text style: To style the text inside your table, select the table or a box, then click the Edit text button on the top menu. Here, you can change fonts, sizes, text placement, and styles.
How to combine and split boxes
To create wide headers or group boxes together, you can combine boxes that are next to each other:
- On the Canvas, click and drag to select boxes that are next to each other.
- In the right-side Properties bar, scroll to the Merge section.
- Click the Merge cells icon to combine the boxes.
- To pull them apart later, select the combined box and click the Split cells icon.

How to move rows and columns
You can quickly move your data around right on the Canvas without deleting and re-typing anything:
- Click your table to show the row and column headers.
- Place your mouse over a row number (1, 2, 3...) or a column letter (A, B, C...).
- Click and hold the blue grab handle on that header.
- Drag the row or column to its new spot and let go of the mouse to move the data.
How to copy and paste tables from other tools
If you already have a product list or pricing chart in a tool like Microsoft Excel or Google Sheets, you don’t need to type it all again in Flipsnack.
- Open your file in Excel or Google Sheets.
- Select and copy (Ctrl + C or Cmd + C) the boxes you want.
- In the Design Studio, click on your page and paste (Ctrl + V or Cmd + V).
- This will automatically create a Flipsnack table that you can easily edit.
Important details when pasting tables:
- Looks: Background colors, custom lines, and fonts from other apps won't carry over. You will need to set the colors, fonts, and lines inside the Design Studio after you paste.
- Links: Any website links inside your copied boxes will not automatically work in your flipbook. To make them clickable, select the text and add a link yourself.
- Size fixes: Depending on how big your columns and rows are, you might need to drag and resize the table so it fits nicely on your page.
Troubleshooting
- Text is cut off or looks weird: If your text is too long for a box, place your mouse over the column line at the top and drag it to make it wider. Or, you can make the text smaller using the Edit text options on the top menu.
- Lines aren't showing up: Make sure the line width is set to at least 1. Also, check that the line color isn't the same as the box's background color. Make sure your Line style is set to a solid, dashed, or dotted line (not hidden).
- Pasted data doesn't line up: Big tables with empty boxes can sometimes paste with crooked rows. Check that your original table has even columns before copying. You can also use the add row/column buttons inside Flipsnack to fix it.
- Combine options are grayed out: Make sure you have picked at least two boxes that are next to each other. You cannot combine boxes that are spread apart.
Frequently asked questions
Can I link tables to my automated product feed?
Yes! Tables work perfectly with Flipsnack's automation tools. You can link product details, SKUs, and prices right to the table boxes. This lets you automatically update thousands of items using your CSV or Google Sheet. Read more about Catalog Automation.
Are tables mobile-friendly?
Yes, tables in Flipsnack automatically fit our flipbook player on mobile. Still, we suggest keeping your tables clean and not making columns too wide. This makes them much easier to read on small screens.
Next steps
Now that you have your tables set up in Flipsnack, check out more ways to customize and build your catalogs:
- How to brand your flipbooks and player appearance
- How to turn your PDFs into shoppable catalogs and automate the process
- How to customize your flipbook player appearance
Need help setting up your tables?
Our team is here to help. Connect with our team experts via the in-app chat for personalized assistance!