
Overview
Give your team better ways to store and share design files while organizing everything within our content creation hub. Separate team and personal files in Design Studio to facilitate collaboration and help everyone find what they need faster, transforming how your organization manages and deploys design assets.
💡 Benefits of separating personal from team uploads
- Accelerate workflow efficiency with centralized asset management
- Reduce operational overhead through organized file distribution
- Enhance team productivity with structured resource access
- Strengthen brand consistency through controlled asset organization
How to use team & personal uploads
Here's what you need to do:
- Open the Design Studio
- Go to the Uploads section
- Click My Uploads to view or upload personal images or videos
Click Team Uploads to view or upload images and videos shared with your team.
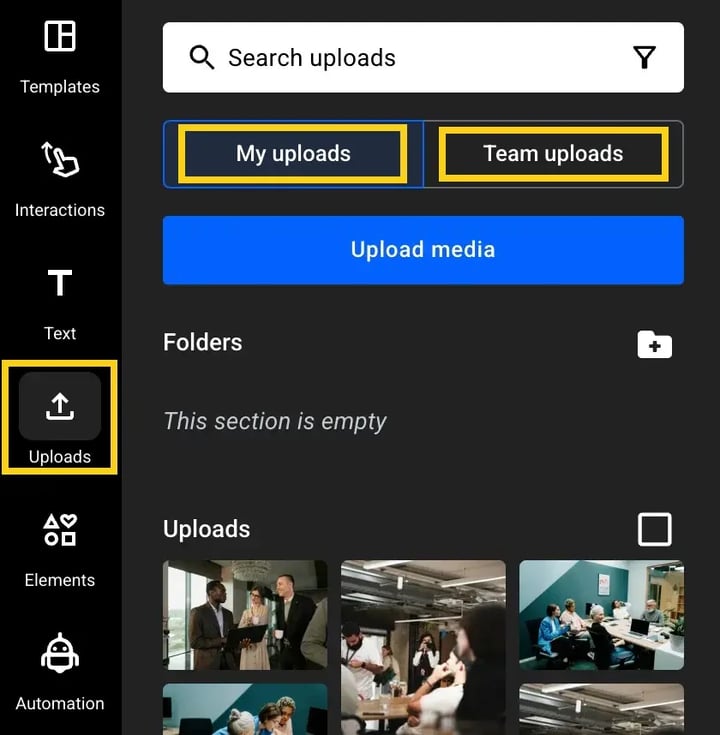
Important: If you’re a part of a team, you can find all of your uploaded images and videos in Team Uploads.
Note: In case you’re part of multiple workspaces, you must upload your files separately for each one.
How to share files with your team
Efficiently distribute design assets across your organization by moving select files from your library to your shared team resources.
To share individual assets:
- Navigate to the My uploads tab
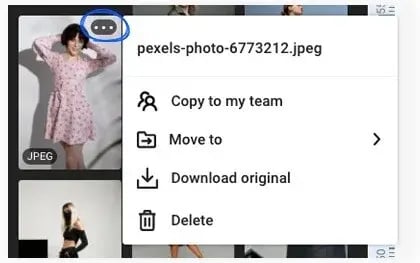
- Hover over any image or video
- Click the 3 dots menu
- Select Copy to my team to make it available workspace-wide
 However, if you want to move all of your files from My uploads to your Team uploads, just click on Select All, and then hit the Copy to my team button.
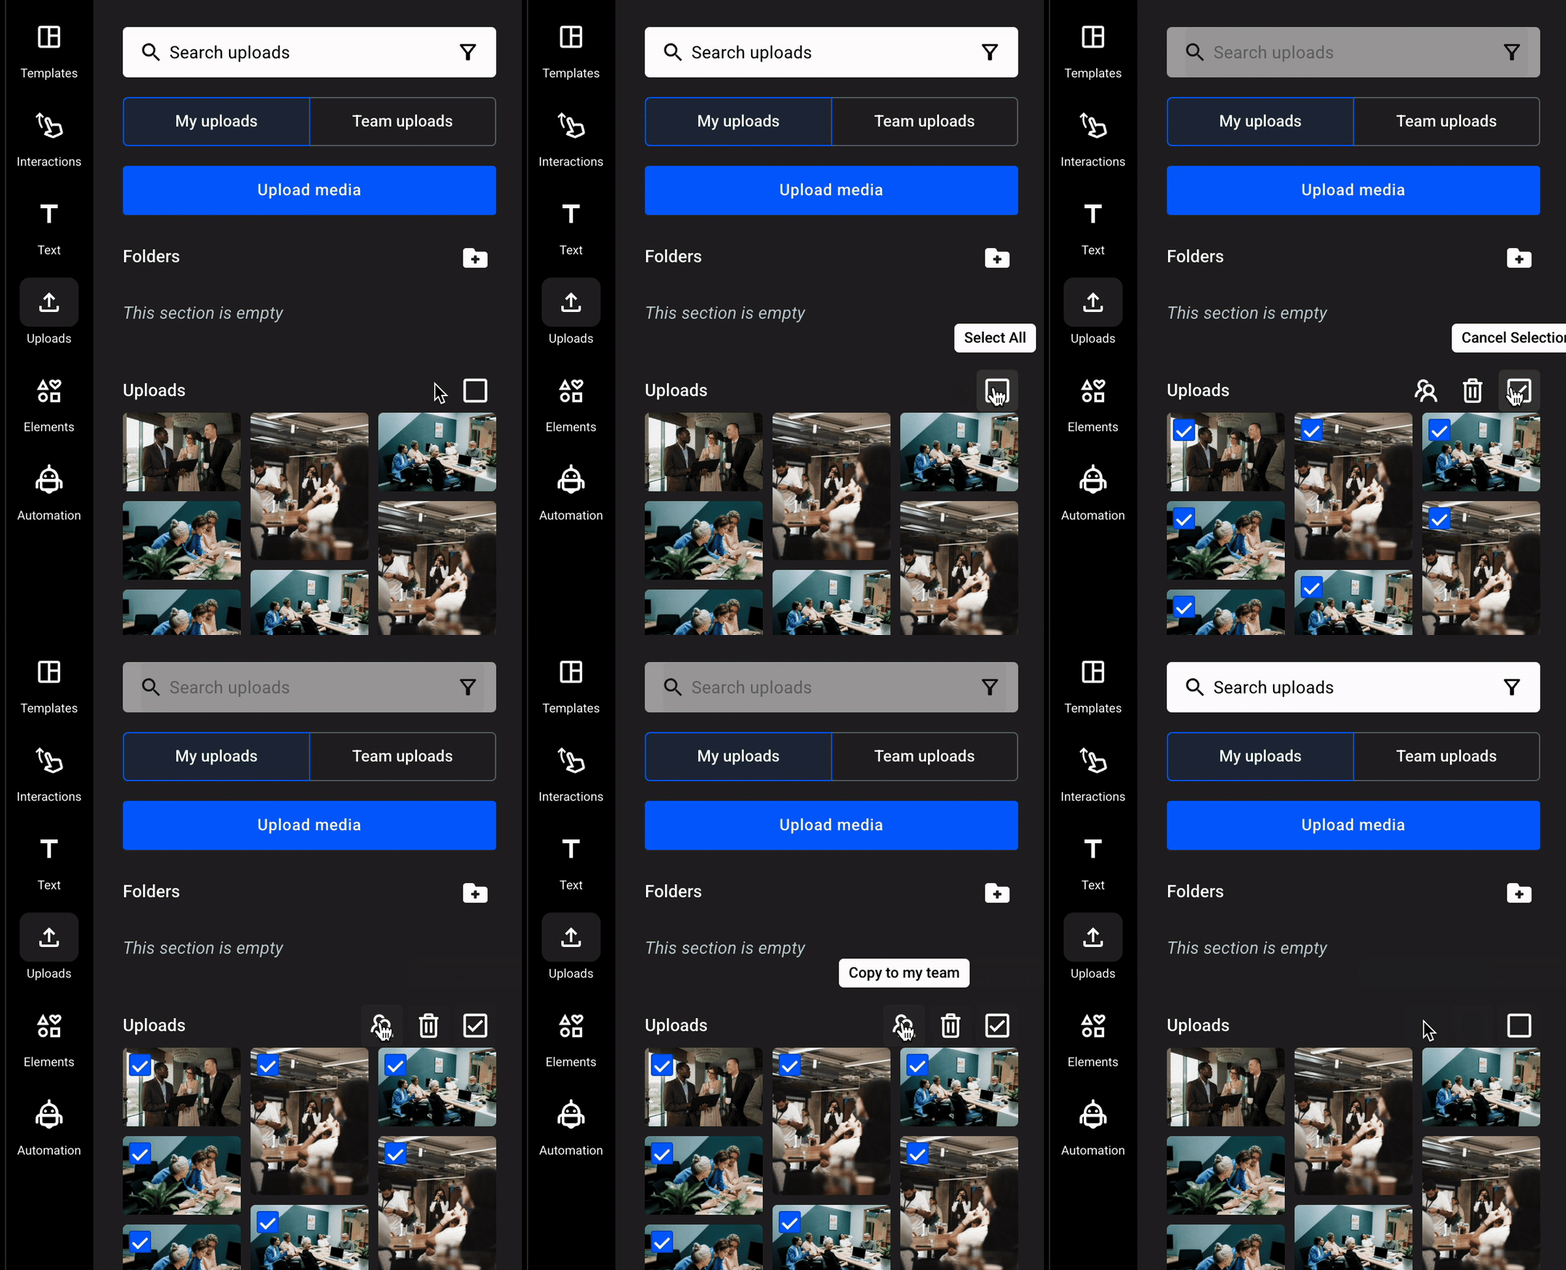
You can even delete all your documents at once if that is your wish. Right after you select them all, you just click on the Trash icon in the middle, and you're done.
Important: Only workspace owners and administrators can share and delete files.
How to create subfolders
Folders don't have to stay flat. You can nest them up to 5 levels deep, so a folder can contain its own subfolders, and those can hold more subfolders still.
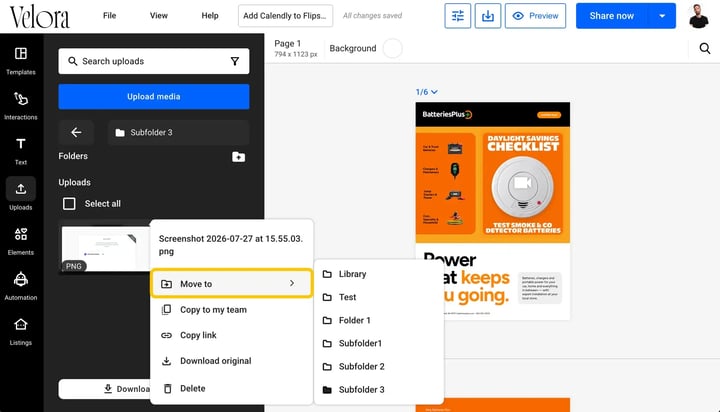
To create a subfolder, open the parent folder, click the New folder icon at the top of the directory tree, name it, then click OK. You can also hover over an existing folder, click the three dots, and select New folder to create a nested child folder without opening it first.
Moving assets into a subfolder works the same way as with regular folders hover over the image or video, click the three dots, select Move to, then pick the subfolder from the tree.
Notes:
- Subfolders work in both My uploads and Team uploads, same as regular folders.
- Deleting a subfolder behaves the same as deleting a folder, contents move back to the uploads library root, nothing gets permanently deleted.
- You can't drag an entire subfolder to reposition it in the hierarchy yet. If you need to change its nesting level, move the files inside it to the new parent instead.
Next steps
Need expert support?
Our team is here to help. Connect with our team experts or message us via the live chat for personalized assistance.