
Overview
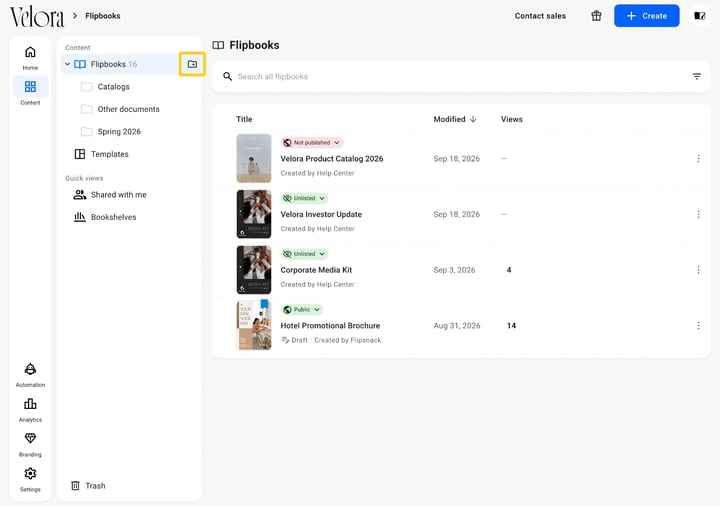
Content is where every flipbook you own lives. Open it from the icon rail on the left and you get a list of your publications, one per row, with its status, when it was last changed and how many views it has. A second rail beside it holds your folders, your templates, and Trash. This is the page the Help Center used to call My flipbooks or the Main dashboard.
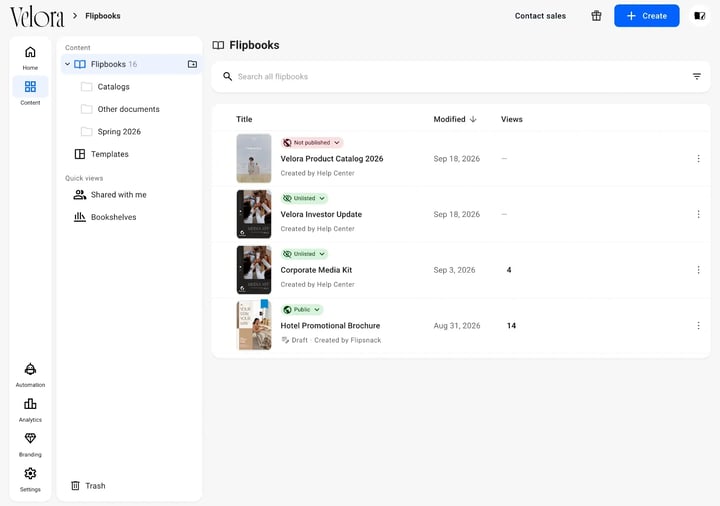
Everything you do to a flipbook outside the editor starts here: sharing it, publishing it, copying it, filing it, or throwing it away.
👥 What the two rails hold
- The icon rail: Home, Content, Automation, Analytics, Branding, Settings. Content is the one holding your flipbooks.
- Flipbooks, with a count beside it: every publication in the workspace, with your folders nested underneath.
- Templates: designs you saved to reuse, kept apart from finished publications.
- Quick views: Shared with me for other people's flipbooks you can reach, and Bookshelves for collections.
- Trash: pinned at the bottom, holding what you deleted until you restore it or remove it for good.
Nothing on this page needs setting up.
Finding a flipbook
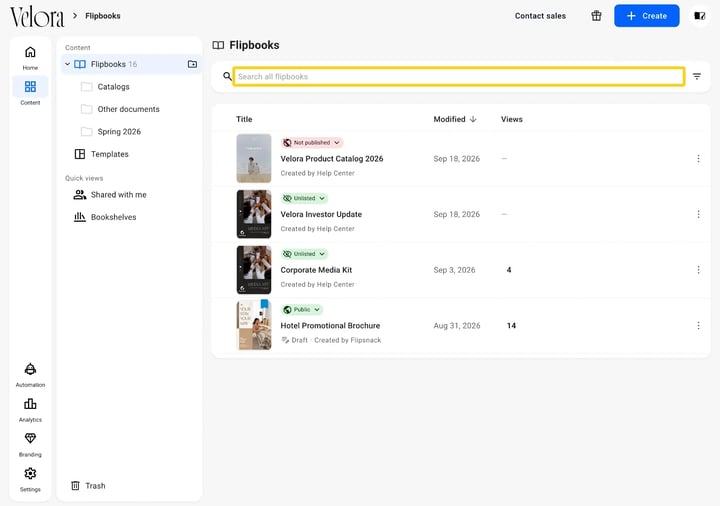
Type into Search all flipbooks at the top of the list. It searches every flipbook in the workspace, not only the folder you are looking at.
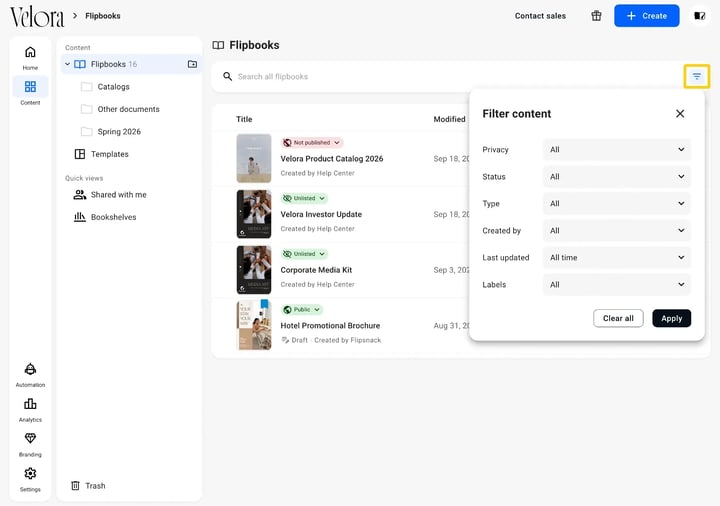
The Filter button at the right of the search field opens Filter content, which narrows the list six ways: Privacy, Status, Type, Created by, Last updated and Labels. Clear all puts it back.
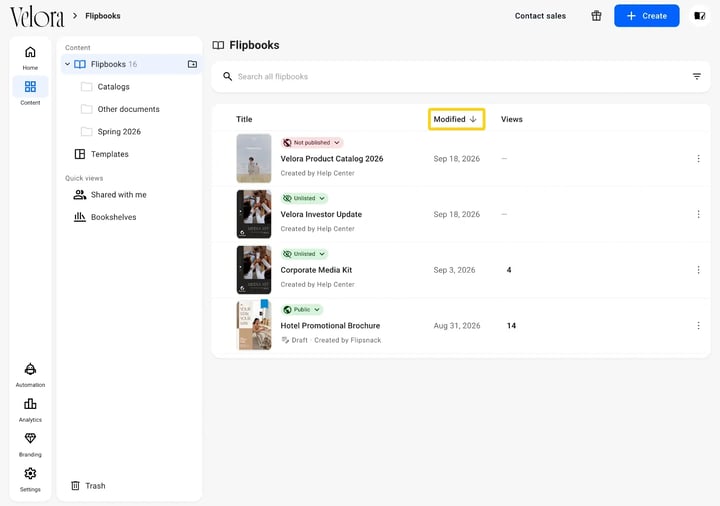
You can also sort: click Title, Modified or Views to order by that column. The list arrives sorted by Modified, newest first.
What you can do to a flipbook
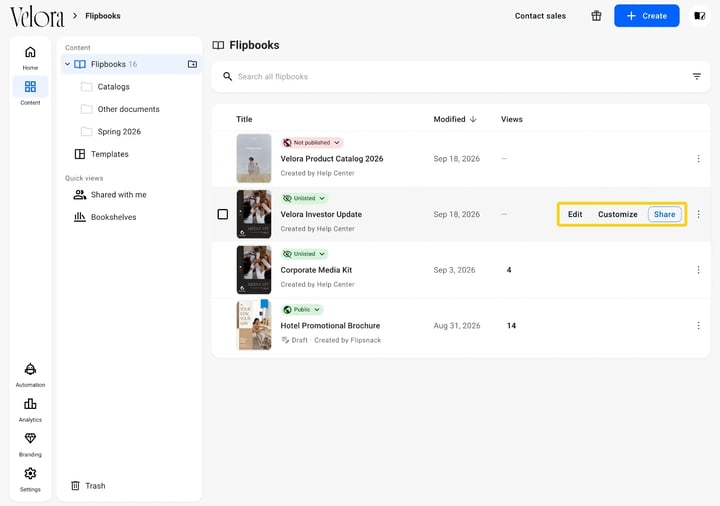
Hover a row and Edit, Customize and Share appear at its right end, with a selection checkbox on the left.
The three-dot button at the end of the row holds the rest: Overview, Analytics, Share, Edit, Save as template, Customize, Download, More options and Move to trash.
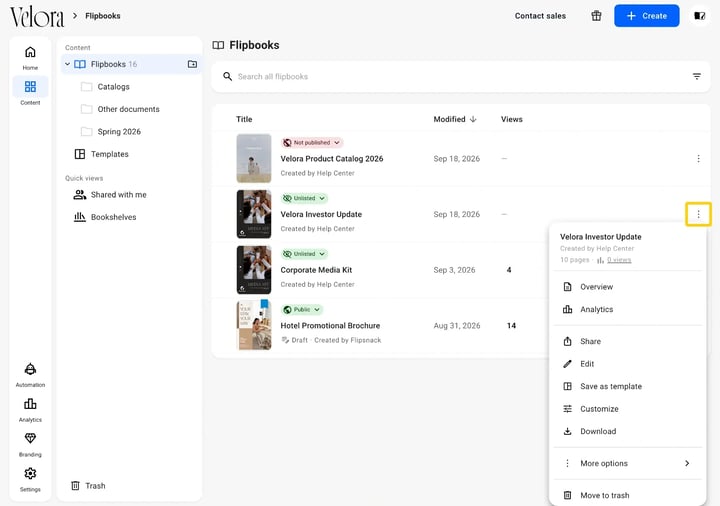
Overview opens the flipbook's Overview page, which was called Details before. It holds Share flipbook, Edit content, Customize preview, Download and Embed.
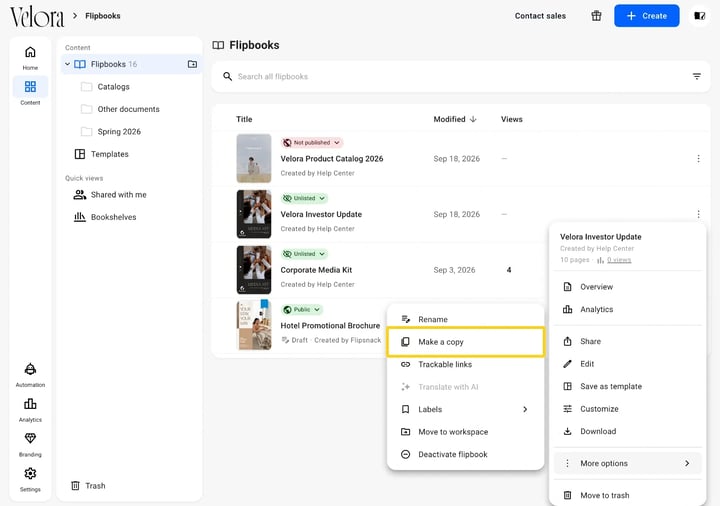
More options holds the less frequent ones: Make a copy, Rename, Trackable links, Translate with AI, Labels, Move to workspace and Deactivate flipbook.
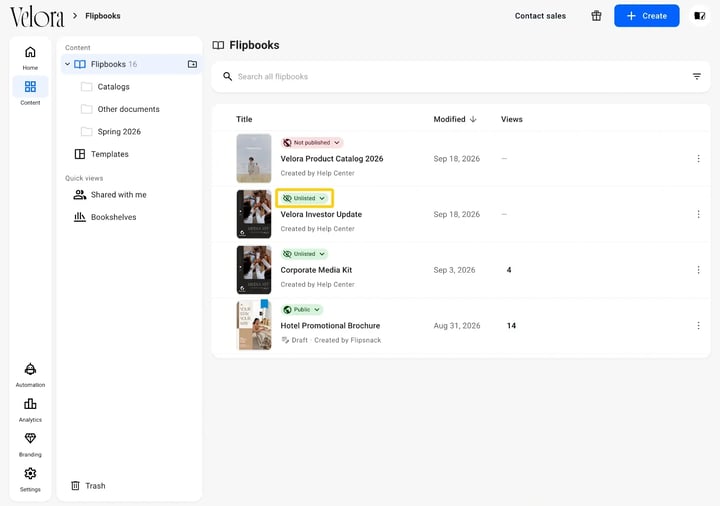
The coloured chip above each title is its visibility. Clicking it opens Publish your flipbook, where you set Public, Unlisted or Private. Publishing options explains who sees what.
Folders
Create one with the folder button on the Flipbooks row of the rail, then drag flipbooks into it.
Hovering a folder in the rail shows its own menu, with four items: New folder for a subfolder, Rename, Get share link, and Move to trash. Get share link is how you share a whole folder at once rather than a flipbook at a time.
Making something new
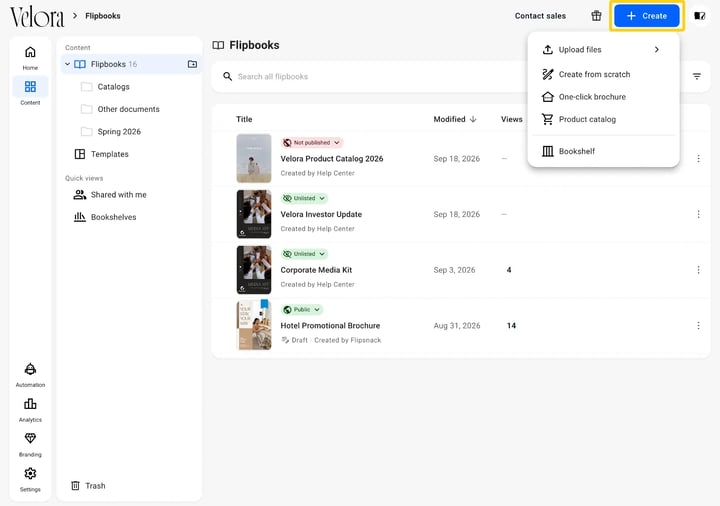
Create in the top right offers Upload files, Create from scratch, One-click brochure, Product catalog and Bookshelf. You can also drag files straight onto the list: it accepts PDF, PPTX, ODP, JPG and PNG.
Deleting and restoring
Move to trash in the row menu removes a flipbook from the list without destroying it. Open Trash at the bottom of the rail to see what is in there. Each row has a More actions button with two choices: Restore, which puts the flipbook back where it was, and Delete forever, which does not ask twice.
Restoring a flipbook brings back its statistics and its link, so a flipbook you deleted by accident loses nothing as long as you have not deleted it for good.
Trash empties itself after 21 days. Deleted flipbooks and folders are then removed permanently.
Switching workspace
Click your avatar in the top right. The panel that opens shows your account, then your current workspace and its plan. Hover that row and My workspaces lists every workspace you can reach, with a tick against the one you are in. The same panel holds My organization, My profile, My account, Settings, Help and support and Log out.
Each workspace keeps its own flipbooks, so switching changes the whole list. Multiple workspaces covers when a second one is worth having.
Additional tips / FAQs
- Where did My flipbooks go? Nowhere. It is the same page, renamed Content, with Flipbooks as the list inside it.
- Can I select several flipbooks at once? Yes. Hovering a row shows a checkbox on its left, and ticking several lets you act on them together.
- What is the number next to Flipbooks? How many publications the workspace holds. It is not a plan limit: your allowance lives in Settings, under billing.
- Where are labels managed? On the flipbook, through More options then Labels, and as a filter in Filter content. See labels.
- What is Shared with me? Flipbooks someone else owns and gave you access to. They are not counted as yours.
Next steps
- Advanced filters in the Content tab and how to use them
- How to organize flipbooks with folders and subfolders
- How to recover a flipbook you deleted
- How to save and reuse your own templates
- Flipsnack publishing options explained: who sees a flipbook
Need expert support?
Our team is here to help. Connect with our team experts or message us via the live chat for personalized assistance.