Table of contents
How to send your flipbook email through Mailjet
Overview
Mailjet is a secure and easy-to-use email marketing platform. This integration empowers organizations to streamline content distribution, enhance engagement metrics, and deliver premium digital experiences directly to target audiences.
Key benefits
- Deliver interactive publications directly to audience inboxes.
- Efficiently scale content reach.
Requirements
- An active Flipsnack subscription.
- Business or Enterprise plan.
Let’s discuss your email communication strategy.
Step-by-step guide
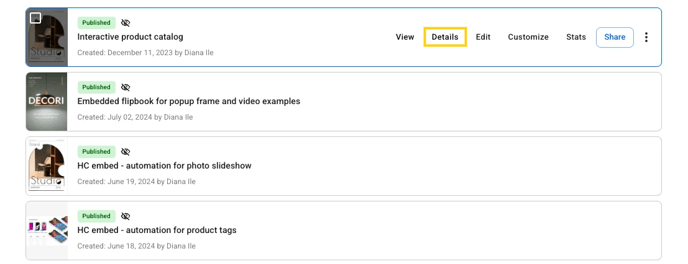
Before sending your flipbook through Mailjet, make sure it is Published. Next, navigate to the right side, click on Details.
In the left side bar, click on Send Email.

After you’ve done this, you can customize the email’s title, description, and so on. Then, just copy the embed code.
Important: Keep in mind that the email embed code is not the same as the flipbook embed code. Also, an embedded flipbook in your email will only open in a new tab if clicked on.
Now, we will move on to the next part.
How to send your flipbook email through Mailjet
1. Create your Mailjet account.
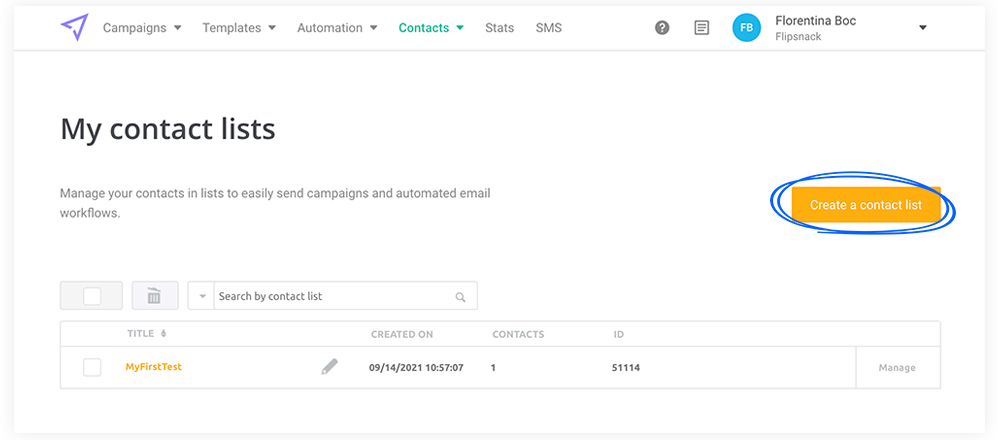
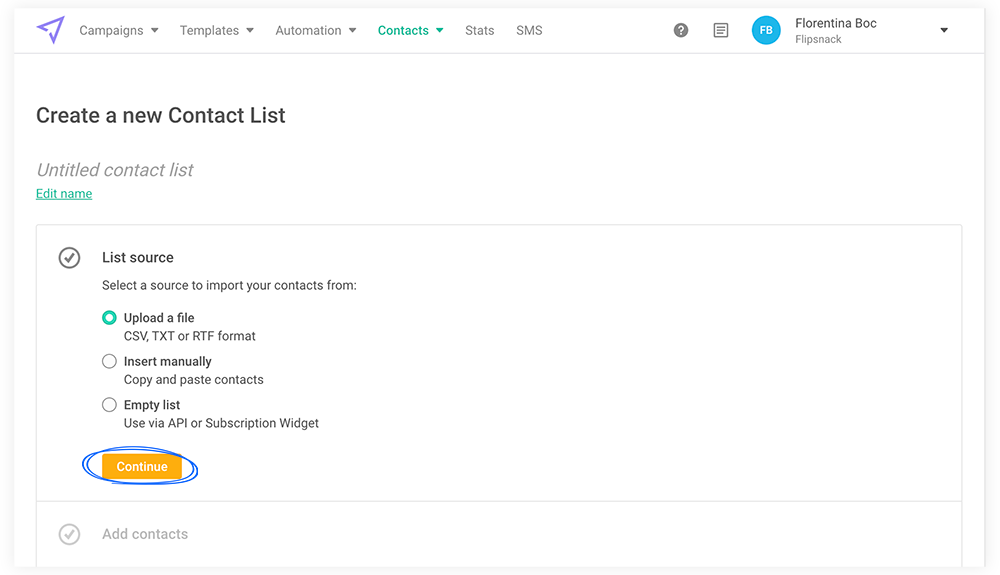
2. Right after this, you’ll need to create your contact list. Head over to the Import contact list and choose between these 3 options.
3. Now click on the Create new campaign button.

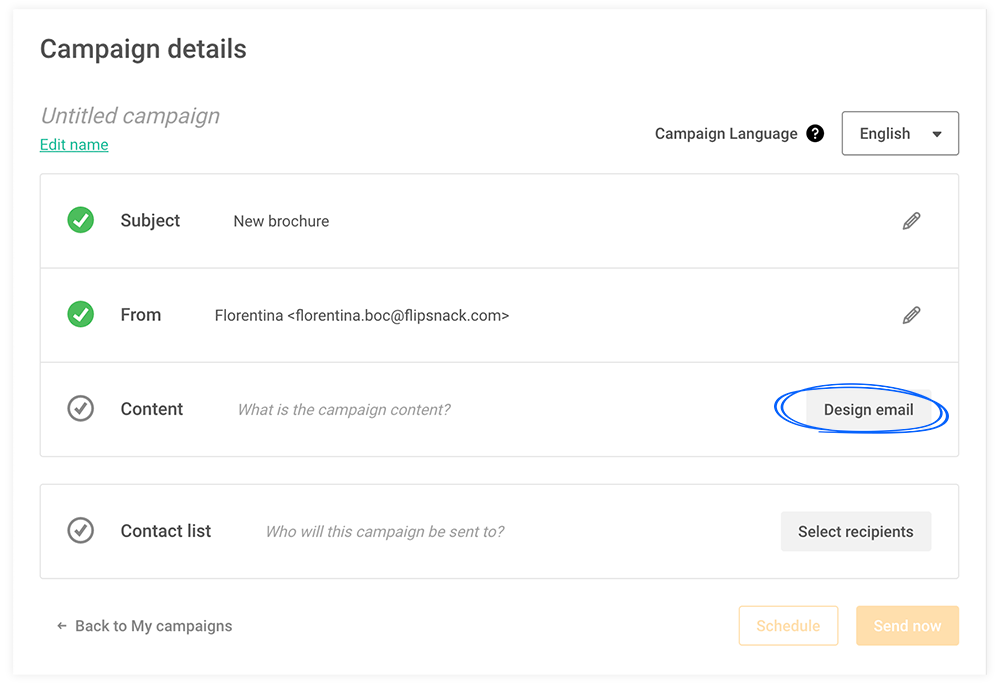
4. Before customizing your campaign details, you’ll have to design your email template. Therefore, click on the Design email button.
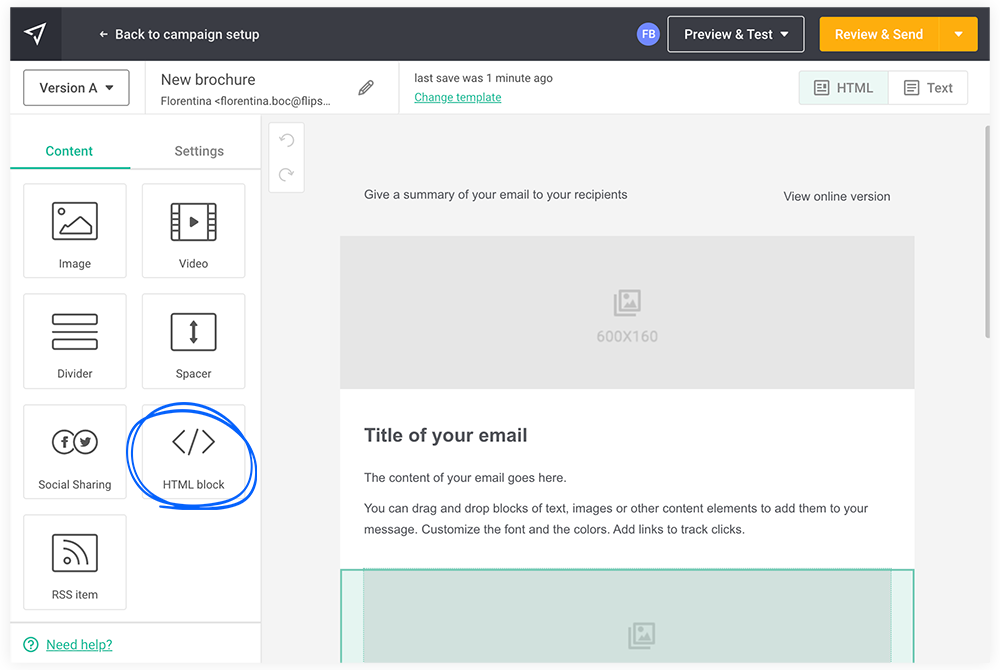
5. Here, you can choose from various options. For example, if you decide to use a template from the Mailjet gallery, go to the left sidebar and drag and drop the HTML block wherever you want in the template.
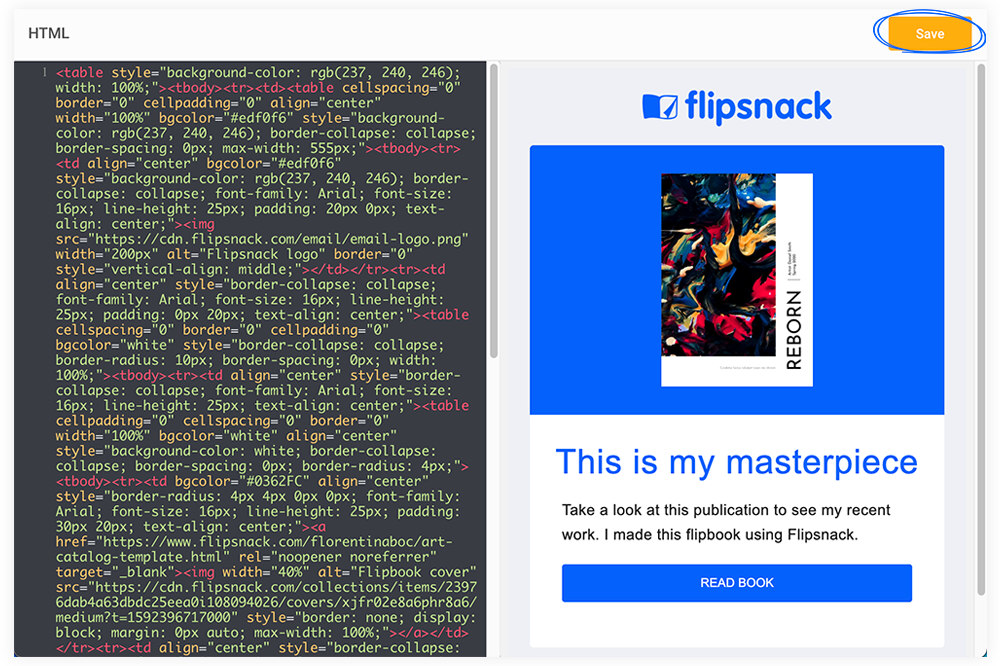
6. Then, click to open the HTML editor and paste the code of your flipbook.
7. Right after that, click Save.
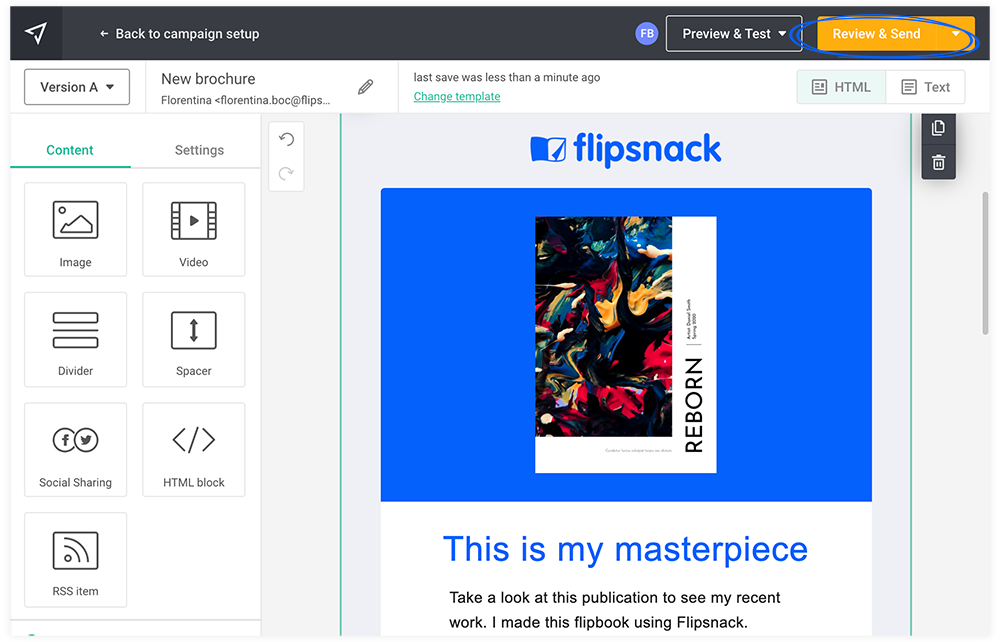
8. Click on the Review & Send button.
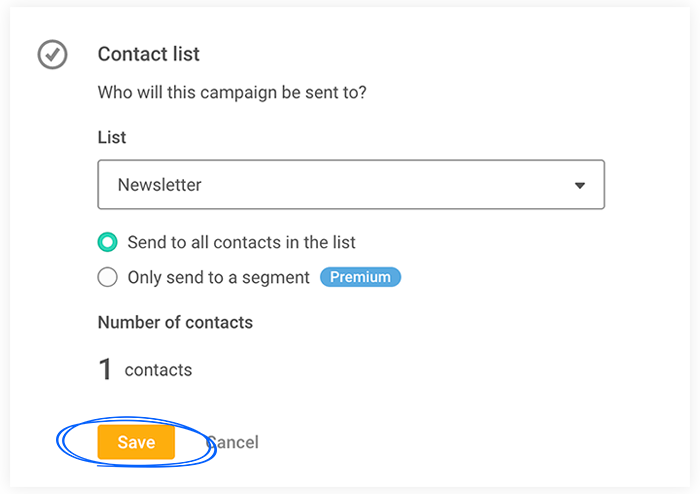
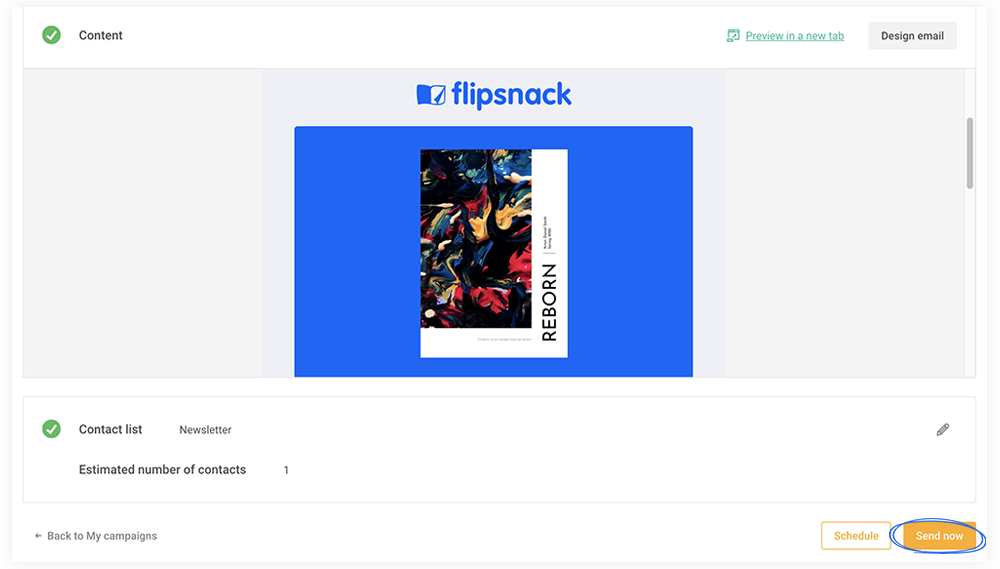
9. Now you’ll be redirected to the Campaign details page that you’ve seen before. Customize all the required fields however you want. Make sure to select the right contact list and click Save.
10. When you’re done, just hit the Send now button or choose to schedule for later.
Next steps
- Learn how to send your flipbook as an email directly through Flipsnack.
- Learn how to send your email via Mailchimp.
- Learn how to send your email via Constant Contact.
Need expert support? Our team is here to help. Connect with our team experts or message us via the in-app chat for personalized assistance.