We've taken important steps to make sure our platform (website, player, and flipbooks) is accessible to everyone. Flipsnack guarantees accessibility for all readers, enabling content creation that follows WCAG 2.1 Level AA guidelines and meets ADA Title III, Section 508, EN 301 549, and European Accessibility Act (EAA) standards. See our VPAT for details.
Table of contents:
What is Accessibility in Flipsnack?
How do you enable the Accessibility option?
Generate AI summary for Accessibility
Using the Accessibility feature as a reader
Recommendations for creating accessible flipbooks or PDFs
Allow fully accessible PDF download
Accessibility overview
Flipsnack helps you make your publications accessible for screen readers and keyboard navigation. This is done both at the level of the flipbook player and the content inside each page.
Note: Flipsnack does not automatically make your flipbook content accessible. You must configure accessibility settings manually or use the AI-based content extraction feature.
Watch our video tutorial on accessibility in Flipsnack to see how it works.
What is Accessibility in Flipsnack?
When it comes to flipbooks published in Flipsnack, accessibility is addressed on various fronts:
1. Accessible Flipbook Player and controls
The player interface - including navigation buttons and control bars - is fully keyboard-navigable using the TAB key. All controls have clear, descriptive labels compatible with screen readers for easy navigation.
2. Accessible interactive elements within pages
Links, buttons, and videos inside flipbook pages are designed to be keyboard accessible and readable by screen readers, ensuring full interaction for users relying on assistive technology. Navigation through the flipbook pages follows a sequence of layers arranged from top to bottom.
3. Accessible flipbook content
Flipsnack offers an accessibility feature via a sidebar tab where creators can add or edit page summaries describing content for screen readers. This makes flipbooks understandable to visually impaired readers. Summaries can be added manually or generated automatically using an AI-assisted tool, with easy proofreading and editing options.
Tip: Our software doesn't include a built-in plugin for reading specific materials. However, it supports third-party reading apps for accessibility. Disabled users equipped with compatible software and enabled accessibility tools can effortlessly access flipbooks.
Macbooks come with pre-installed apps like VoiceOver, aiding users with visual impairments through gestures and specialized commands. Similarly, Windows users need to install additional software such as NVDA or JAWS serving the same functionality.
How do you enable the Accessibility option?
- Create or choose an existing flipbook and go to Customize.
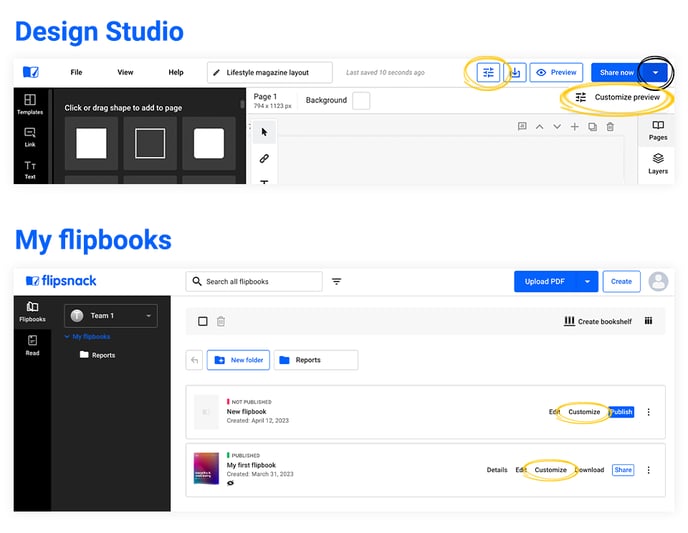

3. Add the Title and Description for the pages you want to make accessible and click on Save changes.
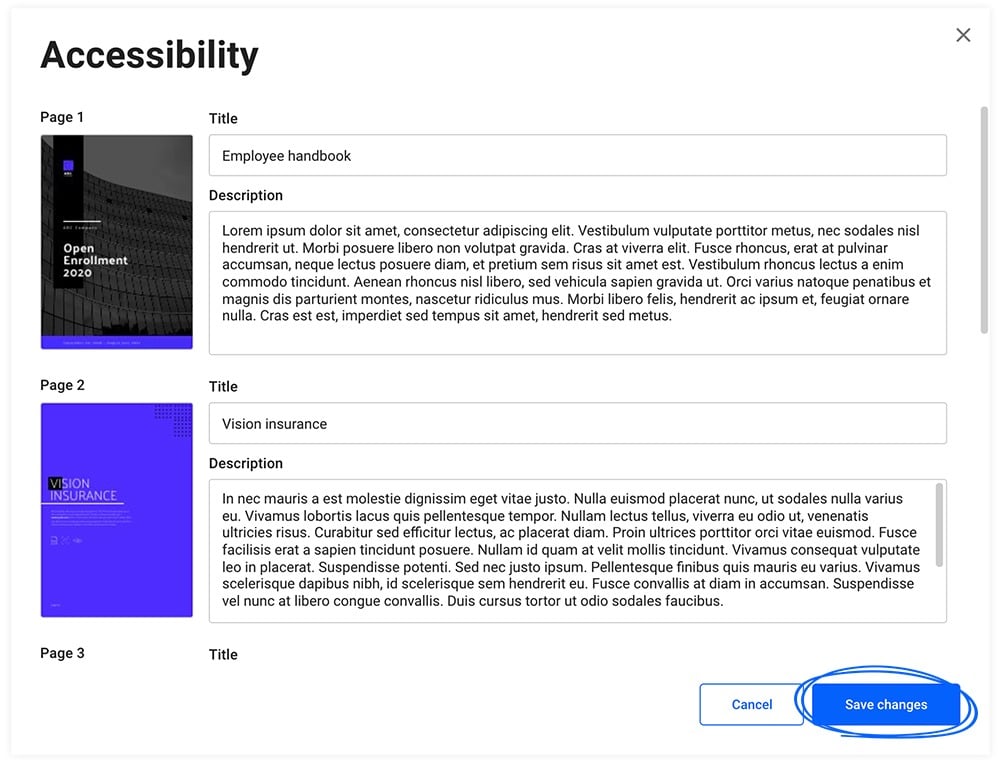
Note: The information in these brackets will be read aloud by the VoiceOver app installed on each computer.
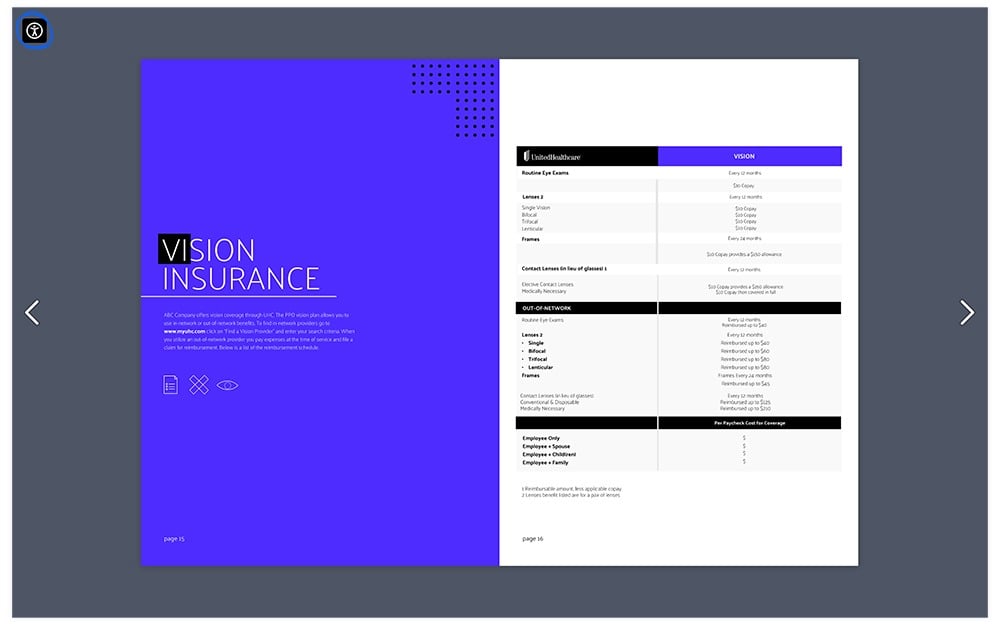
By doing so, your publication is now accessible to visually impaired readers. Your flipbook will now contain the accessibility icon in the top left corner, as highlighted in the picture below:
Extract flipbook text
Would you like the Accessibility tab to display an exact, one-to-one match of the flipbook texts? This is what the second option is about. The extract text feature helps you automatically pull text from pages into the Accessibility panel, providing a seamless, direct reading experience.
By using this option, you don’t need to manually introduce texts for accessibility, which will save you lots of time. However, proofreading is needed - as always when using autogenerated options.
1. So click on the Extract flipbook text option.
2. This pop-up will appear to inform you that image descriptions will not be extracted. Also, make sure to check the text before sharing your publication to ensure that everything is right.

Note: Remember that if you use the Extract flipbook text option, any previous changes you made to the content will be deleted.
Depending on the size and volume of your flipbook’s content, the process might take a while.
After the texts have been extracted successfully, you can easily edit, delete, or rewrite them.
Once you’ve finished the proofreading, just click on Save changes.
Generate AI summary for accessibility
And let’s cover the third option. We understand and appreciate the importance of your time. That's why we have developed features that can take care of the manual tasks involved in making your flipbooks accessible to everyone. With the help of AI, you can now automatically generate a summary for each of your flipbooks' pages without having to write it manually.
Note: If you want to be among the first to try AI for accessibility, you can request early access by accessing this link.
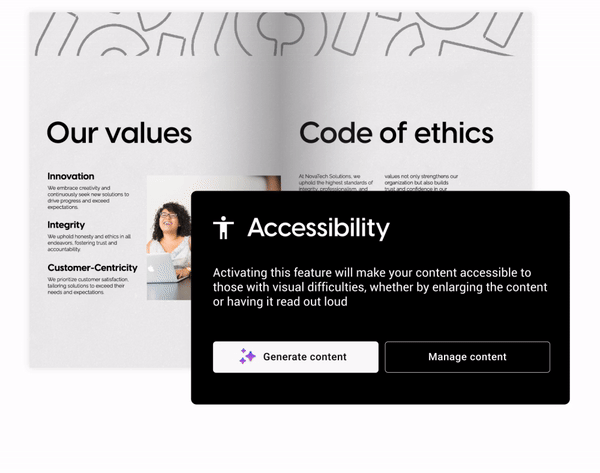
Here’s how easy it is to do it. Go to Customize, and under Accessibility, select Activate accessibility.
You can now choose to generate content by clicking on Generate content.
You will be prompted with a message that says that you’re about to generate new content and that whatever content was previously added to the accessibility feature will be rewritten and can’t be recovered. Click on Generate.
This process might take a while, but once it’s done, check the generated content to make sure it’s accurate and correct. Then click Save.
 If you want to return to the generated content to check it or edit it, just click on Manage content.

Note: We are working on making the AI for accessibility feature work on images as well. Currently, the feature only generates summarized content for pages containing at least 50 words.
Allow fully accessible PDF download
If you want full control over how accessible your flipbook is, especially for offline readers - Flipsnack allows you to upload your own accessible PDF. This version can include manual alt-texts, color-contrast adjustments, and structured tags for screen readers. Readers can then download it directly from your flipbook player.
Learn how to upload and enable an accessible PDF download in Flipsnack.
Recommendations for creating accessible flipbooks or PDFs
To make sure your flipbooks or downloadable PDFs are as accessible as possible:
-
Use high contrast text and backgrounds for readability
-
Avoid relying solely on color to convey meaning (e.g., use icons or labels as well)
-
Add alt text for any meaningful images or graphics
-
Use consistent navigation and layout across pages
-
Limit auto-play elements like videos or audio, and include controls to pause or stop
-
Use clear, concise language to improve comprehension for all users
-
Test with a screen reader and keyboard only to identify any issues in navigation or content
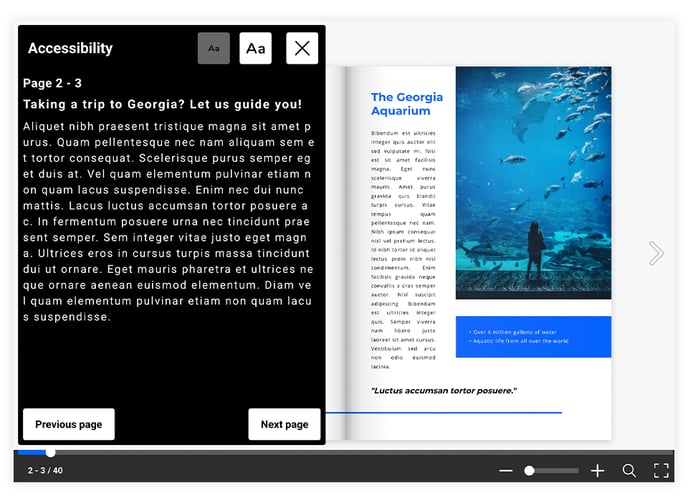
Using the Accessibility feature as a reader
The reader can now either click on the accessibility icon or highlight it using the Tab key and press the Enter key to activate it.
By clicking on the icon, the reader's flipbook will be displayed slightly differently, with the text you’ve added to the description shown separately. The VoiceOver software will now read the text.
Readers can use the Tab and Enter keys to navigate through the various interactive buttons on the page: Next Page, Zoom in, View in full screen, Font size, and more.
Next steps
Other useful resources:
- Is Flipsnack accessible?
- Flipsnack AI package
- How to make your flipbooks accessible in Flipsnack
- How to enable a fully accessible PDF download
Need expert support?
Our team is here to help. Connect with our team experts or message us via the in-app chat for a personalized demo.
Let us know your thoughts on this on our Flipsnack community page.