Table of contents
Overview
Integrating Flipsnack with Okta's OpenID lets your organization centralize user authentication, providing employees easy access to Flipsnack using their existing corporate credentials. This setup not only simplifies the login process but also strengthens security by reducing password proliferation.
Key Benefits
- Centralized Access Control: Manage who can access Flipsnack directly through Okta, ensuring only authorized users have entry.
- Seamless User Access: Employees benefit from automatic sign-ins to Flipsnack using their organizational accounts, eliminating the need for multiple passwords.
- Efficient Account Management: Administrators can oversee all user accounts from a single platform, streamlining management tasks.
Let's discuss your SSO sharing needs
Requirements
Before proceeding, ensure your organization has:
- An Okta account: If you don't have one, create one here.
- Flipsnack Enterprise subscription: Access to the Single Sign-On feature is available with a premium Flipsnack account.
Step-by-step integration guide
1. Configure Okta Application
- Log into Okta: URL example: https://{your-domain}.okta.com.

- Create App Integration:
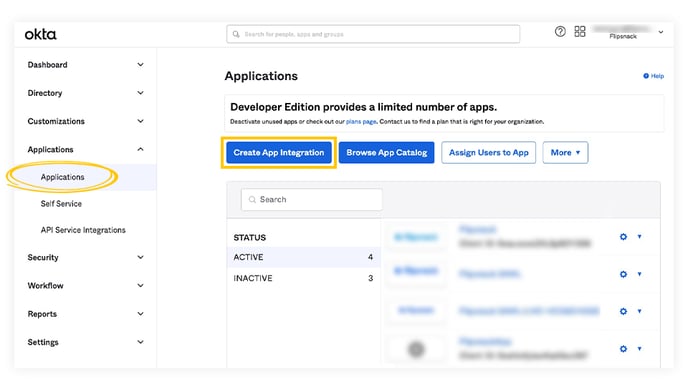
- While on the Okta account admin page, go to the Applications section.
- Click on Create App Integration.
- Select OIDC - OpenID Connect and Web Application as the platform.
- Click Next.

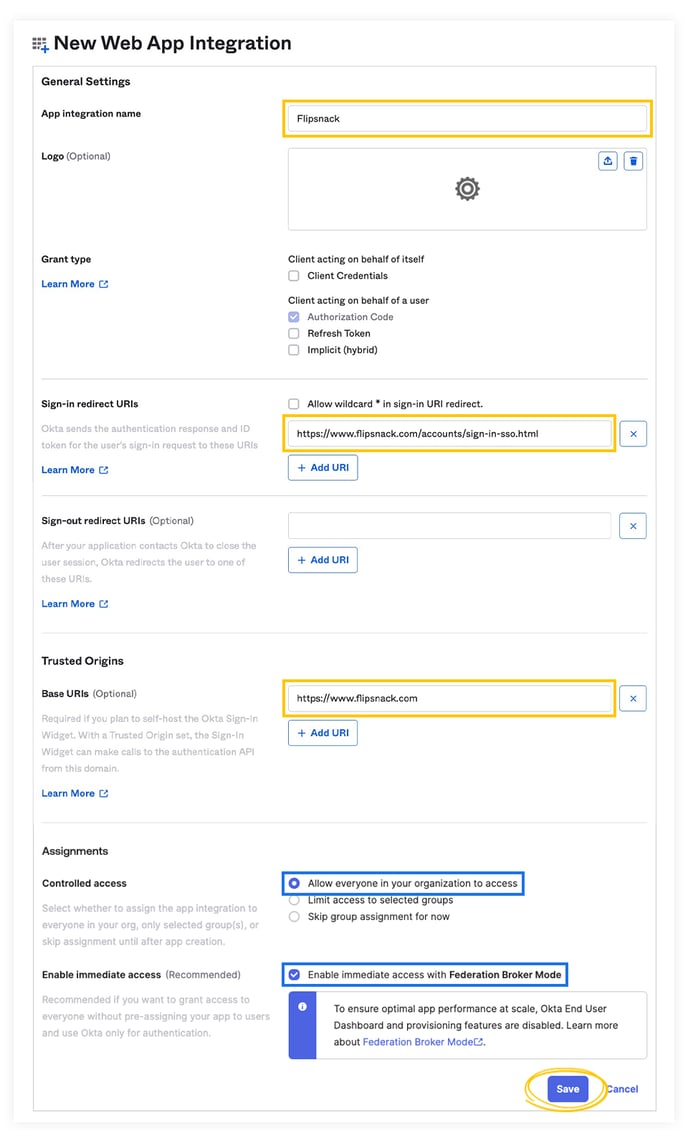
- Set Up Application:
- Provide an App Integration Name (e.g., "Flipsnack").
- In the Sign-in redirect URIs field, enter: https://www.flipsnack.com/accounts/sign-in-sso.html.
- The Sign-out redirect URIs field is optional
- In the Base URIs field, enter https://www.flipsnack.com.
- Under Assignments, we recommend using Allow everyone in your organization to access for the Controlled access option and Enable immediate access with Federation Broker Mode for the Enable immediate access option.
- Click Save to finalize the application setup.
2. Configure Flipsnack for SSO
- Access Flipsnack Settings:
- Login to your Flipsnack account.
- Click on Settings in the lower-left corner.
- Set Up SSO:
- Navigate to the Single Sign-On tab.
- Click on Create SSO Connection.

- Enter a Connection Name (e.g., "Okta OpenID SSO").
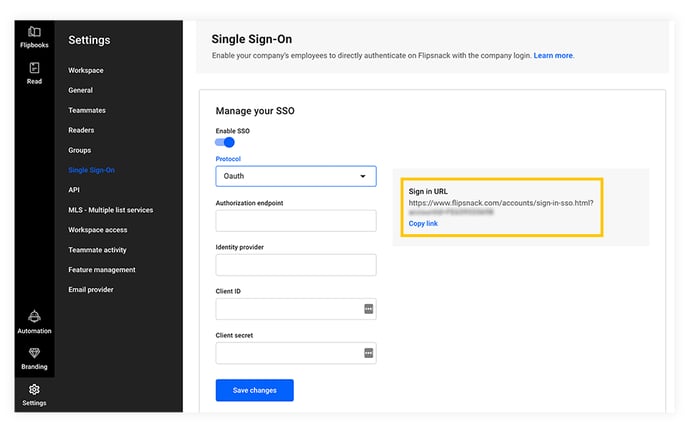
- Select OAuth as the protocol, then click on Next.
- Click Next again when in the Metadata field.
- Enter your Authorization endpoint: e.g: https://${your-domain}.okta.com/oauth2
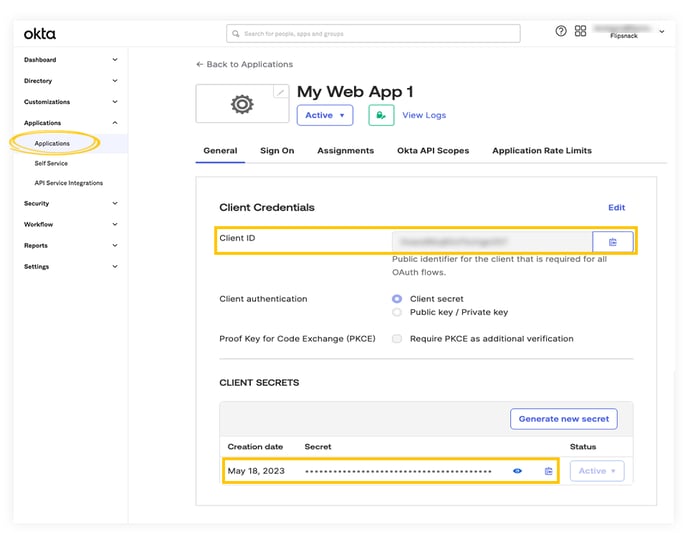
- Go back to Okta and click on the Applications tab from the left-side menu.
- Choose Applications from the drop-down menu.
- Copy your Client ID and Client Secret.
- Return to Flipsnack and paste each of them into the corresponding input fields. Use the image below as an example.

- Click Save changes.
3. Sign in with SSO
- You have two options to sign in with SSO:
- Access this direct link: https://www.flipsnack.com/accounts/sign-in-sso.html.
- Alternatively, locate it in Flipsnack:
- Go to Settings > Single Sign-On.
- Copy the Sign-in URL.
- Paste the URL into your browser or share it with other users who have been granted access.
- You will be redirected to your SSO login page or default Okta login page.
- Enter your credentials and log in to Flipsnack.
Important considerations
- User provisioning: Ensure all users needing access to Flipsnack are added and assigned to the application within Okta.
- SSO-Only access: In Flipsnack's Teammates settings, you can specify whether users can log in exclusively via SSO or also have the option to log in with Flipsnack credentials.
By following these steps, your organization can successfully integrate Okta OpenID SSO with Flipsnack, providing a secure and efficient login experience for your users.
Next steps:
Discover more efficient ways to keep your documents secure:
Need expert support?
Our team is here to help. Connect with our team experts or message us via the in-app chat for a personalized demo.