
Overview
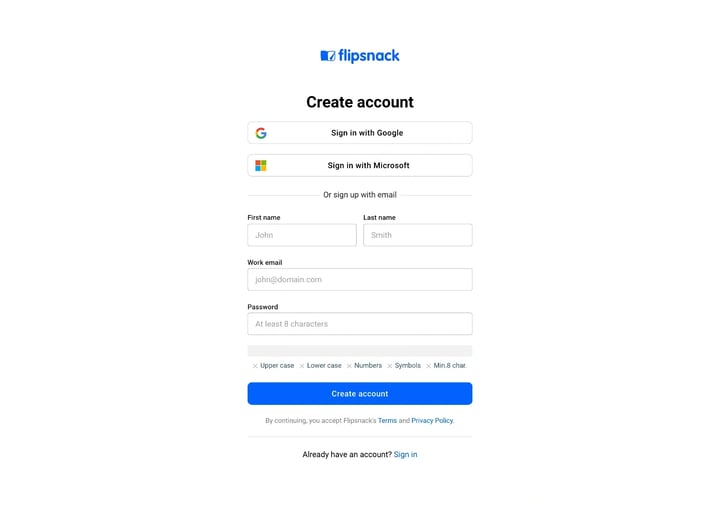
Create a Flipsnack account at app.flipsnack.com/auth/sign-up/, which is where the Try for free button on flipsnack.com goes. You can register with Google, with Microsoft, or with an email address and password. Flipsnack then asks how you plan to use it and offers a starting plan: Free costs nothing and needs no card. The whole thing takes about a minute.
Already have an account? This page is about creating a new one. To sign in to an account that exists, see how to log in to Flipsnack.
👥 Which sign-up method to use
- Google or Microsoft: fastest, and there is no Flipsnack password to manage. Pick the one your work email already uses.
- Email and password: when the address is not a Google or Microsoft account, or when you want a password that is yours alone. It adds an email verification step.
- An invitation from your team: if your company already uses Flipsnack, join their workspace rather than opening a separate account, or your flipbooks live somewhere nobody else can reach.
- SSO: Enterprise teams whose IT department controls access. Your administrator adds you and you never choose a password.
Nothing has to be installed, and nothing has to be paid for.
Requirements
- An email address, or a Google or Microsoft account.
- For the email route, access to that inbox: a six-digit code is sent to it.
How to create a Flipsnack account
Step 1: Open the sign-up page
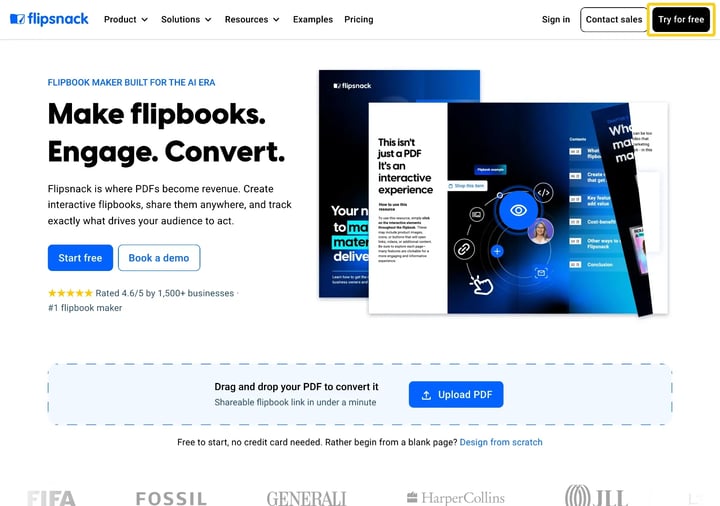
Click Try for free in the top right of flipsnack.com, or go straight to app.flipsnack.com/auth/sign-up/. The page is headed Create account.
Step 2: Choose how to register
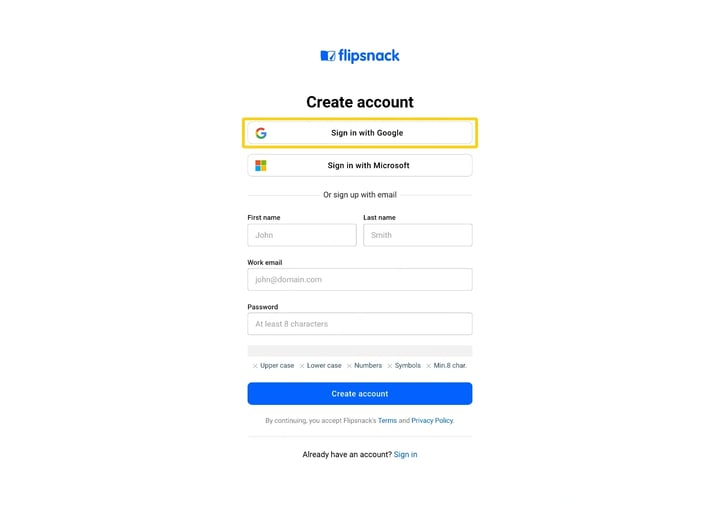
Three routes, and they all reach the same kind of account. The two provider buttons read Sign in with Google and Sign in with Microsoft even here, on the sign-up page.
Sign up with Google
- Click Sign in with Google.
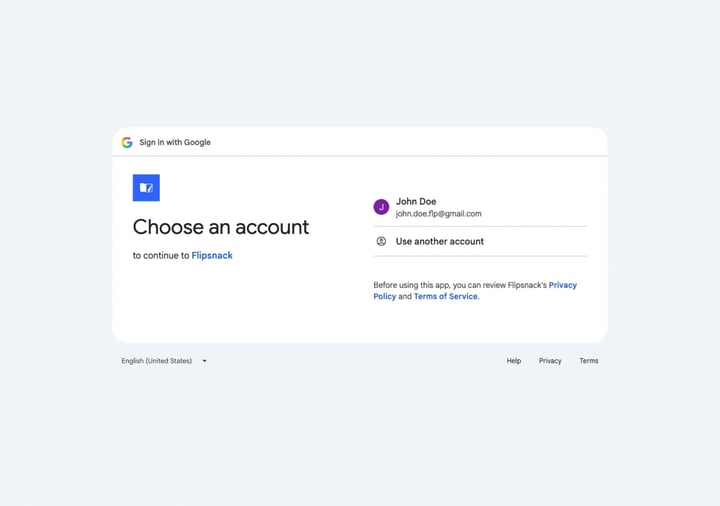
- Pick the Google account you want the Flipsnack account attached to.
Google asks which account to use, and confirms that Flipsnack is the app you are signing in to.
Sign up with Microsoft
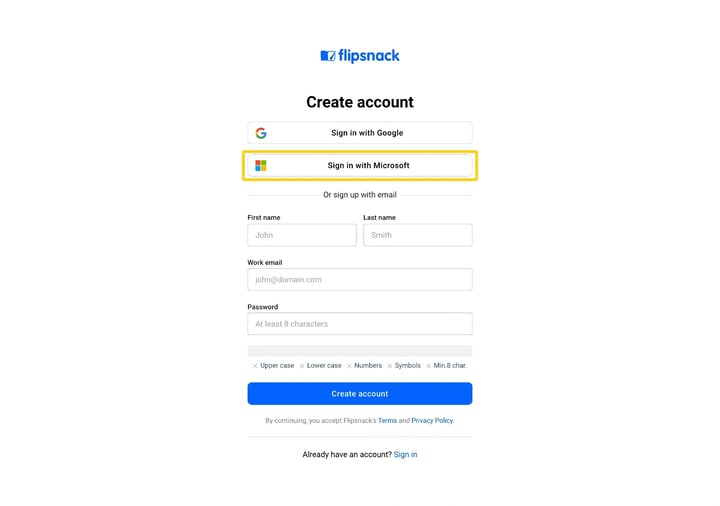
- Click Sign in with Microsoft and sign in through the window that opens.
- A work, school or personal Microsoft account all work.
Sign up with an email address
Under Or sign up with email, fill in First name, Last name, Work email and Password, then click Create account.
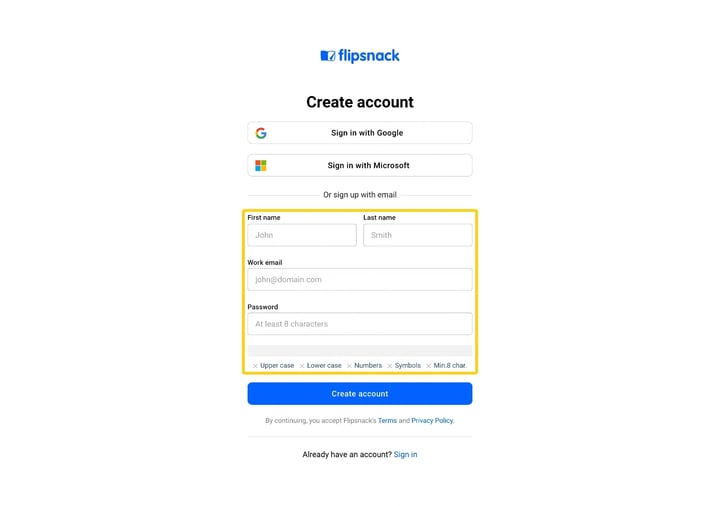
The five chips under the password field tick off as you type: Upper case, Lower case, Numbers, Symbols and a minimum of eight characters. All five have to be met.
Flipsnack then emails a six-digit confirmation code. Enter it to verify the address and carry on.
Tip: The code expires. If it does, or if it never arrives, ask for a new one from the same screen rather than starting the sign-up again. Check the spam folder first: that is where most missing codes are.
Step 3: Say how you will use Flipsnack
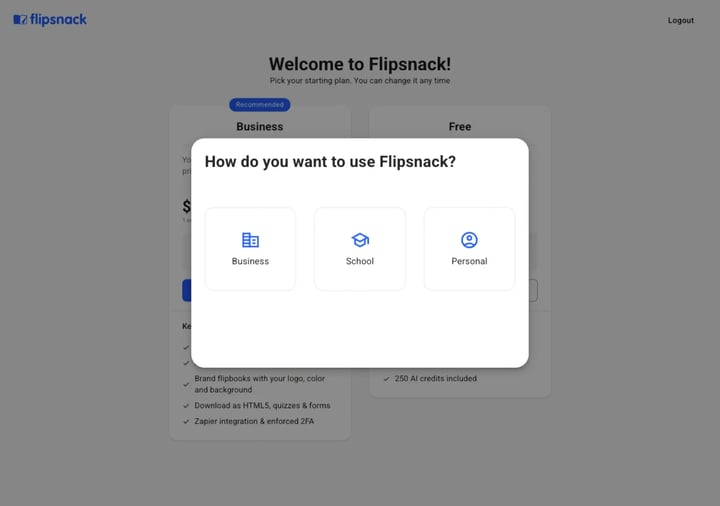
A short wizard opens: How do you want to use Flipsnack?, with Business, School and Personal. Business then asks the size of your company. The answers only tailor what Flipsnack suggests, and nothing here limits the account.
Step 4: Pick a starting plan
The last screen offers two, and you can change plan whenever you like.
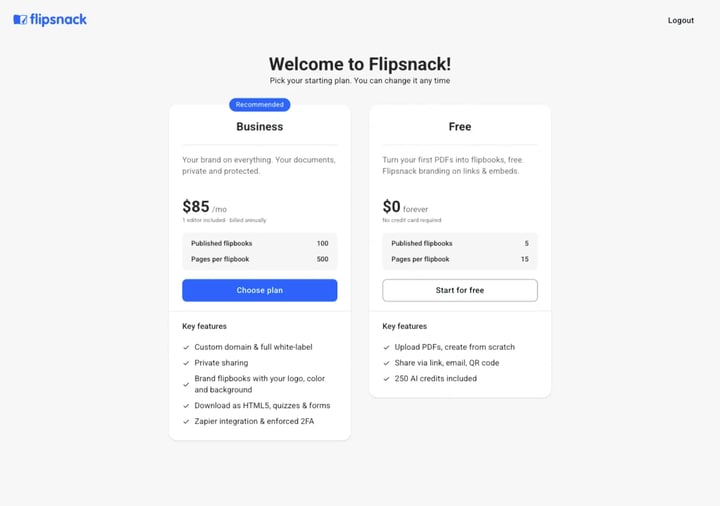
- Free, $0 forever, no card: 5 published flipbooks, up to 15 pages each, and 250 AI credits. You can upload PDFs, design from scratch, and share by link, email or QR code. Free flipbooks carry Flipsnack branding on links and embeds.
- Business, $85 a month billed annually: 100 published flipbooks, up to 500 pages each, one editor included. Adds your own branding and custom domain, private sharing, HTML5 download, quizzes and forms, Zapier and enforced two-factor authentication.
Click Start for free or Choose plan and you land on Content, ready to upload a PDF or start designing. The full comparison is in Flipsnack plans and pricing explained.
Joining a team instead of starting alone
If your company already uses Flipsnack, join their workspace rather than opening a separate account. The owner or an admin sends an invitation by email, and accepting it puts you straight into their workspace with the role they chose.
- Invitations expire after 24 hours. If yours has, ask an admin to send another.
- If you had no Flipsnack account, accepting the invitation creates one and that workspace becomes your main one.
- Enterprise workspaces using single sign-on skip the password entirely: once an admin adds you, you sign in with your work credentials. See implementing SSO.
What each role can do is in how to add teammates to your workspace.
Additional tips / FAQs
- Is there a Facebook sign-up? No. The page offers Google, Microsoft and email only.
- Does creating an account cost anything? No. Free asks for no card and does not expire.
- The confirmation code never arrived. Check spam, then confirm you typed the address correctly, then use the resend option on the same screen.
- I registered with Google. Can I set a password too? Yes. Use Forgot password on the sign-in page with the same address, and afterwards both routes work.
- Can I change the email on the account later? Yes, from your account settings: changing your account email address.
- I already have an account but cannot get in. That is a sign-in problem, not a sign-up one: how to log in to Flipsnack covers every method and what to do when one fails.
- Can one person have two accounts? Yes, on different email addresses, though a second account is usually the wrong answer to a problem a workspace invitation solves.
Next steps
- How to log in to Flipsnack: email, Google, Microsoft, SSO
- How to convert a PDF into a flipbook, or merge several
- Flipsnack plans, features and pricing explained
- How to add teammates to your Flipsnack workspace
- How to recover access to your Flipsnack account
Need expert support?
Our team is here to help. Connect with our team experts or message us via the live chat for personalized assistance.