Workspace readers
Everything you need to know about workspace readers - members in your workspace with read-only access
On Flipsnack, we use the term "reader" in 2 ways, and it's really important to understand the difference:
1. Anyone who reads a flipbook
2. A teammate who is added to the workspace and who is assigned a "reader" role.
This article is about the latter.
Table of contents:
How to add readers in your workspace
How to remove readers from your workspace
Any content that you publish exclusively for readers with the reader role will be limited to their access only. Other than the team members assigned as readers in the workspace, no one else will be able to view or read the published material.
This role is very special in the workspace because Readers can't create or view any flipbook in the workspace unless it's shared with them.
If you frequently publish private documents for your organization, we suggest adding a group of people as readers or workspace readers.
This is particularly helpful for a variety of reasons:
-
It's a very secure way to publish documents for internal use only, as it requires authentication.
-
It can be used in conjunction with SSO authentication; for the most advanced level of security.
-
It's very convenient if you publish these documents regularly because you won't have to add a list of email addresses every time you publish something
-
You can opt to send email announcements through our system whenever you publish a new document.
How to add readers in your workspace
The first step would be to contact an account manager to discuss this option and have them activate it for you. Once you have this option activated in your workspace, you will be able to access the Readers list.
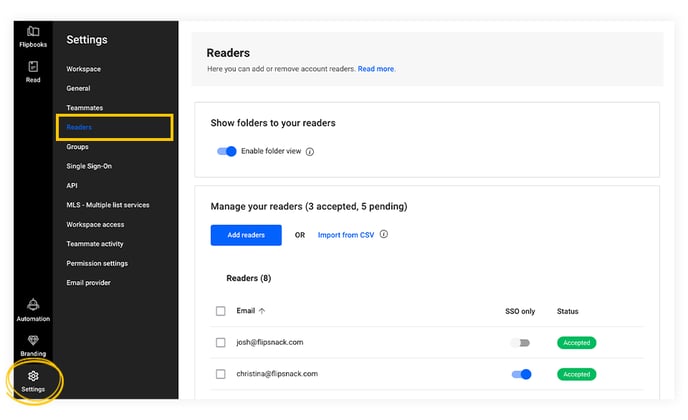
In order to do so, from the main dashboard, in the lower left corner, go to Settings, and on the side panel, click Readers.
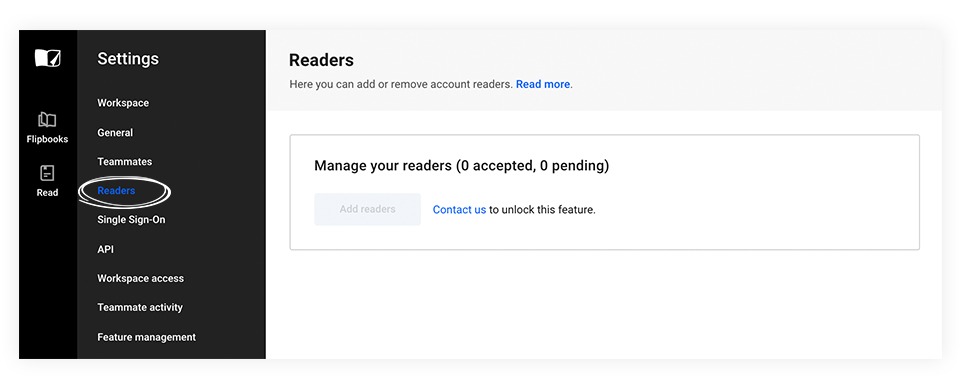
If the feature is not yet activated for you, this is what you will see:
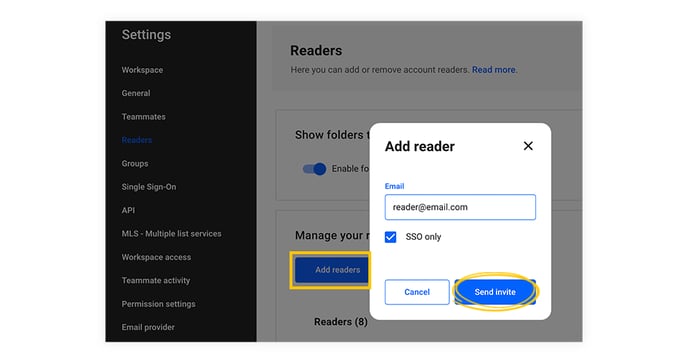
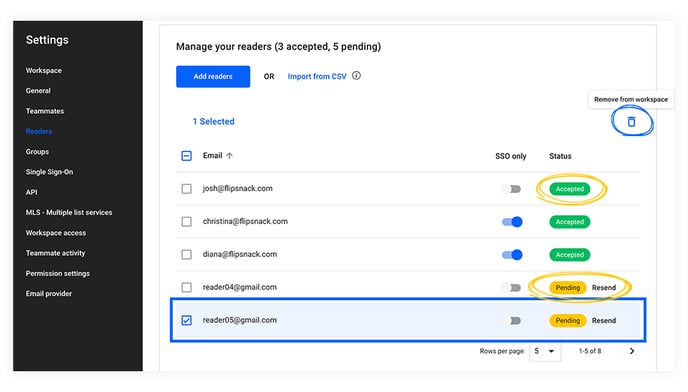
However, if the feature has been enabled, you will see here how many readers you have invited (pending) and how many have accepted your invitation. This is also where you can add readers by entering their email addresses.
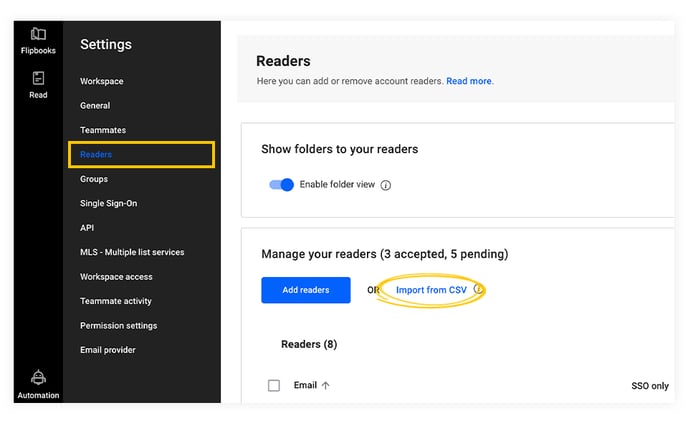
If you have a large organization or reader base, as part of our Enterprise plan, you can upload a CSV file with the readers' email addresses instead of manually uploading each address. Keep in mind that the CSV should not exceed a total of 500 emails per upload.
To upload the email addresses, click on Import from CSV, choose the CSV file, and then click on Open.
The list will be uploaded automatically, and you will then see the status of each reader: Accepted or Pending. You will also then have the option of resending the invitation or removing readers from the list.
How to remove readers from your workspace
In order to remove readers from your workspaces, you have to check the boxes to select at least one email address, and the Remove from workspace icon will appear in the upper right corner of the list.
Show folders to readers
Just above Manage your readers, you have this option:
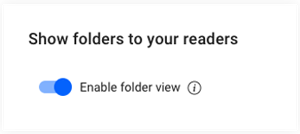
If you plan to use multiple folders for the content that you share with your readers, it would be a good idea to turn it on. This way, your readers will see the folders in the workspace - it will help them find documents or flipbooks more easily.
If you plan to have multiple folders, but everything that you publish for readers will be in one folder, you can simply not activate the folder view. The same goes if you don't plan to use folders at all.
How to share a flipbook with your workspace readers
To make a flipbook accessible to your workspace readers, you need to choose a specific option in the Publish popup. You will need to perform this action for each flipbook that you want to make available to your readers.
If you're doing this for the first time, it's advisable to check how many readers have accepted your invitation. If you've just invited the readers, it might be a good idea to give them a few days to accept before you start sharing files with them. This way, you can ensure that they are ready to receive and access your content.
Now, let's assume that your readers have accepted the invitation. In the main workspace, find the flipbook that you wish to share with them (or upload a PDF), then click the Publish button.
In the publishing pop-up window, make sure you select Private and Readers only.
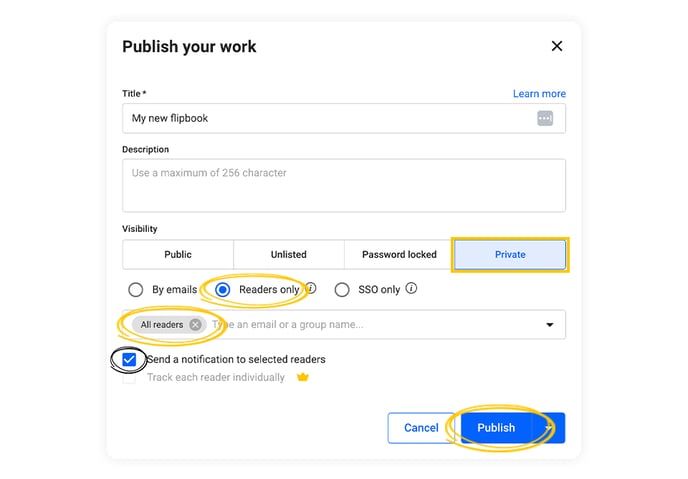
Now you can either choose to share with all your readers, or type an email or a group name.
Here you can also activate the email notification option and the individual tracking. In most cases, you will want to activate these before you hit Publish.
Here is what they do:
Send a notification to my readers - This sends your readers an email notification that you've shared a flipbook with them. If you don't check the box, they would have to log in from time to time to see what's new. Another option might be for you to announce the publishing of new documents some other way if you don't want to use our email notification system.
Track each reader individually helps you get a very clear picture of how each reader interacts with your document.
Important update about documents shared with readers
We’ve recently made a few security improvements to documents shared with readers. Because these documents have private visibility, they now use a different URL than public documents and open directly in the app.
As a result, readers must be logged in to their Flipsnack account to access them.
This applies to all documents shared with readers, including older ones, anything shared before the update will redirect to the new private URL and will also require authentication.
Sharing with one reader vs. a group
Anything you share with readers becomes instantly available to everyone added as a reader.
So:
-
If you want to share a file with a group, choose the Private option → Share with readers only → then select the reader group you want to give access to.
-
If you want to share a specific file with just one person, use the other Private option and invite by email only that individual. That way, only that person will be able to view the file.
If you have more questions, please ask us via live chat. You can also use the chat to ask to be put in touch with an account manager if you're interested in using this for your organization.