
Overview
The flipbook player is what your readers see when they open a published or draft flipbook: the toolbar, the page transitions and every control around your content. Customize it from the Customize page, reached from a flipbook's Edit / Customize switch, to match your brand and control what readers can do while they read.
💡 Benefits of customizing your flipbook player
- Responsive design: the player reads well on desktop, tablet and mobile without extra work.
- Custom appearance: skins, logos and colors match the player to your brand.
- Enhanced readability: layouts adapt automatically to each reader's screen.
- Advanced controls: let readers share, download, search or print your flipbook.
- Accessibility support: screen reader-friendly for every reader.
Requirements
- Plan: customization is available on all plans — fully branded flipbooks need Business or above — check your plan or compare plans
- A flipbook, published or unpublished, to customize
👥 Where player customization is helpful
- Brand and marketing teams: match the player's colors and logo to brand guidelines before sharing a catalog or brochure.
- Sales and support teams: add a lead form and Reader notes to collect reader information without leaving the flipbook.
- Publishers with long documents: turn on Table of contents and Accessibility so readers can navigate and read the whole publication.
How to open the Customize page
- Go to Content and find the flipbook you want to update.
- Open its card menu and click Customize.
- Or, from inside the Design Studio, use the Edit / Customize switch in the app header — a pencil icon for Edit, a sliders icon for Customize.
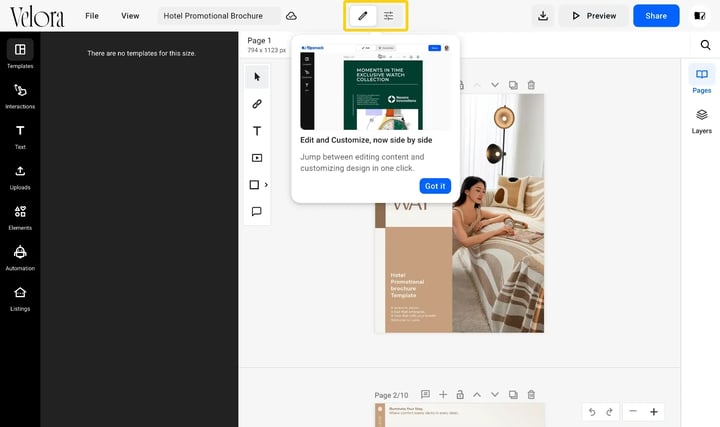
The Customize page opens with four sections in the rail: Branding, Appearance, Controls and Add-ons. Each section applies once you press Update — a setting you change and leave without pressing it never reaches the live flipbook.
Branding
- Add logo: upload your brand logo and add a link to it.
- Background color: choose transparent, a solid color, or a custom image.
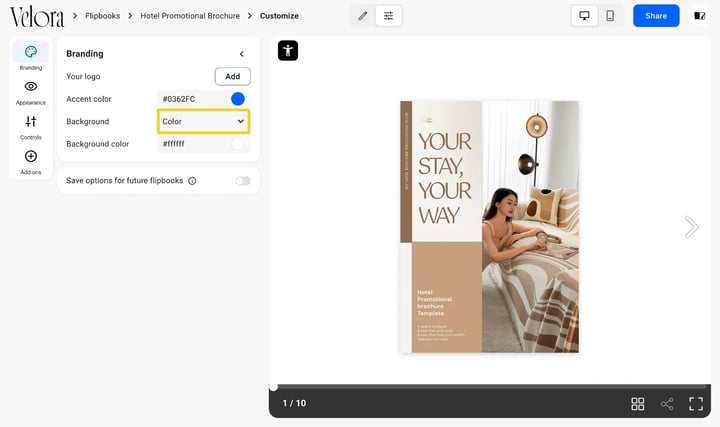
- Player accent color: apply your brand color to player UI elements. Once set, it appears on the progress bar, selected items, and hover states.
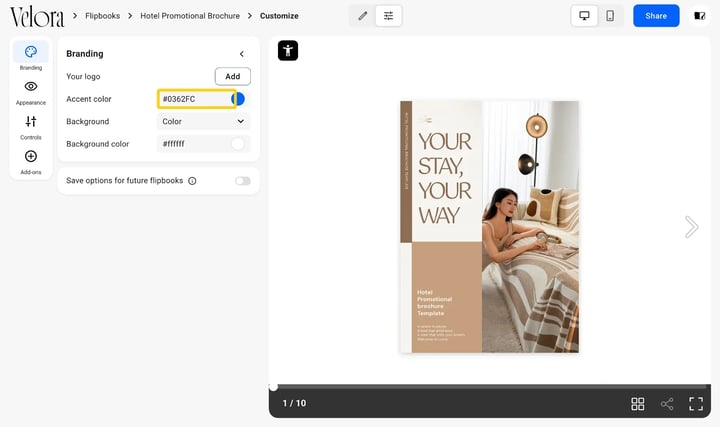
Note: Set your brand colors from the Branding page for quick access. You can find the Branding section on your Dashboard.
Appearance
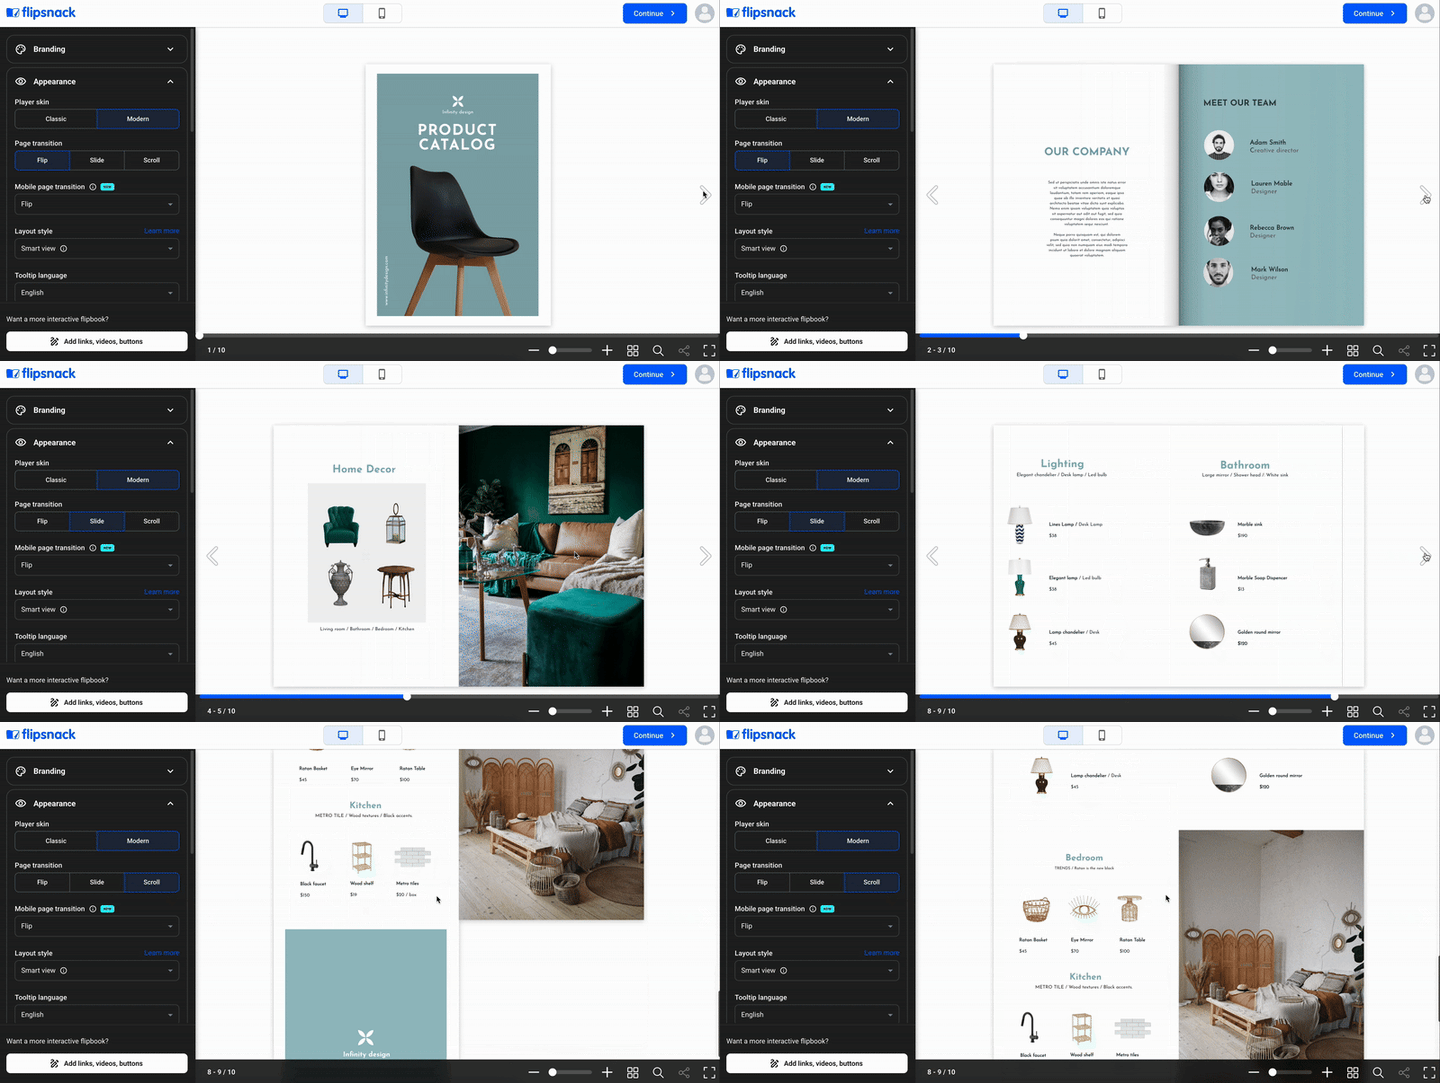
- Player skin: choose between Classic (toolbar above the flipbook) and Modern (toolbar below).
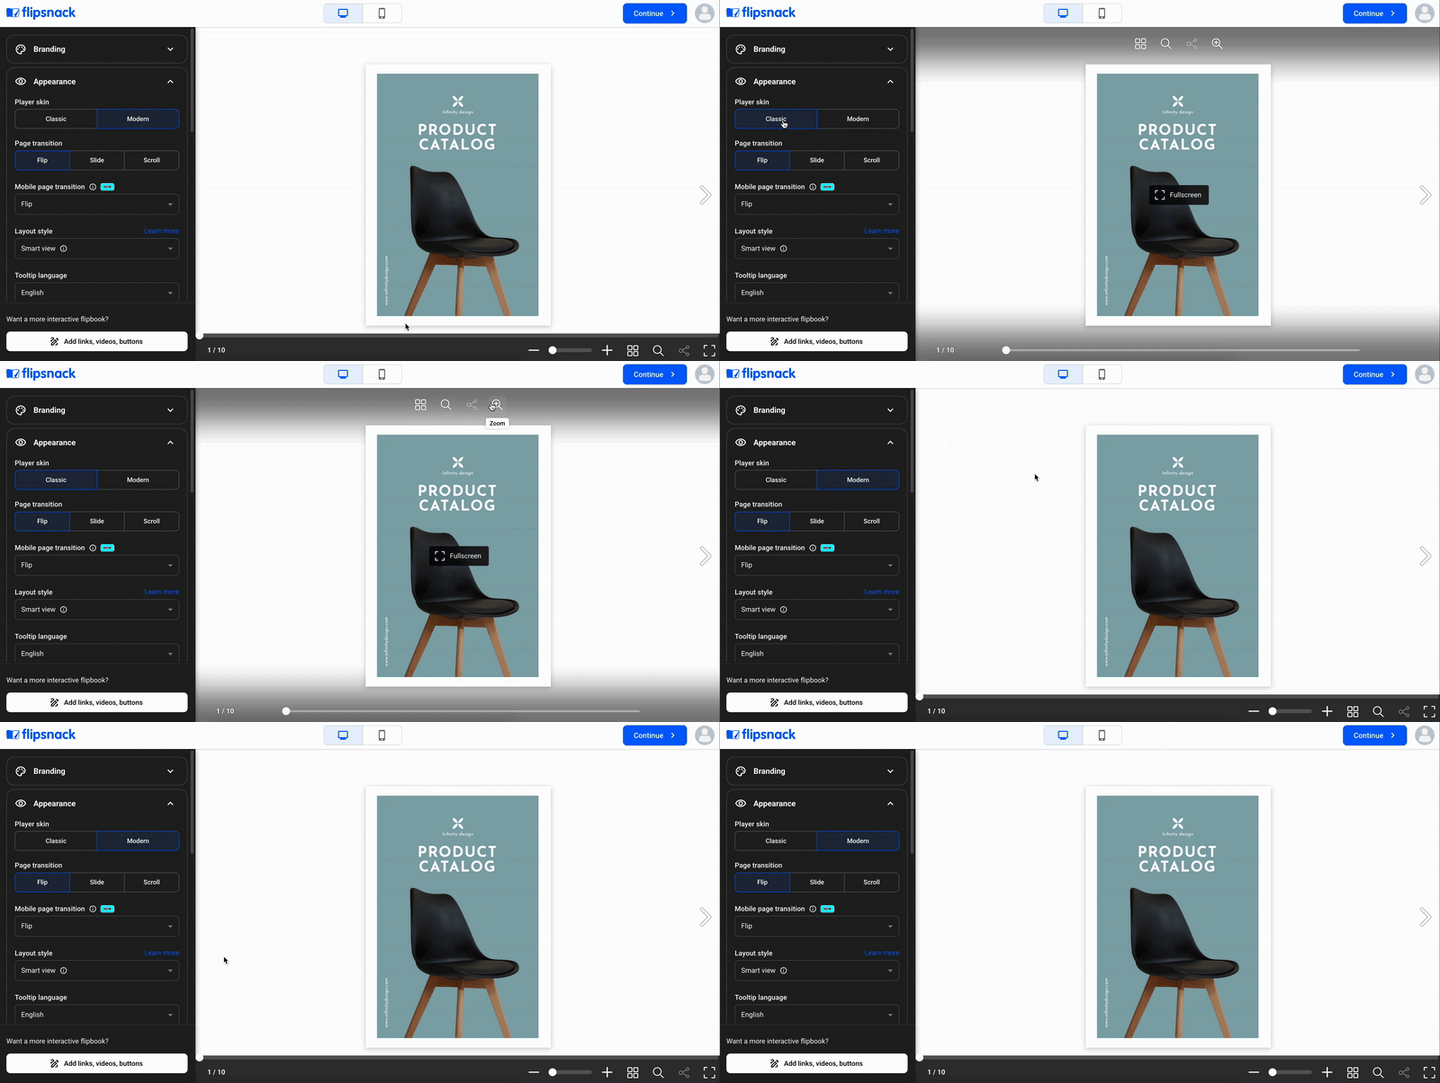
- Page transitions: select Flip, Slide or vertical Scroll effects.
- Mobile page transition: works only on phones, with the same transitions: flip, slide or scroll.
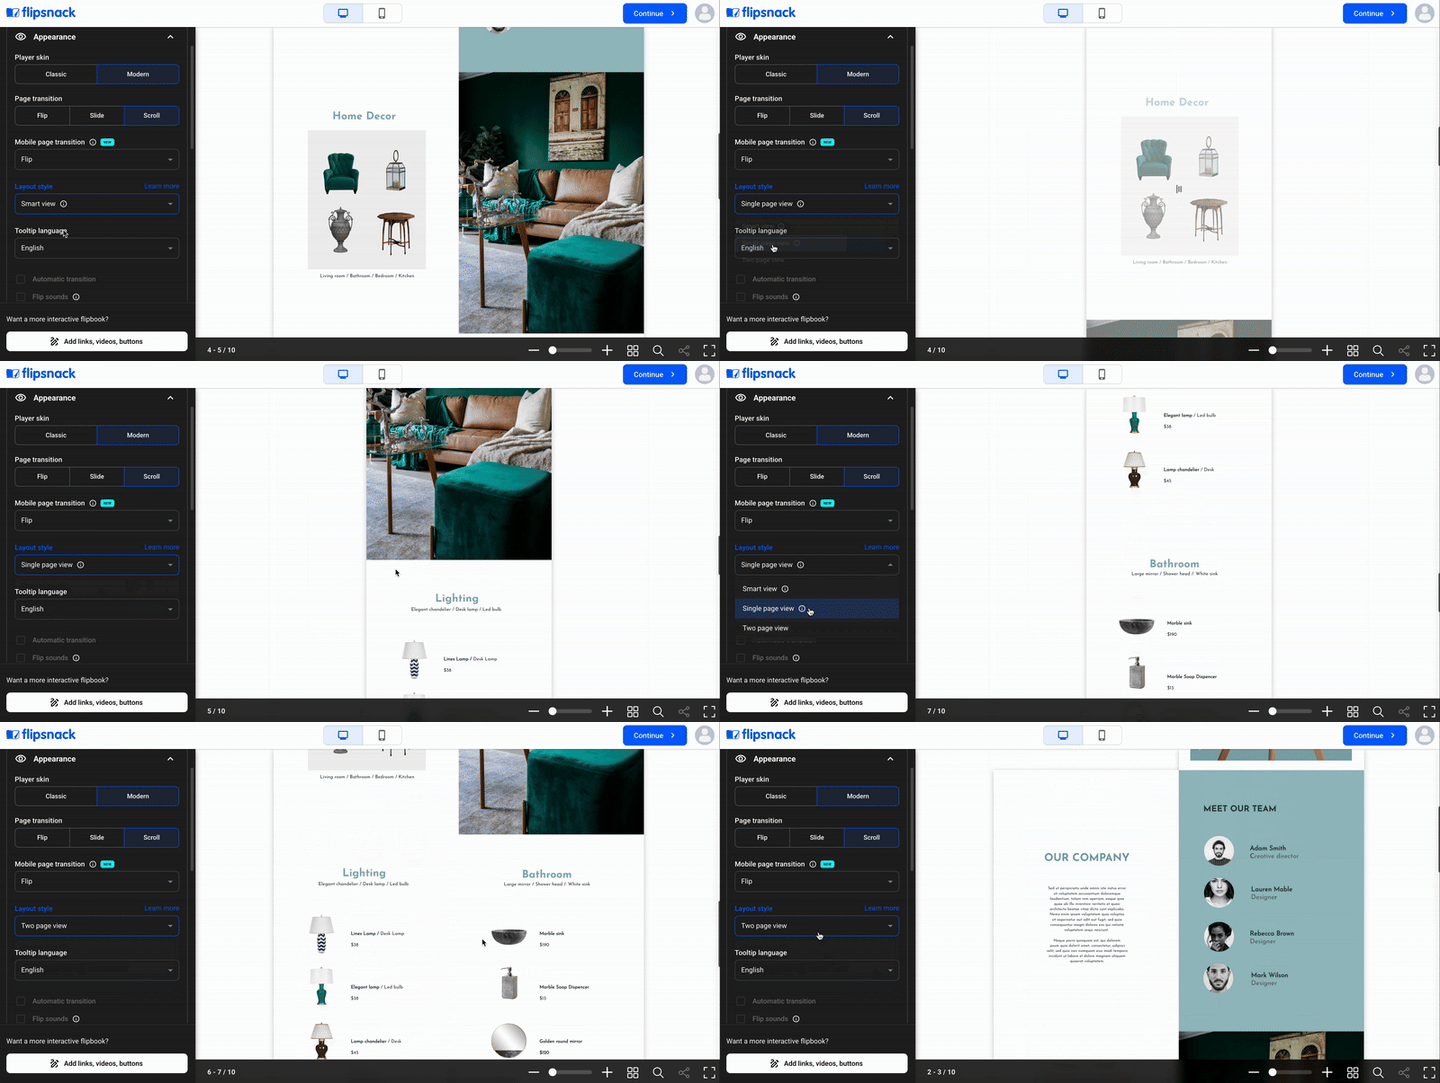
- Layout style: Smart view (two-page on desktop and laptop, single-page on mobile), Single page, or Two-page.
You can also set:
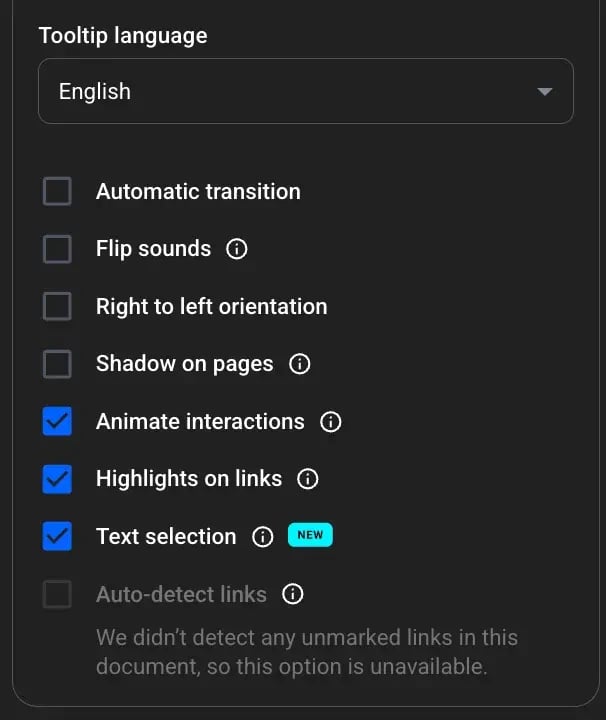
- Tooltip language: the interface language shown to readers.
- Automatic transition: enable and configure automatic page turning.
- Flip sounds: add a realistic page-turning sound.
- Right-to-left orientation: for RTL languages like Arabic or Hebrew.
- Shadow on pages: add visual depth and interactivity.
- Animate interactions: make interactions pop by animating them.
- Highlights on links: make links pop by highlighting them.
- Text selection: enable text selection and copy for text and pop-ups.
Caution: text from the flipbook and pop-ups is selectable only if the flipbook was created from scratch or uploaded as a vector PDF. For PDFs uploaded before the conversion quality update, only pop-ups are selectable.
See how to choose the PDF conversion quality in Flipsnack.
- Auto-detect links: Flipsnack detects unmarked links in your flipbook and links them automatically.
Tip: with text selection active, readers can highlight any text on the page, right-click to open the context menu, and click Share selected text. This copies a unique URL to their clipboard. Opening that link navigates the player to that exact page and highlights the selected text.
Controls
Appearance was split in two: the settings above stayed in Appearance, and the rest moved into their own Controls section — Flipsnack's own reason is to make each setting easier to find without scrolling through one long list.
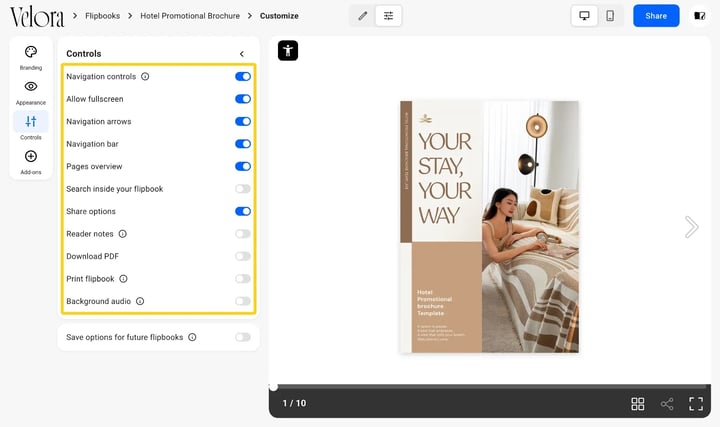
- Navigation controls: display control settings without entering fullscreen mode.
- Allow fullscreen: enable immersive viewing.
- Navigation arrows: hide or show the bottom navigation arrows.
- Navigation bar: hide or show the bottom navigation bar.
- Pages overview: show every page thumbnail after publishing.
- Search inside your flipbook: let readers search within the publication.
- Share options: enable sharing on social media or via email.
- Reader notes: let readers add their own notes on a page.
- Download PDF: allow readers to download your flipbook in PDF format, entirely or as a custom set of pages.
- Print flipbook: allow readers to print your flipbook.
- Background audio: add an mp3 audio track that plays across pages in the background.
Tip: you can zoom in and out more easily using a trackpad pinch gesture, or by holding CTRL and scrolling with the mouse wheel.
Add-ons
Lead form
Flipsnack's lead form feature helps you collect contact information from readers directly within your flipbook. Set it on a specific page and add up to 8 fields — such as name, email, phone, or a custom input — and choose which ones are required.
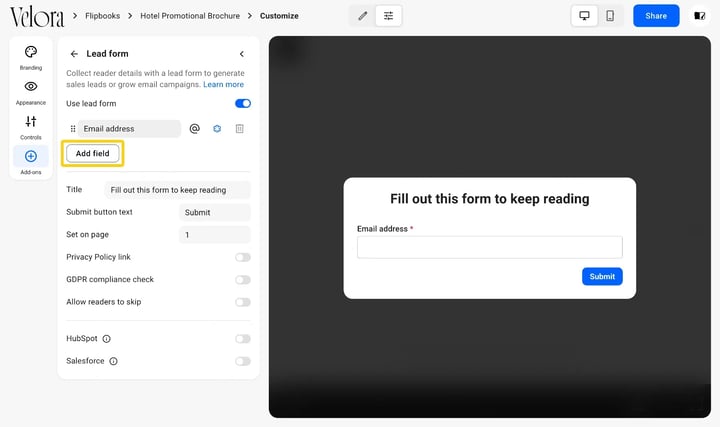
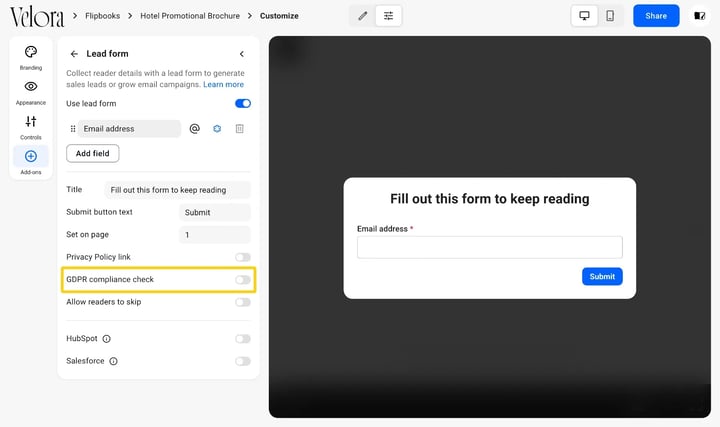
Validation options make sure data like emails or phone numbers is entered correctly. You can also add a Privacy Policy link and an optional GDPR compliance checkbox for transparency. Collected data appears under the Statistics section of your flipbook dashboard, and it's available for CSV download.
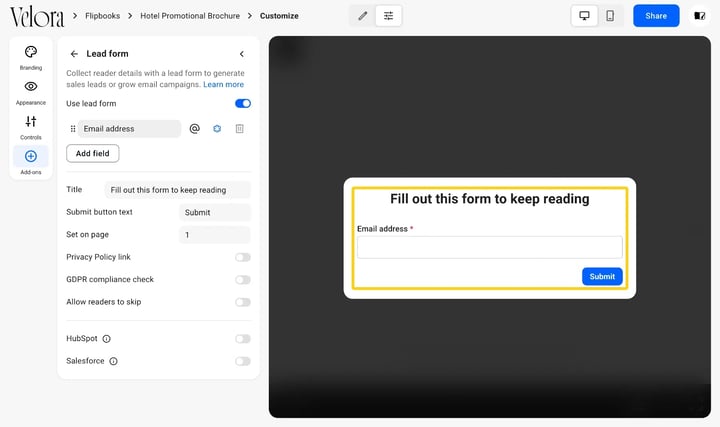
You can block content until readers submit the form, and customize it with your own title, input placeholders and button text.
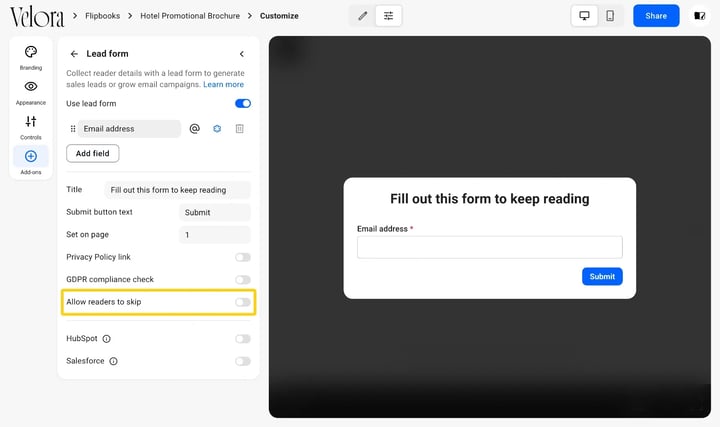
Or you can allow readers to skip it:
Note: lead forms are available starting with the Pro plan.
Table of contents
Let readers navigate your flipbook by adding a table of contents.
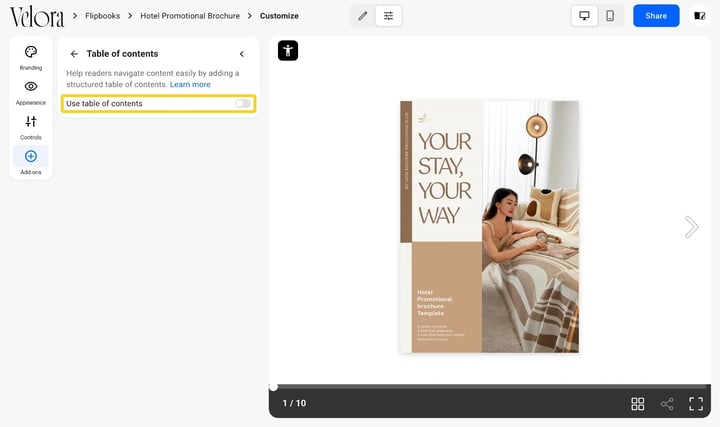
- Activate Table of contents: check the box to enable it in your flipbook.
- Start with table of contents open: check this box to make your publication open with the table of contents already expanded. It only appears once the table of contents is active.
- Add chapters/subchapters: click Add new to insert a chapter or subchapter, then enter a name and assign it to a page number.
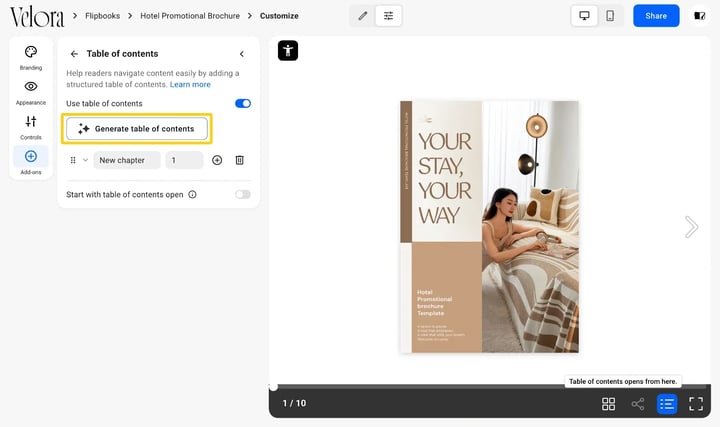
You can edit, reorder, or delete chapters and subchapters at any time.
Accessibility
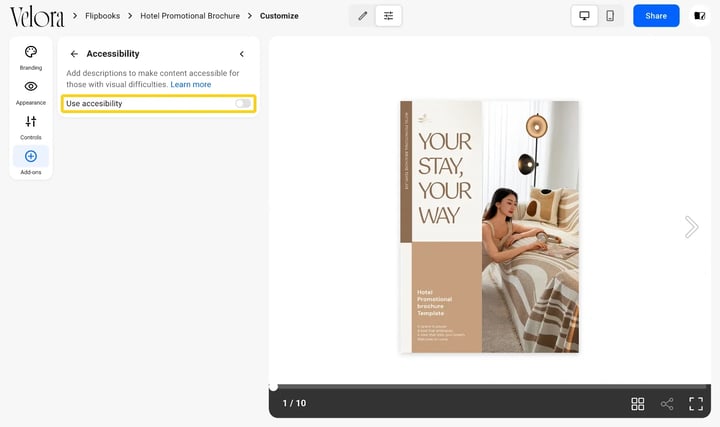
Accessibility helps make flipbooks usable for all readers by complying with WCAG, ADA, and Section 508 standards. Add titles and descriptions for each page manually, extract the existing text automatically, or generate descriptions with AI — these are read by screen readers like VoiceOver or NVDA, so visually impaired readers can navigate and understand the content. The flipbook player itself is fully keyboard-navigable, and its interactive elements are screen-reader friendly.
Turn on the Accessibility toggle to activate it on your flipbook.
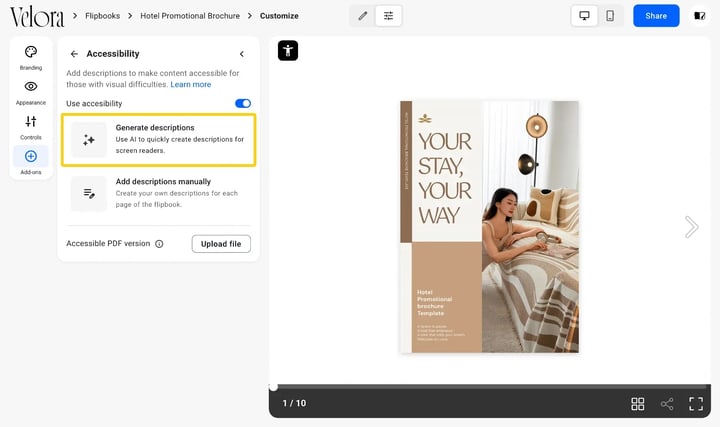
Once it's on, you can Generate descriptions for each page, Extract flipbook text, or Manage content manually. Even if you generate descriptions with AI, you can still edit the text after — recommended.
AI chat
Add an AI chat assistant to the player, so readers can ask questions about your flipbook's content without leaving it.
Google Analytics, Google Tag Manager and HubSpot tracking
Connect your flipbook to the analytics platform you already use. Paste your Google Analytics Measurement ID, GTM Container ID, or HubSpot tracking code into the matching field, and reader behavior and traffic start showing up alongside the rest of your data. Read this help center article for a step-by-step guide to Google Analytics.
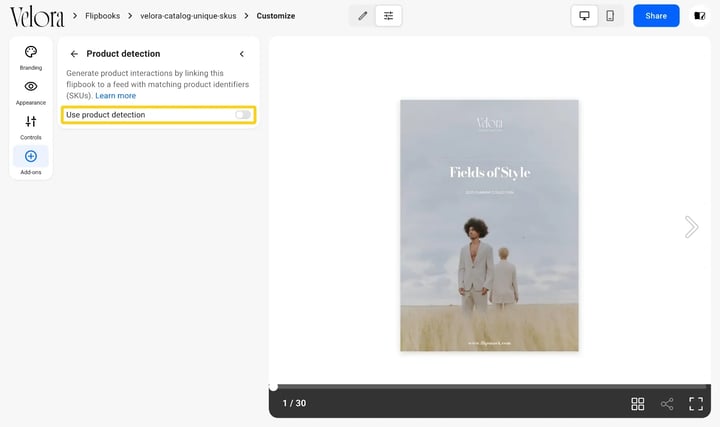
Product detection
Automatically detect SKUs in your catalog and turn them into shoppable products. Product detection is unavailable for flipbooks created from scratch — it needs a catalog converted from a PDF.
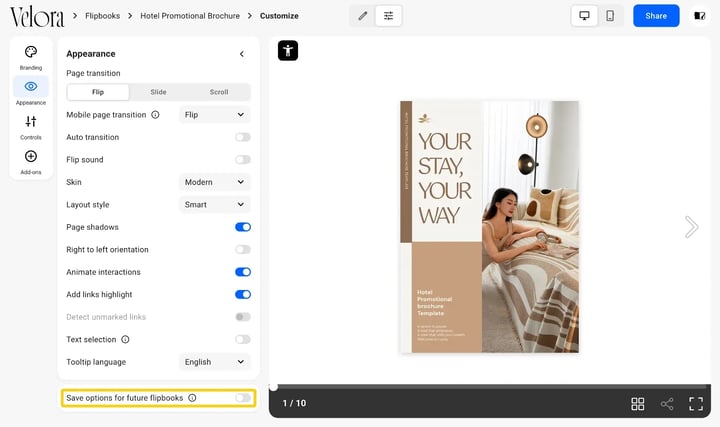
To apply your Branding, Appearance, Controls and Add-ons settings to future flipbooks, check the box at the bottom of the Customize page before you press Update.
Troubleshooting
- Flipbook not updating: make sure you pressed Update on the Customize page, then refresh the flipbook — a setting you leave without pressing Update never reaches the live flipbook.
- Missing buttons in player: check whether they're enabled in Controls.
- Accessibility not working: make sure you've added titles or descriptions to each page.
Additional tips / FAQs
- Does customizing the player require republishing my flipbook? No. Pressing Update on the Customize page applies your changes to the live flipbook right away, whether it's published or unpublished.
- Why is Product detection greyed out? Product detection needs a catalog converted from a PDF. It's unavailable for flipbooks created from scratch.
- What's the difference between Appearance and Controls? Appearance covers how the flipbook looks and reads — skin, transitions, layout and text behavior. Controls covers what readers can do with it — navigation, sharing, downloading, printing and audio.
- Do these settings apply to flipbooks I already published? Yes. Open any flipbook's Customize page, make your changes, and press Update — the live, already-published flipbook updates too.
Next steps
- How to customize your flipbook's appearance
- Public sharing options explained
- Sharing flipbooks via email: options explained
- Sharing flipbooks with readers only
- Using Google Analytics with your flipbook
- Enabling accessibility features
- How to create a table of contents for your flipbook
Need expert support?
Our team is here to help. Connect with our team experts or message us via the live chat for personalized assistance.