
Overview
Folders keep the images and videos that you upload to the Design Studio in order. You find them in the Uploads panel of the editor: create a folder, rename it, move files into it, or delete it. Folders work for your Personal uploads and for your Team uploads.
How to create a folder
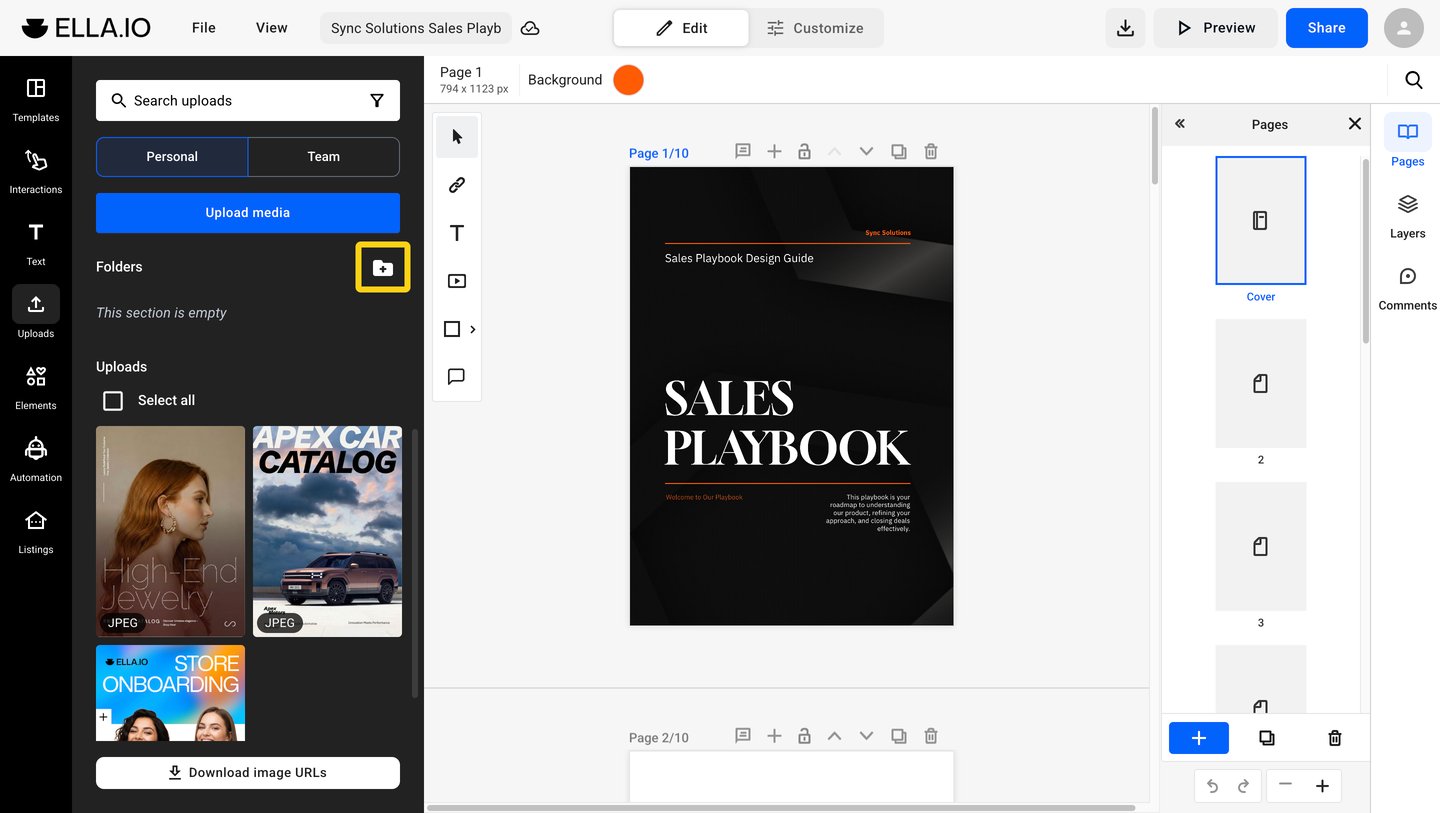
- Open a flipbook in the editor and click Uploads in the left sidebar.
- Next to Folders, click the New folder icon.
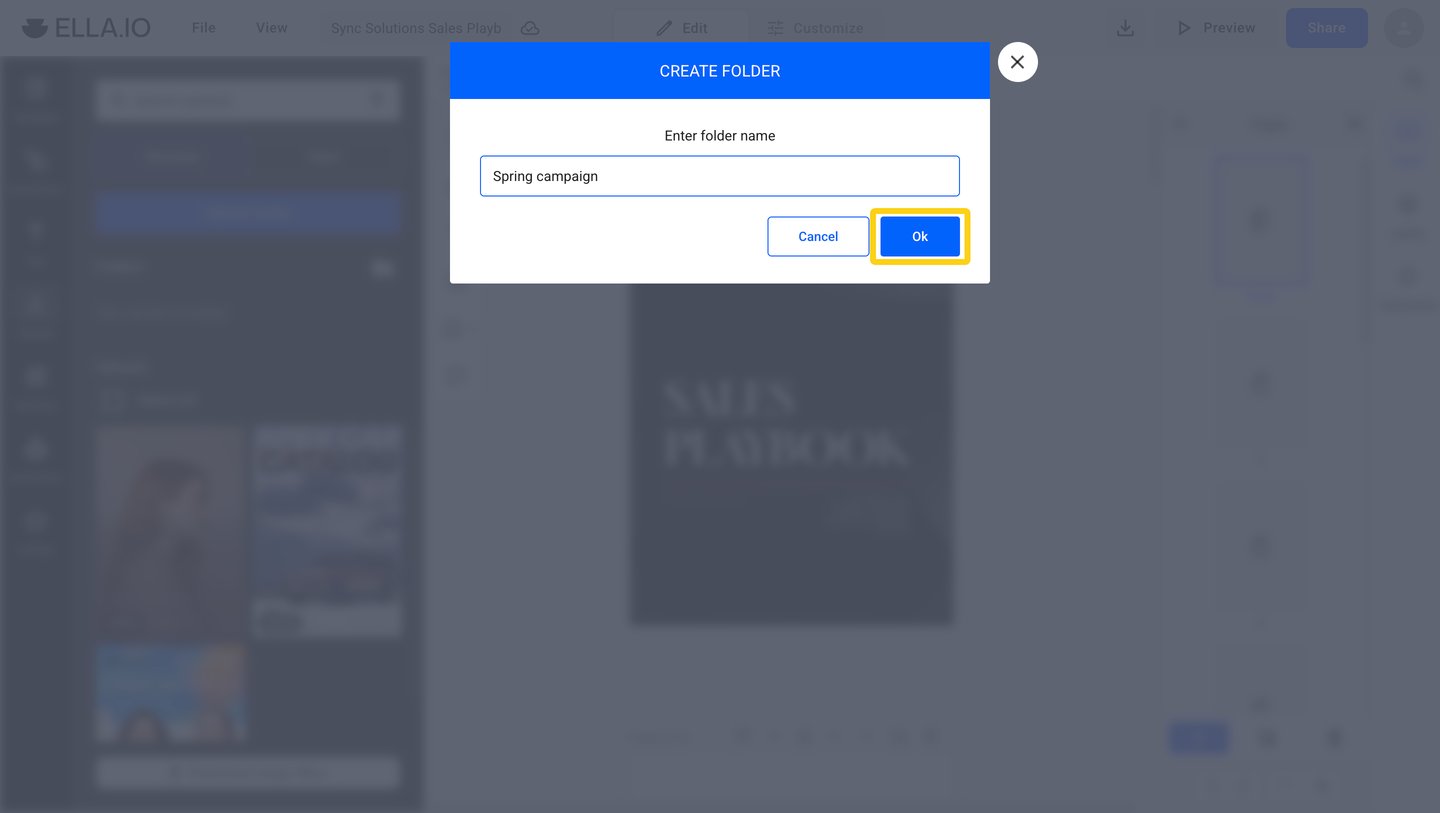
- Enter the folder name and click Ok.
How to rename a folder
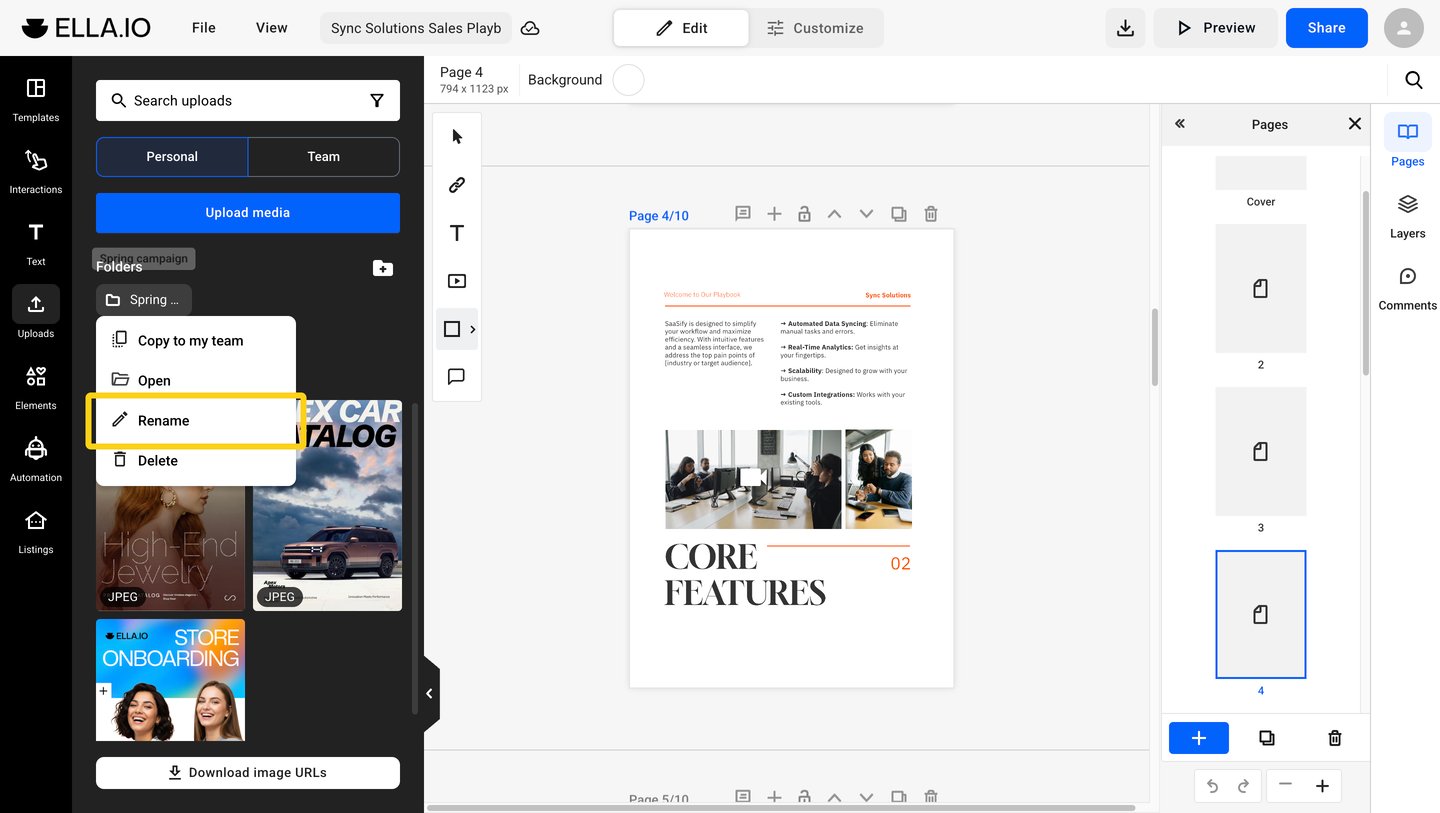
- Move the pointer over the folder and click the three dots.
- Click Rename.
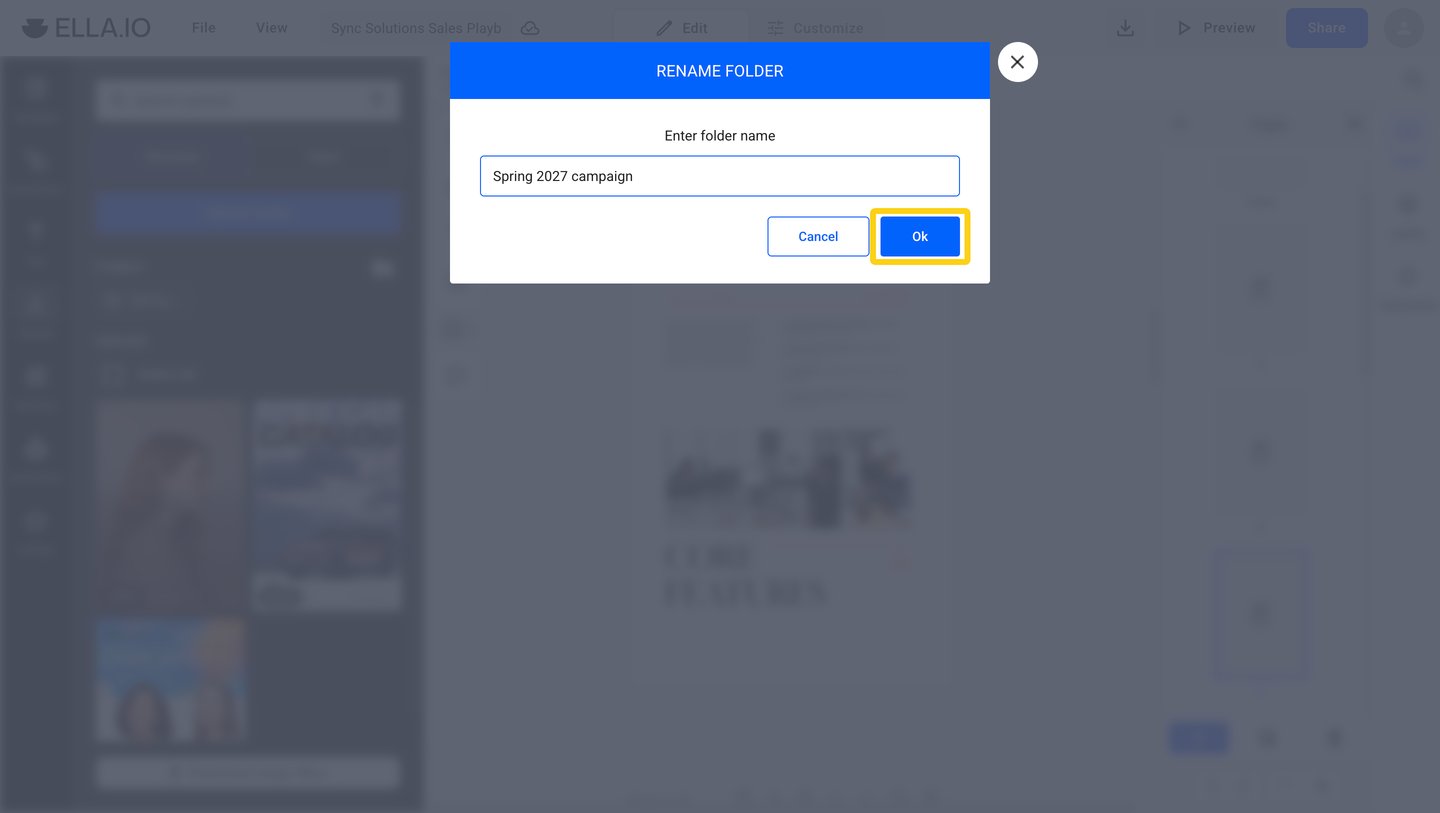
- Change the name and click Ok.
The same menu has Open, which shows the files in the folder. To go back to all uploads, click the back arrow next to the folder name.
How to move to a folder
- Move the pointer over an image or a video in Uploads and click the three dots.
- Move the pointer to Move to.
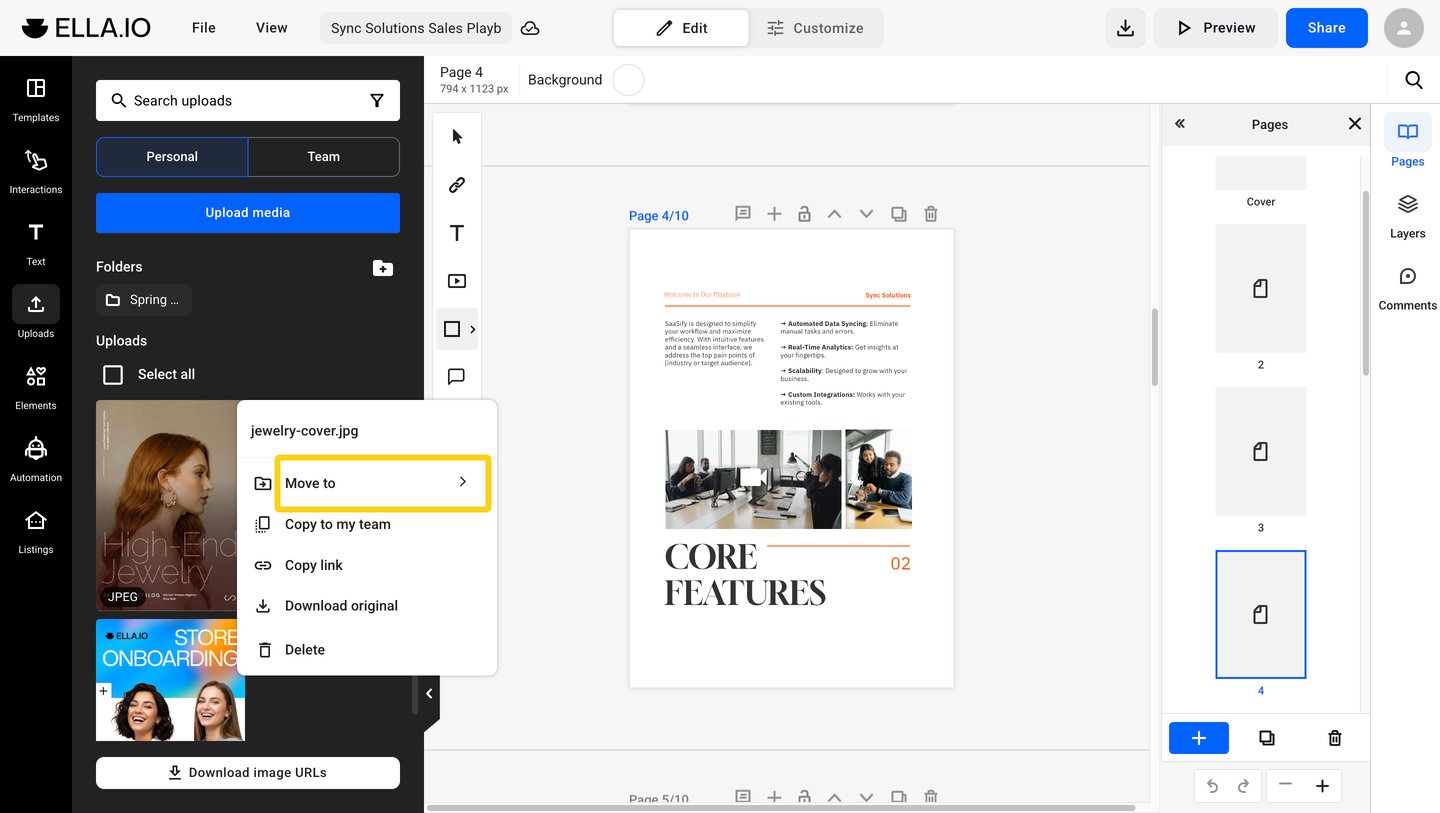
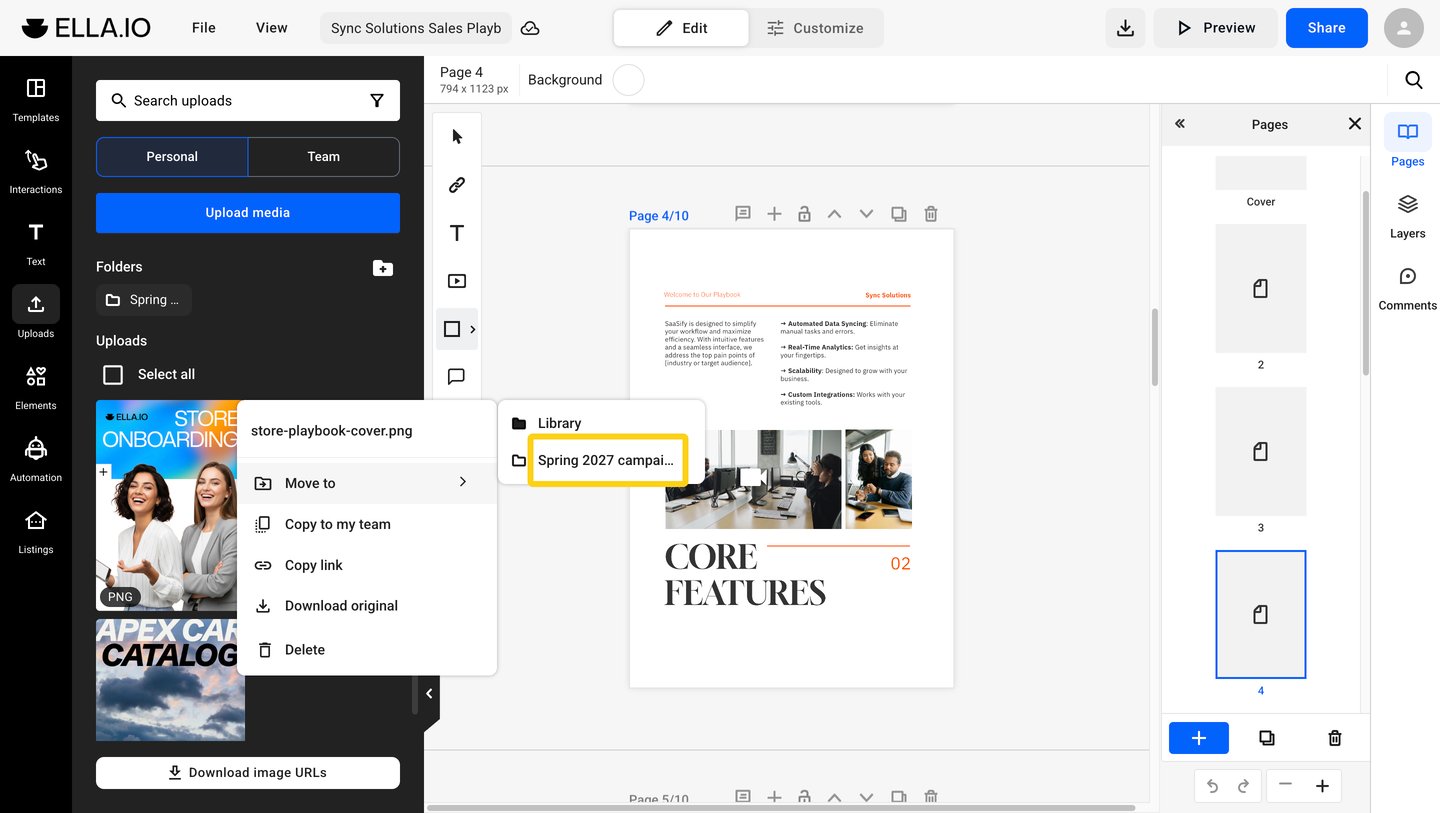
- Click the folder. To move a file out of a folder, choose Library.
Images and videos filters
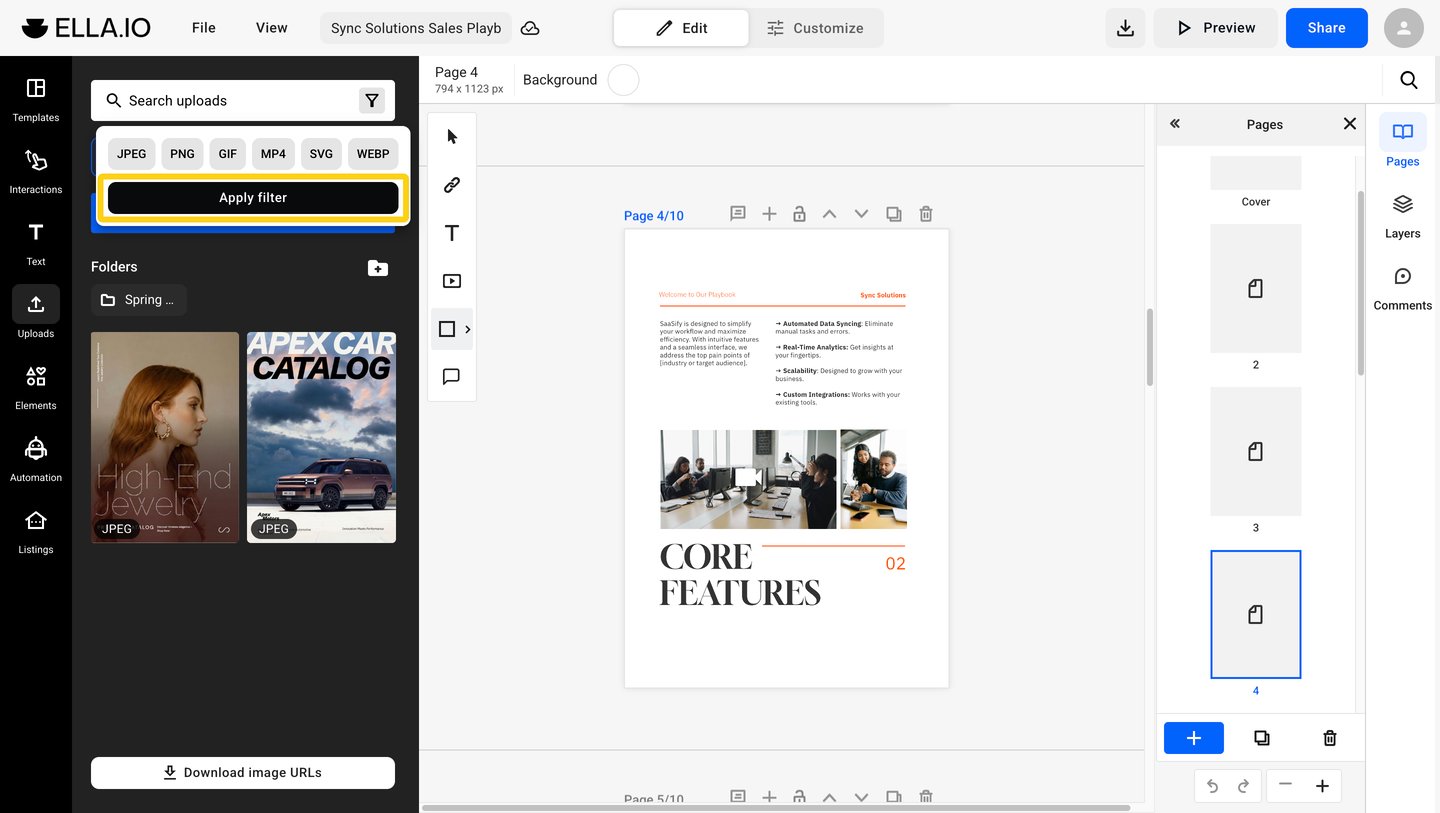
To show only some file types, click the filter icon in Search uploads, select one or more formats (JPEG, PNG, GIF, MP4, SVG or WEBP), then click Apply filter.
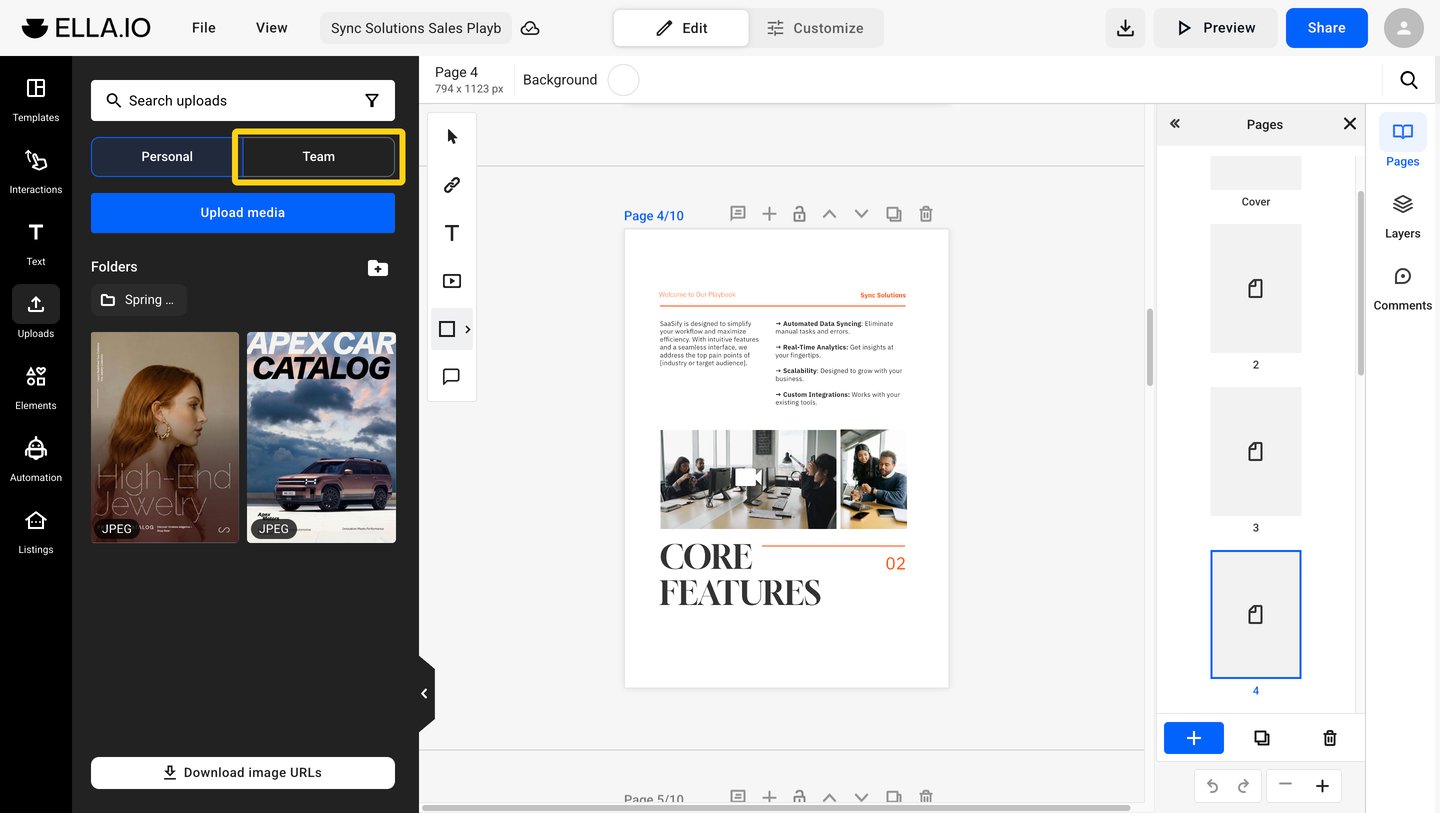
To work with the files that your team uploaded, click Team. You create, rename, move and delete team folders with the same steps.
How to delete a folder
- Move the pointer over the folder and click the three dots.
- Click Delete, then click Delete again to confirm.
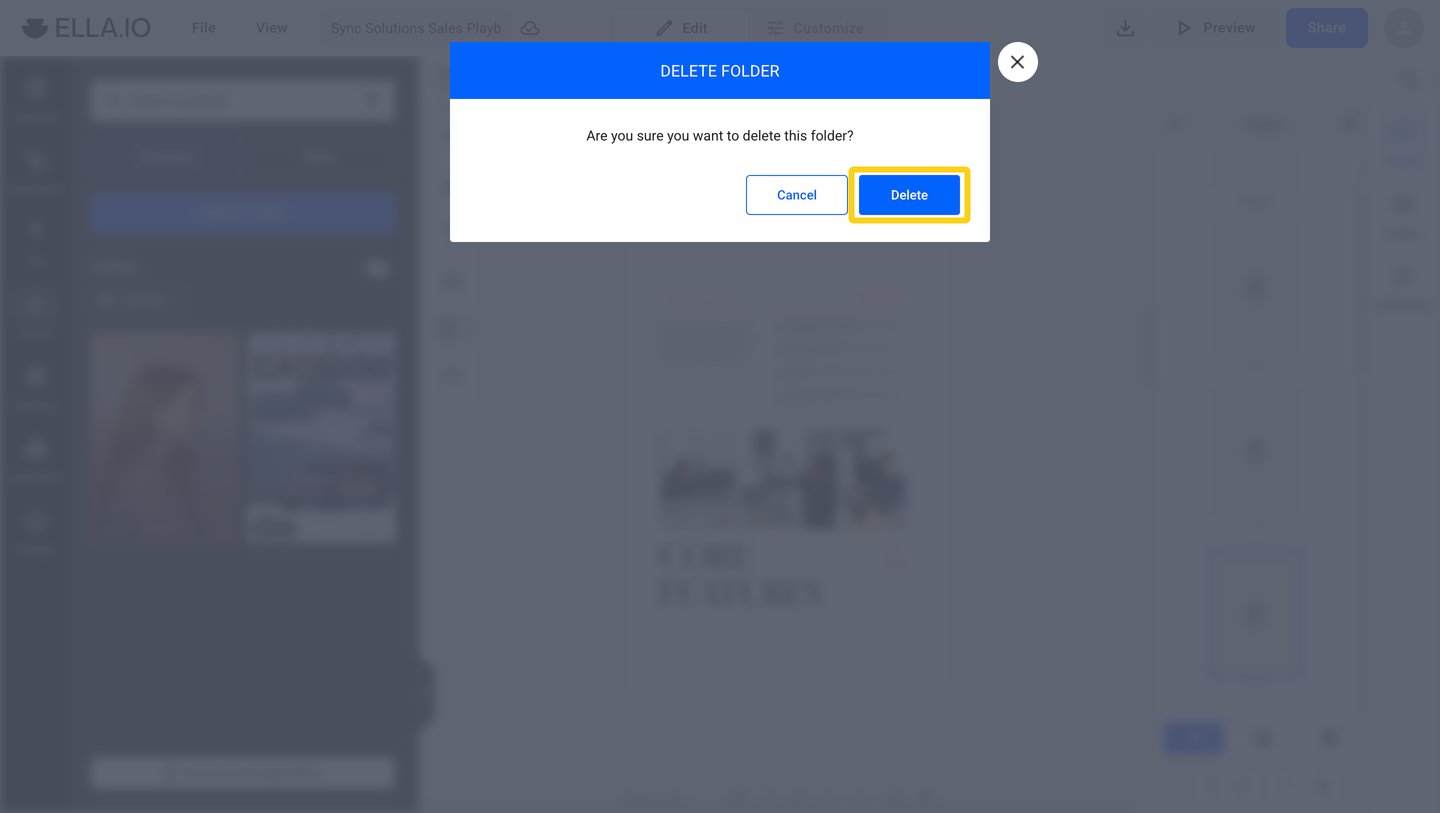
Important: When you delete a folder, the files in it are deleted too. To keep a file, move it to Library before you delete the folder.
Next steps
- How to upload images and videos in the Design Studio
- Using the Media Library to reuse images and videos
- How to use folders and subfolders in the Media Library
Need expert support?
Our team is here to help. Connect with our team experts or message us via the live chat for personalized assistance.