CrazyEgg is a powerful analytics tool that allows marketers to collect data on how visitors interact with their web pages. By integrating CrazyEgg with Flipsnack via Google Tag Manager (GTM), you can monitor user interactions on your catalogs, analyze heatmaps, and track user recordings. This guide will walk you through setting up CrazyEgg tracking on your Flipsnack catalogs.
Table of Contents
-
Overview
-
Setting Up CrazyEgg Tracking for Catalogs
-
How to Set Up Heatmaps and Recordings in CrazyEgg
-
Next Steps
Overview
This integration is available only with the Enterprise plan. Before starting, ensure that you have correctly installed Google Tag Manager on your Flipsnack profile. If you haven’t done so yet, please refer to our guide on How to Install Google Tag Manager in Flipsnack.
Once GTM is set up, you can proceed with configuring CrazyEgg.
Key Benefits
-
Advanced user behavior tracking: Gain deeper insights into how visitors interact with your catalogs.
- Visual heatmaps and session recordings: Understand reader engagement through click and scroll data.
-
Optimized catalog performance: Use data-driven insights to refine content and design.
-
Enhanced marketing strategies: Identify high-interest areas and adjust advertising efforts accordingly.
Requirements
-
Plan: Enterprise
-
Access: Mid-market and Enterprise accounts
- CrazyEgg account (premium subscription required)
-
Admin access to Google Tag Manager
Setting Up CrazyEgg Tracking for Catalogs
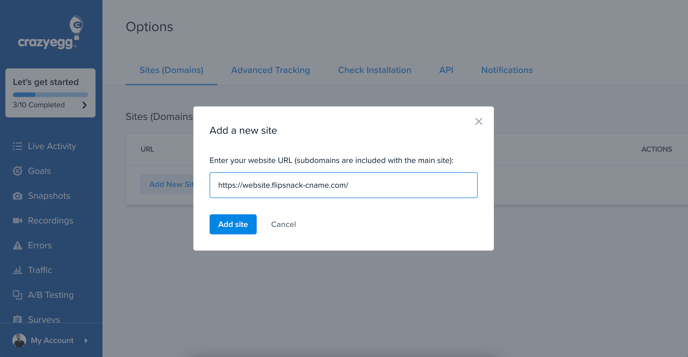
1. Log in to CrazyEgg or sign up for an account if you don’t already have one.
2. During the account setup or in the options menu, add your Flipsnack profile URL or Custom domain as your site.
- To find your profile URL, navigate to Branding > Brand Profile > Settings in Flipsnack.
Connect CrazyEgg to Google Tag Manager
1. Go to Install CrazyEgg and select Connect with Tag Manager from the third-party integrations.
2. Follow the detailed instructions provided by CrazyEgg.
3. Copy the CrazyEgg unique site ID displayed in the setup.

4. Log in to Google Tag Manager and create a new tag:
- Select New Tag > Tag Configuration > CrazyEgg.
-
Paste the Account ID with your unique site ID.
- Set the trigger to All Pages.

5. Click Submit, add a name and description for the new version (optional), and Publish the changes.
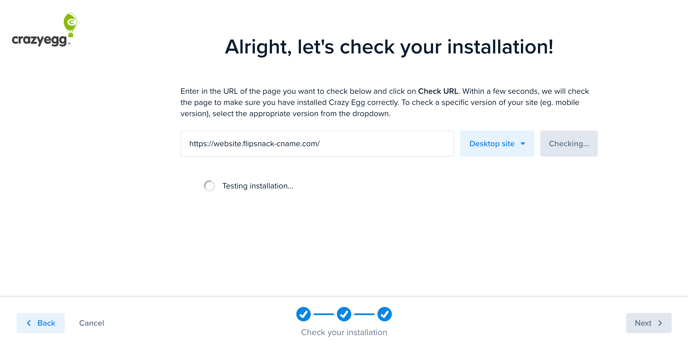
Step 3: Verify the Installation
-
Return to CrazyEgg and click Check my installation.
-
Enter your Flipsnack profile URL and click Check my installation again.
-
If successful, you’ll see an Installation successful message.
How to Set Up Heatmaps and Recordings in CrazyEgg
Once tracking is installed, you can start collecting data using heatmaps and recordings.
Caution: Ensure that you have added the Google Tag Manager code to your Flipsnack profile if you want to track profile activity, and to each flipbook individually if you want to track flipbook interactions.
Setting Up Heatmaps (Snapshots)
-
Go to Snapshots in CrazyEgg and click Create a Snapshot.
-
Select One Snapshot to track a single catalog or Multiple snapshots for multiple catalogs.
-
Enter the URL of the flipbook(s) you want to track and customize the settings of the snapshot.
Note: Heatmaps in CrazyEgg provide a static image of the catalog cover with click, scroll, or movement overlays. Multiple pages within the catalog will not have individual heatmaps.
Setting Up Recordings
-
Go to Recordings in CrazyEgg and click.
- Click on Customize Recordings.
-
Select Only Start recording sessions once visitors land on a specific page and enter your flipbook URLs.
-
Save your settings and wait for data collection to begin.

Next Steps
Now that you have set up tracking, you can start analyzing user interactions and optimizing your catalogs.
Useful Resources: