Setting up and using Typography
Create custom text styles and learn how to use them to maintain brand consistency and streamline the process of creating your publications
Flipsnack is no stranger to branding options, and those options expand even further with the typography feature.
Any of our premium plan holders have the option to set custom text styles to match their brand identity and save it for later use. It’s basically a template for all the text styles you prefer to use in the Design Studio.
Note: This feature is available starting with the Business plan onward.
It can be quite a hassle to manually set the font type, size, and all text styling options every time you place a text box within a catalog or publication. With this typography feature, you won’t have to go through and tediously change the text style every single time you use it.
You can make your brand’s identity prominent throughout all of your publications with a few simple clicks. Set up your preferences once, and you’ll never have to do it again.
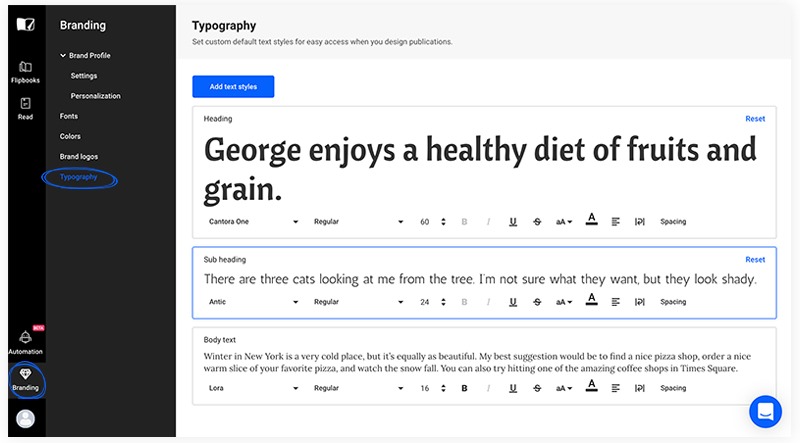
The first thing you want to do is go to your Branding section in My flipbooks and select Text styles.

Here, you can set a font (keep in mind that you can upload your own font), choose to have it bold, adjust the text size, and many other things.
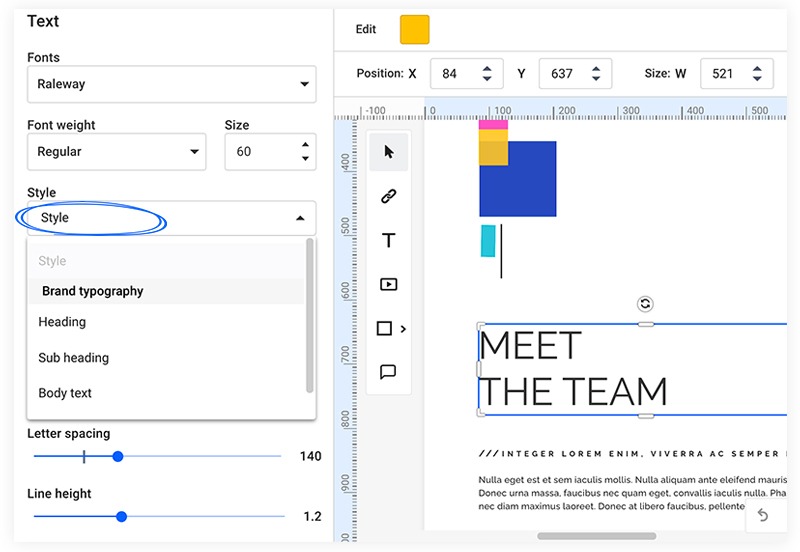
Once you’ve found the perfect combo to match your brand, simply select it from the text options in the Design Studio next time you’re creating a flipbook.

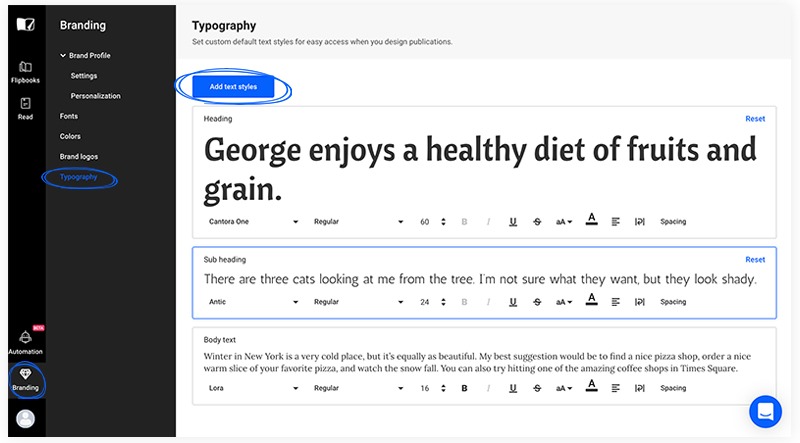
You also have the option to create many new styles to add to your arsenal. Simply create a new section in the typography section, name it appropriately, make all the necessary changes, and you’re good to go.

You can add up to 20 different styles at any given time. You can delete and add them as you need. If you choose to delete a custom style, the displayed text options in the Design Studio (heading, sub-heading, and body text) will go back to Flipsnack’s default settings, as they cannot be deleted permanently. But don’t worry, it’s easy to edit again if needed.
Now, when you’re creating a flipbook, simply select the text that you’ve already applied, go to the top of the Design Studio, click on the style, and select your new style.
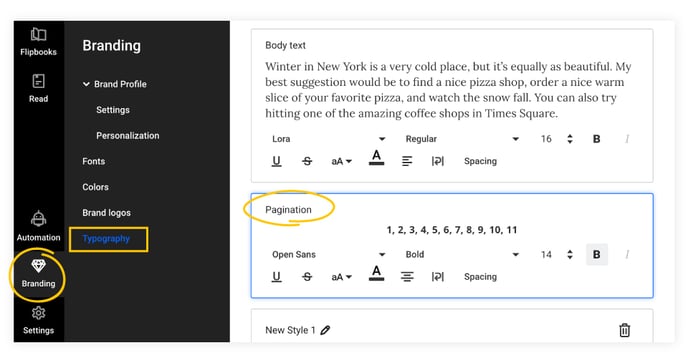
In addition, here is also where you can set your default style for Pagination. Style the page numbers to comply with your brand identity and requirements. Next time you need to add page numbers to your documents, you’ll have your presets ready to go and looking the same every time.

We hope that this new feature finds itself useful for all of our premium users out there. If you’re not a premium user, this feature can help you establish a true brand identity. It’s more than worth it to upgrade. Check out our pricing options for more information on that.