With our individual text formatting options, you can now change the color, opacity, and size individually for each word or letter in your text and also edit the line spacing, line height, and whether you want the text to be bold, italic, upper case, lower case, underlined or striked through up you can do all that in our Design Studio.
Important: Individual formatting is not available for the existing templates since they were created before this feature. You can currently only do that with a new text box.
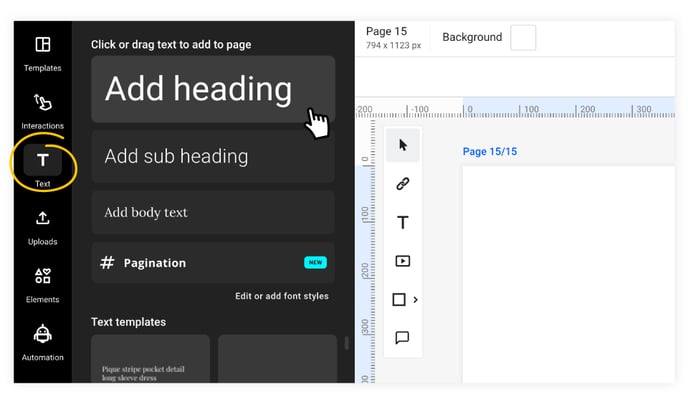
How to add text to your publications
1. Open your flipbook in the Design Studio.
2. Click on the Text button on the left side of the page, then select the type of text you want.
3. Type or paste your text into the text box and then click outside the text box. If you want to edit some words, double-click within the text field, choose the words you want to alter, or delete them using the backspace key on your keyboard and type new ones.
4. When you select a box, a word, or a few letters, the Edit panel will appear on the left side. To change the text size, simply click on the size input and you can select one of the options from the drop-down menu, or you can delete the number and type a new one.
5. You can also adjust the Letter spacing or the Line height by sliding the blue dot on the left to decrease the distance or on the right to increase it.
Text editing options
1. When the text box is selected, at the top of the Design Studio, immediately below the header of the application, you will find a colorful square. If you click on it, it will open the color panel, where you can change the text color. You can choose the color you like from your recent colors, brand colors, default palette, or gray shades, or paste a hex color.
Keep in mind that you can make bulk adjustments if necessary by grouping more text boxes and applying the desired text editing options at once.
Snap to grid and align to groups
group elements together and align them to existing rulers or to other groups
- improving design precision and maintaining cohesive layouts.
2. Click on the Opacity button in the upper-right corner of the Design tool to change the transparency of the letters/words in your text.
3. Select the text and change its font styles from regular to Bold (B), Italic (I), Underline, or Strikethrough by clicking their respective icons on the left side menu.
4. Select the text box you want to change to lowercase, uppercase, or capitalized then click on the text case transformations icon (aA) in the text edit panel.