
Overview
To crop an image in Flipsnack, select it in the Design Studio and click Crop in the toolbar. Drag to choose the area you want to keep, pick a ratio such as 1:1 Square if you need a fixed shape, then click Done. You do not need an external editing tool.
How to crop images
1. Select your image to reveal the Crop button at the top of the Design Studio.
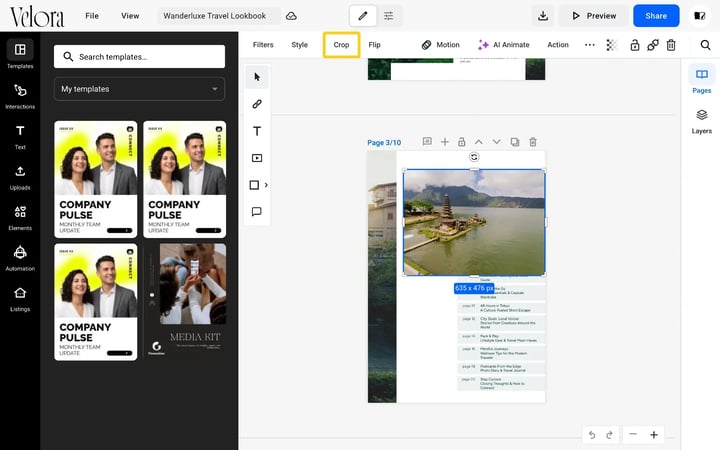
2. After you select the Crop button, select the area you want to crop.
Click and drag to select the area you want to keep.
Tip: If you found the perfect ratio, but want to make the cropping area larger or smaller, just hold Shift on your keyboard as you drag one of the corners of the selection outward or toward the center of the selection.
Crop ratio options
Now that you have selected the area you want to crop, choose from different ratio options:
- Original ratio, which gives you the image's ratio as a starting point;
- 1:1 Square which gives you a square as a starting point;
- 4:5 ratio;
- 6:9 ratio.
Then, simply click Done (hit Enter). If you changed your mind just click Cancel (Esc) to exit crop mode.
Additional image editing tools
There are many other image editing options in Flipsnack that you should explore:
- Filters
- Image masks
- Transparency
- Flip horizontal or vertical
- Border, rounded corners, shadow
For any questions, don’t hesitate to contact us via live chat and we’ll be more than happy to help.
Next steps
- How to apply image filters in the Design Studio editor
- How to use the spotlight effect for images in your flipbook
- How to crop, resize and replace a video in Flipsnack
Need expert support?
Our team is here to help. Connect with our team experts or message us via the live chat for personalized assistance.