Table of contents
- Overview
- Converting a single PPTX or ODP file into a flipbook
- Merging multiple PPTX or ODP files into one flipbook
- Next steps
Overview
If you already have a presentation created in PowerPoint or another presentation tool, you can easily turn it into a digital flipbook using Flipsnack. Supported formats include .PPTX, and .ODP, allowing you to upload your files without needing to start from scratch.
Note: Edit your slides directly in Flipsnack (Beta)
Although the feature is called Edit PDF, it is fully compatible with PPTX and ODP files!
When you upload your presentation using this flow, Flipsnack converts your slides into editable elements. This means you can fix typos, change font colors, or swap images directly in our Design Studio without having to go back to PowerPoint and re-upload.
Flipsnack automatically converts each slide into individual flipbook pages, keeping your layout and content intact while also offering additional customization and interactivity options.
Requirements:
- The Upload PPTX feature is available for all plans, including the 14-days trial.
- Better engagement & interactivity: Unlike regular PowerPoint or ODP files, flipbooks support embedded videos, hyperlinks, buttons, and forms. These added features allow you to create a more immersive and clickable experience for your audience.
- Instant access - no downloads needed: Flipbooks can be opened directly in any modern browser—no need for PowerPoint, LibreOffice, or downloads. This ensures your audience can access your content quickly on any device, even if they don’t have presentation software.
- Better responsiveness on every device: Flipbooks are designed to be responsive and accessible, automatically adjusting to any screen size and often including features like zoom, adjustable fonts, and screen reader compatibility.
- Easy sharing and broader reach: Flipbooks are easy to share via links, social media, or embedding on websites, and can be accessed by unlimited viewers simultaneously.
- Powerful analytics & performance tracking: Flipsnack offers built-in analytics, allowing you to track views, time spent, clicks, and reader behavior.
Converting a single PPTX, or ODP file into a flipbook
Step 1: Once logged in, go to Main Dashboard and click on Create.
Step 2: Choose the source of your PPTX or ODP
You have two options: From device and Google Drive.

Upload from your computer
- Select PPTX or ODP files directly from your device.
- Before uploading, ensure your files are named appropriately for easy identification.
Caution: If your file contains hidden slides, the conversion process will fail. Please remove or unhide any hidden slides before uploading the .pptx to Flipsnack.
Upload from Google Drive
- Click Upload from Drive, and then connect your account to enable access.
- Once connected, make sure the PPTX or ODP is already stored in your Google Drive, then simply select it to proceed.
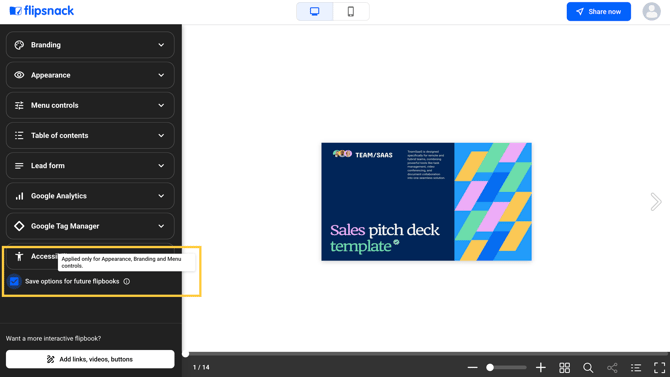
Step 3: Customize & add interactive elements
Now you are on the Customize page and there are different options you can choose from: Branding, Appearance, Menu controls, Table of contents, Lead form, Google Analytics, Google Tag Manager, and Accessibility.

Check the Save options for future flipbooks box if you want to keep the Appearence, Branding and Menu controls the same for your next flipbooks.
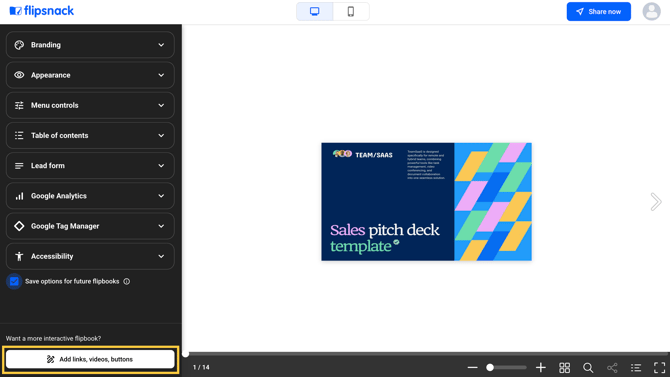
Add interactive elements
Click on Add links, videos, buttons if you wish to add interactive elements such as links, videos, and other interactions and elements.
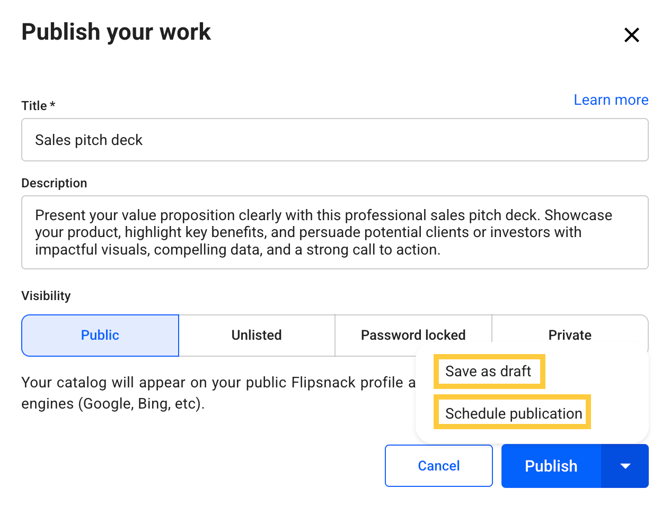
Step 4: Publish your flipbook
Click on Share now if you want to publish your flipbook.

Now’s the time to add a Title and a Description. If you’re interested in ranking organically, make the flipbook public and check this article on how to optimize it for search engines.

Before clicking the Publish button, you should know that by selecting the arrow next to it, you will have the option to Save as draft or Schedule publication.
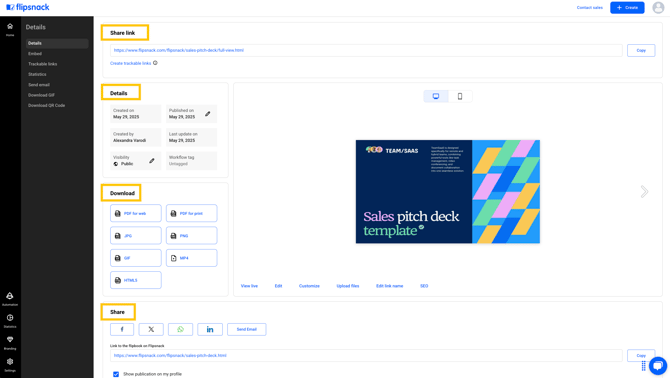
The details of your published flipbook
After publishing your flipbook, here’s the Details page. This page is where you’ll have the full-view link and the status of your flipbook, the Download and Sharing options, and the Preview to see how it looks when shared or embedded.
Merging multiple PPTX or ODP files into one flipbook
Step 1: From the Main Dashboard, click on Create and choose the location of your PPTX or ODP files: From device or Google Drive.
Step 2: Select all the files you want to upload and click on Merge them into one.
Note: You can merge the following file formats: PDF, PPTX, ODP, JPG, and PNG.

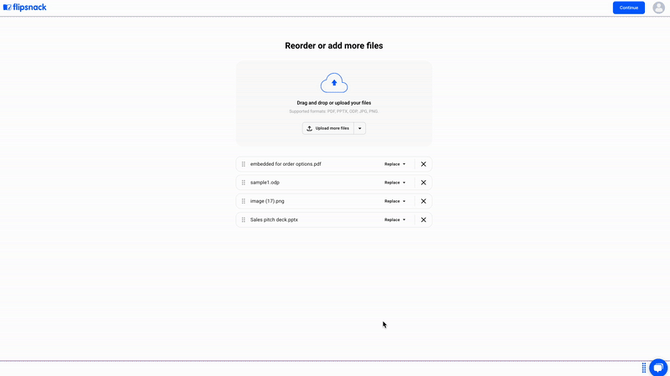
Step 3: Next, you can reorder or add more files if needed. After that, click on the Continue button.
Step 4: Click on Share now if you want to publish your final flipbook.
This final step is the same as the one we showed earlier for publishing a single PPTX or ODP file.
Next steps
Now that your flipbook is published, you can explore other guides such as:
- How to replace PDF and keep interactions
- Discover all the ways in which you can share and embed your flipbook
- Learn more about Flipsnack statistics
Need expert support?
Our team is here to help. Connect with our team experts or message us via the in-app chat for a personalized demo.