Table of contents
Schedule a flipbook publication
Schedule a flipbook deactivation
Overview
With Flipsnack, you can schedule when your flipbook goes live, gets updated, or is deactivated. This allows you to plan releases in advance, automate updates, and better coordinate your content strategy across teams.
Scheduling is especially useful for teams managing seasonal campaigns, time-sensitive publications, or content approvals. You can choose the exact date and hour for any of these actions.
Key benefits
-
Plan ahead with confidence: Schedule publications or updates to go live automatically at a chosen time
-
Improve team workflows: Avoid last-minute publishing or manual updates
-
Maximize campaign timing: Align publication or update times with launches, announcements, or events
-
Flexible control: Schedule publishing, updating, or deactivation independently
Requirements: Available starting from the Business plan.
Schedule a flipbook publication
You have the option to schedule publications for a later date and hour. Here’s how you do it:
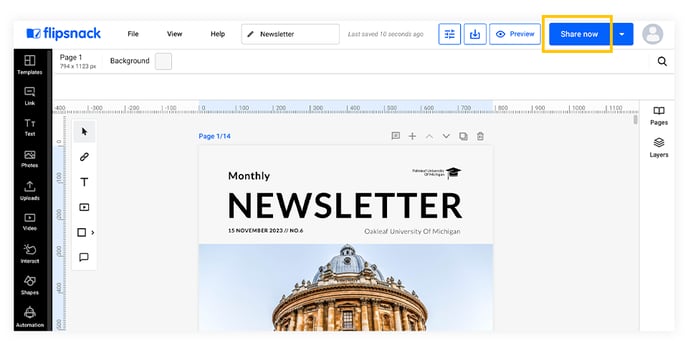
1. Once you are done with the editing process, click on the Share now button.
2. Click on the white arrow next to the Publish button and select Publish later.

3. Choose the desired date and hour and click on the Schedule button.
4. Click once again on the Publish button.
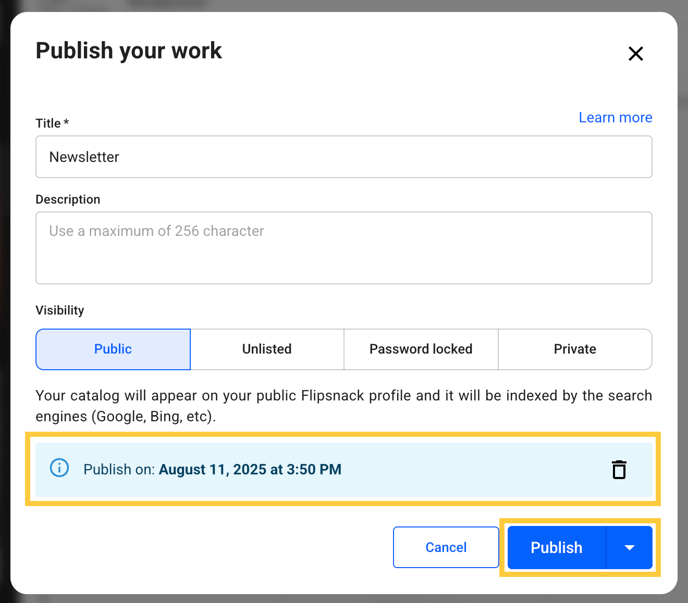
5. To delete the publish date, click the Delete icon on the right. To change the date, follow the same steps described above.
Important: Keep in mind that if you schedule to publish a flipbook at a later date or time, you won’t be able to share it before that particular date, as only published flipbooks can be shared.
Schedule a flipbook update
Another option available is to schedule publications for a later date and hour. Here’s how you do it:
1. Once you are done with the editing process, click on the Share now button.
2. Click on the white arrow next to the Update button and select Update later.

3. Choose the desired date and hour and click on the Schedule button.
4. Click once again on the Update button.

5. To delete the publish date, click the Delete icon on the right. To change the date, follow the same steps described above.
Schedule a flipbook deactivation
Another option is to schedule deactivation for a later date and hour. Here’s how you do it:
1. Once you are done with the editing process, click on the Share now button.
2. Click on the white arrow next to the Update button and select Set inactive date.

3. Choose the desired date and hour and click on the Schedule button.
4. Click once again on the Update button.

5. To delete the deactivation date, click the Delete icon on the right. To change the date, follow the same steps described above.
Next steps
Explore more ways to optimize your publishing process:
Need expert support? Our team is here to help. Connect with our team experts or message us via the in-app chat for personalized assistance.