
💡 Benefits of animating a static image with AI
- 25 or 50 credits, 4 to 8 seconds: a 4-second animation costs 25 credits and the longer two cost 50, so the length you pick is also the price you pay.
- Nothing to install: the clip is generated in Design Studio and lands in your Uploads, so there is no video editor and no round trip out of Flipsnack.
- The original is still there: your static image stays under the video in the Layers panel, so dropping the animation is one delete rather than a re-upload.
- Four presets, or your own words: Auto animate, Living photo and Focus in need no prompt; Custom prompt takes up to 500 characters when none of the three suit the image.
- It plays for the reader: the video auto-plays in Preview and in the published flipbook, though never inside Design Studio.
Overview
A still image on a page can become a short, auto-playing cinematic video without leaving the Design Studio. Living Visuals does that for you, with several predefined animation styles to choose from, so you decide how much motion your visual gets.
The presets need no prompt: a predefined one runs behind the scenes to generate the cinematic result. When no preset suits the image, you can write a custom prompt describing how it should move.
The animated version behaves like a video element and plays automatically when your audience views the flipbook.
Image compatibility: Living Visuals animates the original uploaded image, so these are not supported or not preserved:
- Images placed inside masks
- Images flipped horizontally (the video uses the original orientation)
- Images with filters applied (the video starts from the original, unfiltered image)
Requirements
- Plan: Pro or above: check your plan or compare plans
- AI credits: 25 AI credits for a 4-second animation, 50 for 6 or 8 seconds: how AI credits work
How to animate an image with AI
1. Select the image
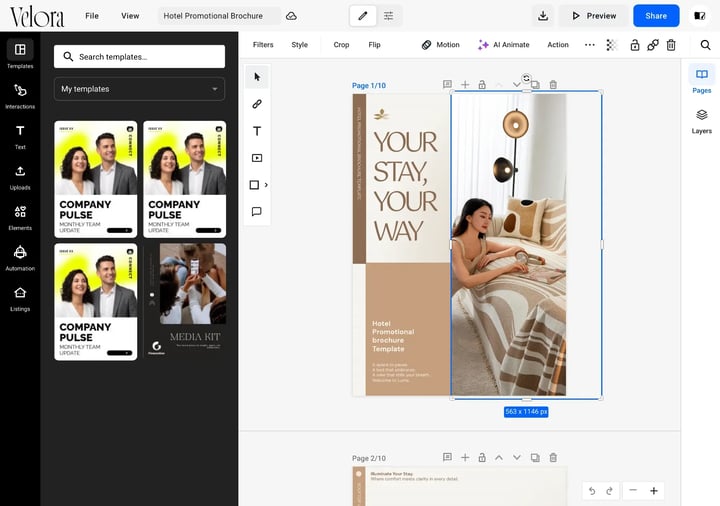
Open your flipbook in Design Studio.
Select an image that you either:
- Uploaded yourself
- Added from our stock photography library
- Added from an editable template
Make sure:
- The image element is actively selected
- The image is not placed inside a mask (Living Visuals does not support masked images)
2. Make your image animated
Selecting an image replaces the page toolbar with the image toolbar. Click AI Animate, between Motion and Action. Without an image selected the button is not on screen.
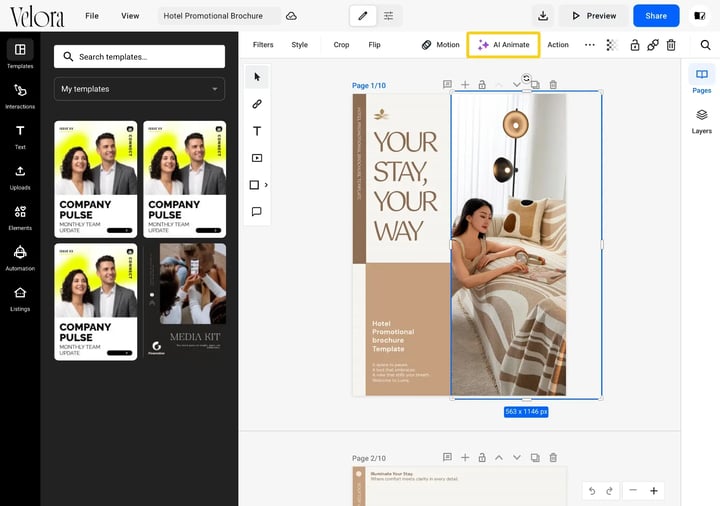
Animation styles
AI Animate opens as a panel on the left, in place of the Templates panel. It holds four presets:
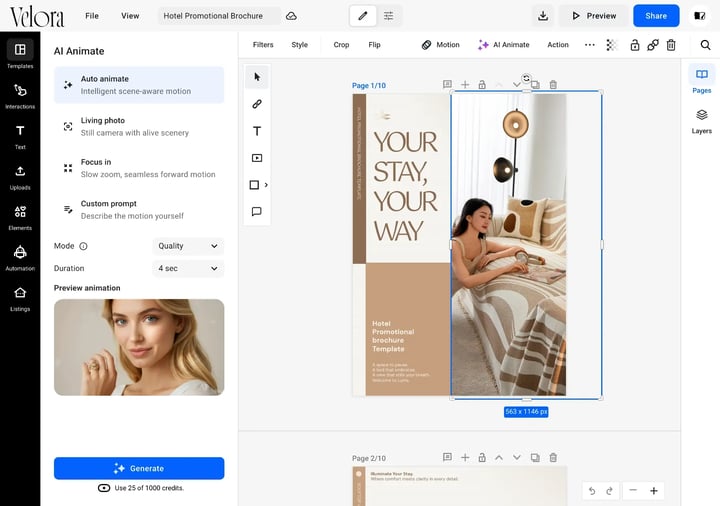
Choose your preferred animation style:
- Auto animate: intelligent scene-aware motion. Selected by default.
- Living photo: still camera with alive scenery.
- Focus in: slow zoom, seamless forward motion.
- Custom prompt: describe the motion yourself.
Write your own prompt
Click Custom prompt when no preset suits the image. The preset expands and a text box appears under it, with a counter that allows up to 500 characters. Describe the motion you want: "Slow pan across the lobby with soft morning light".
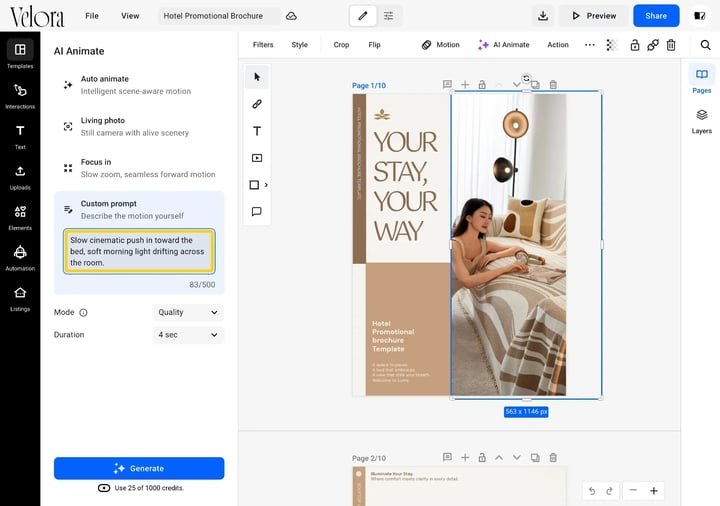
Set the mode and the length
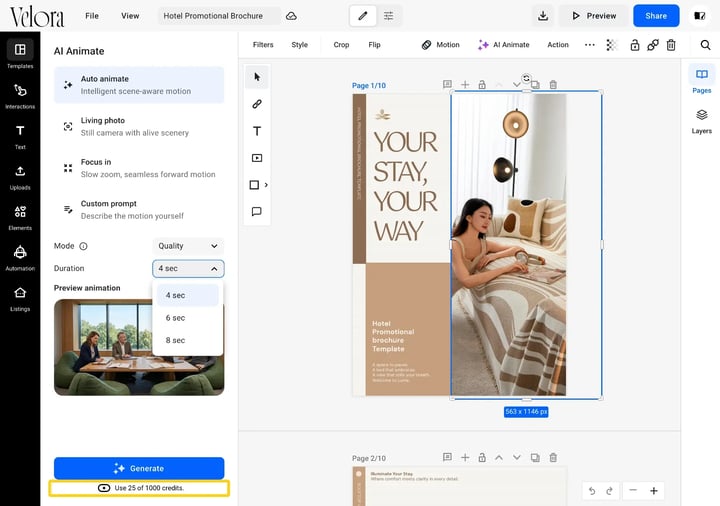
Two dropdowns sit below the presets.
- Mode: Quality or Fast. It opens on Quality.
- Duration: 4 sec, 6 sec or 8 sec. It opens on 4 sec.
Below them, Preview animation shows a sample of the preset. Click Generate to make the clip.
After selecting a style:
- The image enters processing mode
- A cinematic version is generated
- The credits are deducted: 25 for a 4-second animation, 50 for 6 or 8 seconds
Each generated animation:
- Runs for the length you chose: 4, 6 or 8 seconds
- Is added as a video layer on top of your original image
- Is saved in your Uploads section
- Can be downloaded individually (no watermark)
Pick the duration by the job. 4 seconds keeps a background loop tight and the file light. 8 seconds gives the motion room to finish.
Note: A 4-second animation costs 25 AI credits; 6 and 8 seconds cost 50. The panel prints the cost under Generate, and it changes with the duration you pick. Make sure you have enough credits before starting. If you need more, contact us via live chat.
3. Preview your animation
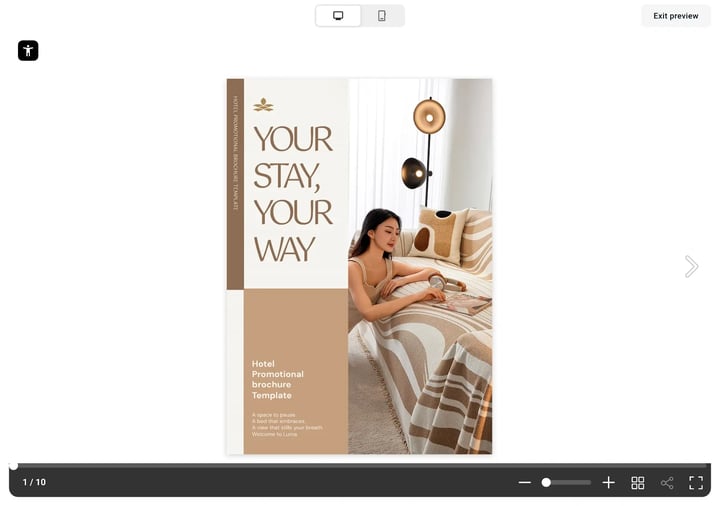
Click Preview in the top-right corner to see how the animation appears in your flipbook.
Try different animation styles to compare how each one impacts your visual.
Important:
- The animation auto-plays in Preview and published flipbooks
- The animation does not auto-play inside Design Studio (this is expected behavior)
4. Customize your animated video
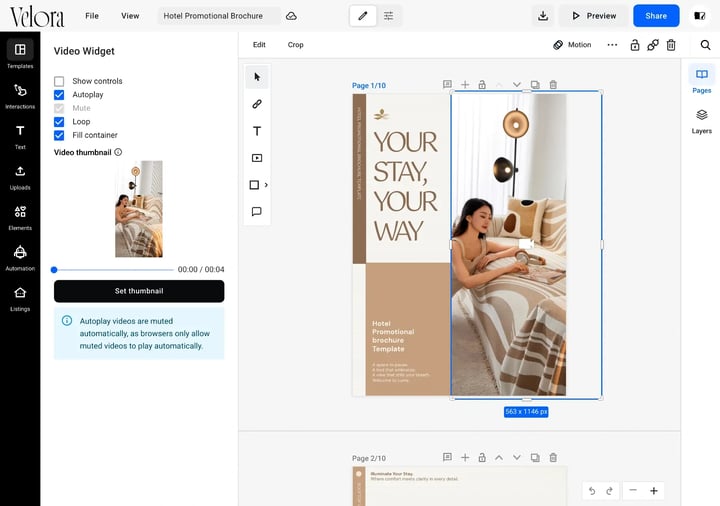
Once generated, the animated image becomes a video element.
Select it and use the Edit panel to adjust video-specific settings:
- Autoplay
- Loop
- Mute
- Show controls
- Fill container
- Set thumbnail
Your original static image remains available in the Layers panel as a hidden element underneath the video.
This ensures a non-destructive workflow so you can remove the animation at any time.
Content and usage guidelines
To ensure responsible use of Living Visuals:
- Do not use images of famous public figures without appropriate rights or permissions
- Avoid generating videos featuring minors for commercial purposes
- Make sure you have the legal right to use any image you upload and animate
You are responsible for ensuring your content complies with applicable laws and usage rights.
Tips for best results
For high-quality, realistic animations:
Troubleshooting
1. The AI Animate button is greyed out or does nothing
- No image element selected: Make sure you selected an image element
- Element is not a standard image: Make sure the selected element is a standard image
- Image is a stock photo: Confirm the image is not a built-in stock photo
- Image inside a mask: Images placed inside masks are not supported, so remove the mask and try again
- Not inside Design Studio: Check that you are inside Design Studio
- Plan doesn't support Living Visuals: Check that your plan supports Living Visuals
2. Not enough AI credits
- Check credit balance: Verify your credit balance from the Account menu
- Out of credits: Purchase additional credits if needed
- Contact live chat: Contact live chat for assistance
3. Animation does not play in Design Studio
- Expected behavior: This is expected behavior
- Animation not playing: Use Preview mode to see the animation auto-play
4. The generated video looks different from my edited image
Living Visuals generates animations using the original image file.
If you:
- Image was flipped: Flipped the image horizontally
- Filters applied: Applied filters
- Other visual adjustments: Used other visual adjustments inside Design Studio
These changes will not be reflected in the generated animation. The video will appear in the image’s original orientation and without filters.
To ensure the animation matches your intended look, edit the image externally before uploading it, then apply Living Visuals.
5. I don’t see the animation immediately after clicking AI Animate
This is expected behavior. After clicking AI Animate, you now need to select an animation style before the video is generated.
Next steps
- How to add videos in Design Studio
- Using interactive elements in your flipbook
- Understanding AI credits
- Publishing your flipbook
- Flipsnack AI Credits Explained
- What is Flipsnack AI and how does it enhance content creation?
Need expert support?
Our team is here to help. Connect with our team experts or message us via the live chat for personalized assistance.