
Overview
A running header or footer is a group of elements, such as your company name, logo or address, that shows in the same spot on every page of a flipbook. Build it once in the Design Studio, group it, and add it on all pages. An edit on any page then changes every page.
💡 Key benefits
- One fix, every page: correct the phone number in your footer once, and a 300-page catalog shows the new one throughout.
- The same spot on every page: your logo tab sits in the same corner from page 2 to the back cover.
- A clean cover: hide the header on page 1 and keep it on every other page.
- Readers keep their bearings: a catalog title in the header tells someone on page 148 what they are reading.
Headers and footers are built with master layers. Master layers: add an element to every page at once covers the feature itself; this article walks through one header and one footer.
Build a header and add it to every page
- On any page, place the pieces of your header. In this example it is a square shape for the tab and a text box with the company name on top of it.
- Select all the pieces.
- Click the ... menu in the top bar and choose Group.
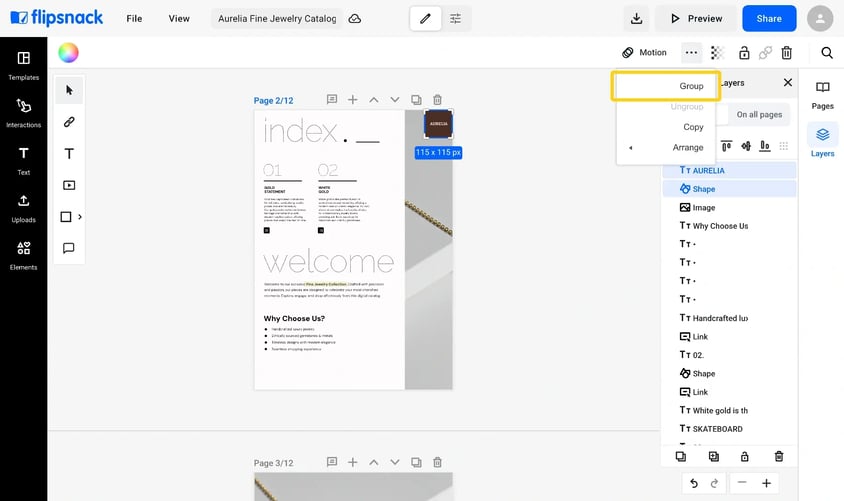
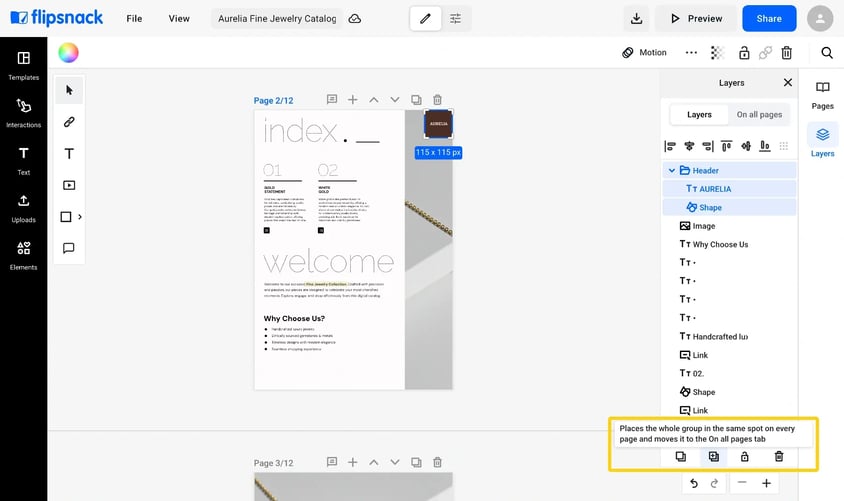
- With the group selected, click the Add on all pages icon at the bottom of the Layers panel. You can also right-click the group and choose Add on all pages.
- The editor switches to On all pages mode and dims your page content. Click Done to go back to your pages.
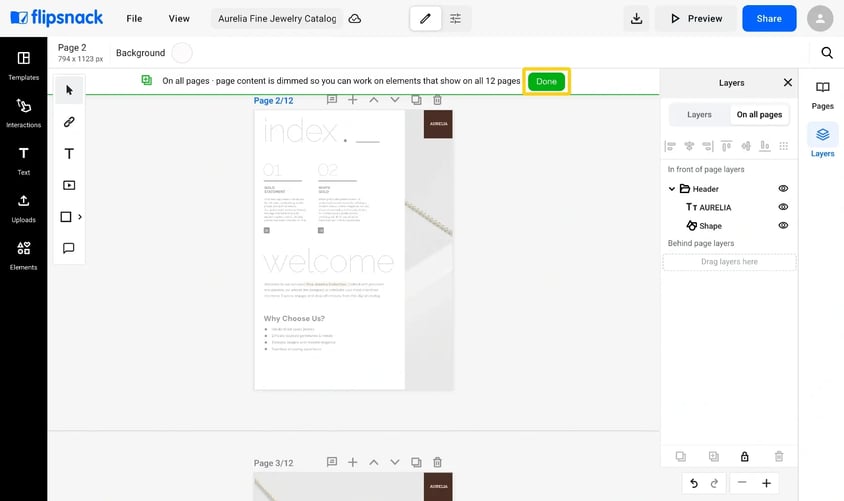
The header now shows on every page of the flipbook.
Add a footer the same way
- Place a shape along the bottom edge of the page, the full width of it, and a text box on top with your address, phone number or website.
- Select both, click the ... menu and choose Group.
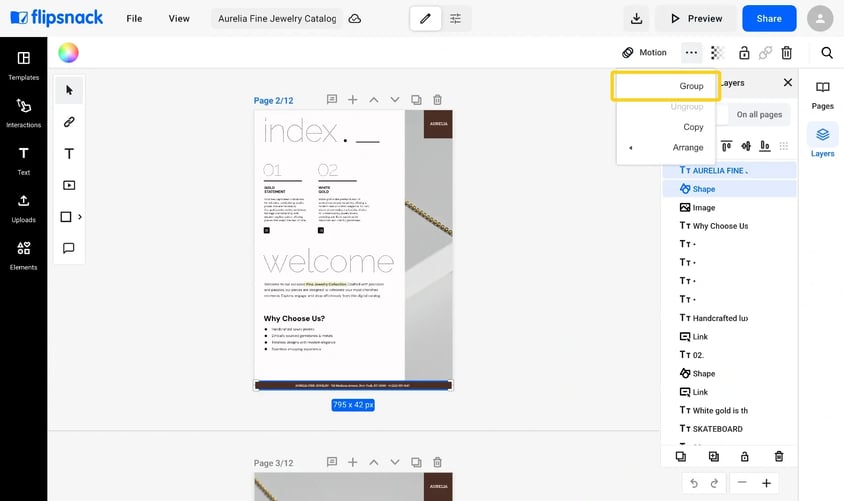
- Click the Add on all pages icon, then Done.
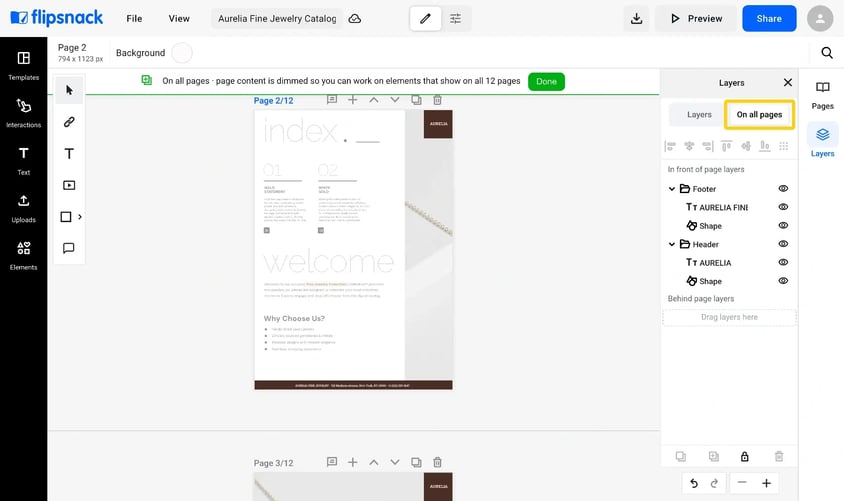
Both groups are now listed in the On all pages tab of the Layers panel, under In front of page layers. Keep them there: anything in Behind page layers sits under your page content, so a full-page photo covers it.
Change it on every page at once
Select the header or footer on any page and edit it: the text, the color, the size or the position. The change reaches every page. A selected master layer has a green outline. A blue outline means you selected a normal layer, and your edit stays on that one page.
Keep it off your cover
- Go to the cover and open the On all pages tab in the Layers panel.
- Right-click the group's row, for example Header.
- Choose Visibility, then Hide on this page. Hide on all pages puts it away everywhere without deleting it.
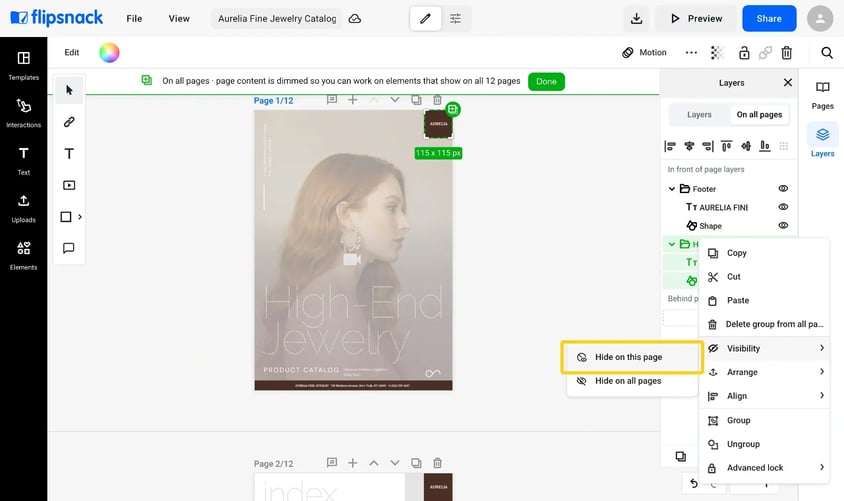
Caution: right-click the row in the tab, not the header on the page. On the page, a right-click hides only the piece you clicked, so the text goes and the shape stays.
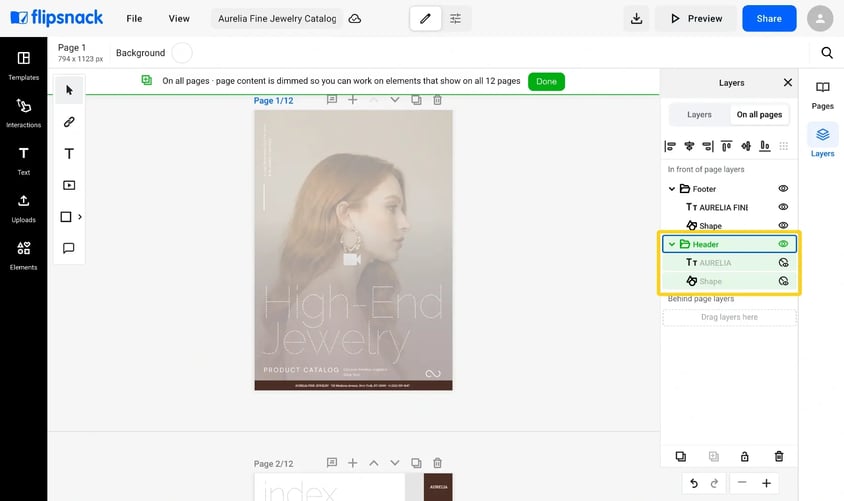
Every other page keeps the header. On the cover, the group's pieces show a crossed-out eye in the On all pages tab. Click it to show the header there again.
Remove it from every page
Right-click the group's row in the On all pages tab and choose Delete group from all pages. It goes from every page at once. To keep it on most pages, hide it on the others instead.
Troubleshooting
- Your header shows on one page only: it is still a normal group. Select it and click the Add on all pages icon at the bottom of the Layers panel.
- Only part of the header repeats: the pieces were not grouped. Group them first, then add the group on all pages.
- The cover still shows the shape, or only the text: you hid one piece from the page. Hide the whole group from its row in the On all pages tab.
- A photo covers your footer: the footer is in Behind page layers. Drag it into In front of page layers in the On all pages tab.
- Your edit changed one page only: you edited a normal layer. Select the master layer, the one with a green outline, and edit that.
- Your Layers panel has no On all pages tab: master layers is not on every account yet. Contact our team to ask about it.
Additional tips / FAQs
- Can my header include a logo? Yes. Group the logo image with the other pieces before you add the group on all pages.
- Can my footer show the page number? Yes. How to automatically number the pages of your flipbooks shows how to add page numbers.
- Can I show a header on odd or even pages only? Not yet. A master layer goes on every page. Hide it on the pages you want to skip.
- Can I find my groups faster in the Layers panel? Rename them, for example Header and Footer. How to rename layers in the Flipsnack Design Studio shows how.
Next steps
- Master layers: add an element to every page at once
- How to automatically number the pages of your flipbooks
- How to select multiple elements and group them together
Need expert support?
Our team is here to help. Connect with our team experts or message us via the live chat for personalized assistance.