
Overview
Integrating Flipsnack with Okta SAML SSO allows organizations to manage user access efficiently, ensuring that employees log in using their organization credentials. This integration enhances security, offers centralized access control, and simplifies user management.
💡 Benefits of setting up Okta SAML SSO
- Access control: decide who reaches Flipsnack from inside Okta.
- Automatic sign-in: users sign in to Flipsnack with their organization account.
- One place to manage: every account is administered from one central location.
Requirements
- Plan: Enterprise: contact sales
- An Okta subscription. You can get a free trial if you don't have an Okta subscription.
Creating the SAML application and adding it to Flipsnack
Here’s how to create and configure a SAML application in Okta:
1. Log in to Okta , and on the left navigation panel, click on Applications, then Create App Integration..jpg?width=720&height=367&name=Screenshot%202025-02-25%20at%2022.46.32-mh%20(1).jpg)
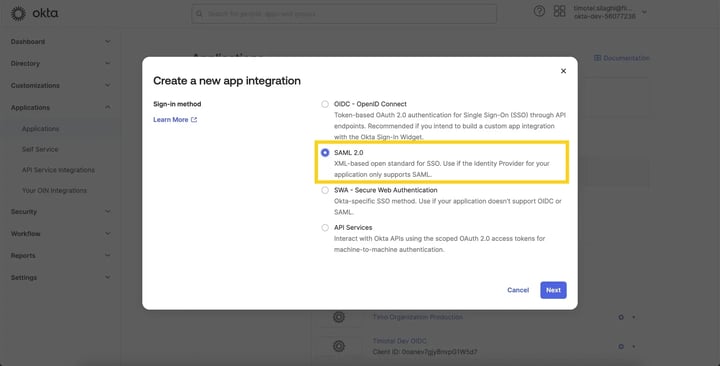
2. In the newly opened pop-up, select SAML 2.0, then click Next.
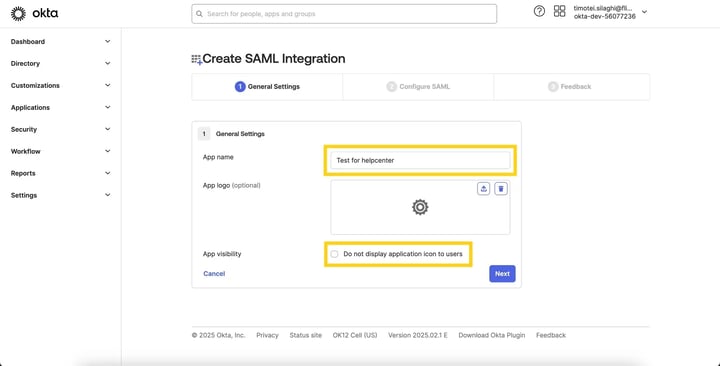
3. You are now ready to complete your SAML integration. In General Settings, you need to fill in your application name. At this step, you can choose an application logo or make other optional changes to the application. Click Next.
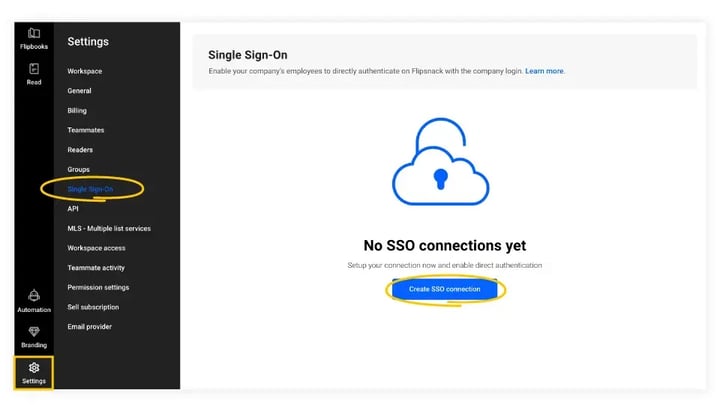
4. Now, switch to the Flipsnack application. In the main dashboard, click on Settings in the lower left corner and then go to the Flipsnack SSO settings.
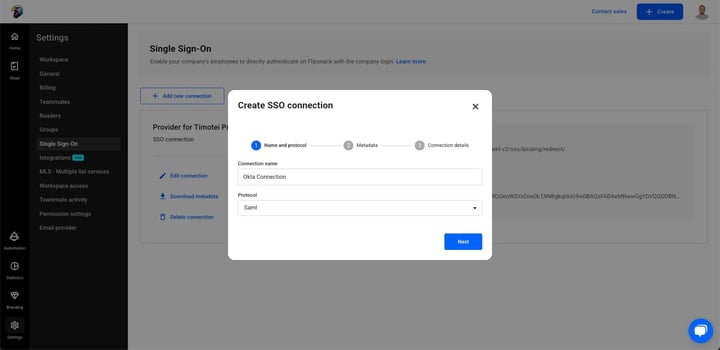
5. Enter a connection name and click Next.
6. Copy the following information into the Okta tab under the “Configure SAML” section. More details are available in Step 4.
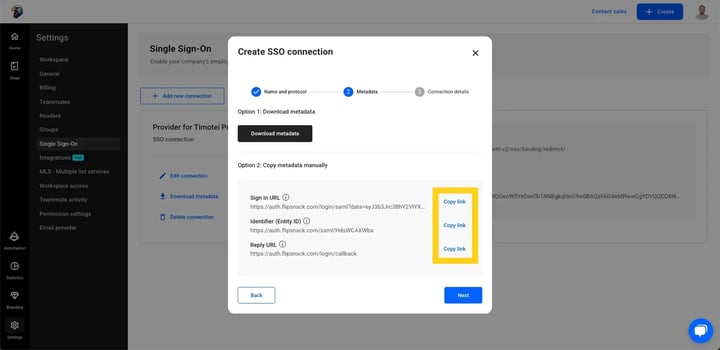
7. At Configure SAML (In Okta), fill in the following information and select Next:
- Single sign-on URL: Found under the “Reply URL” name in Flipsnack
- Audience URI (SP Entity ID): Found under the “Identifier (Entity ID)” name in Flipsnack
Important: Set “Name ID format” to “EmailAdress”.
-mh-jpg.jpeg?width=720&height=350&name=Screenshot%202025-03-03%20at%2011-07-55%20(1)-mh-jpg.jpeg)
8. In the Feedback section, select “This is an internal app that we have created”, then click Finish.
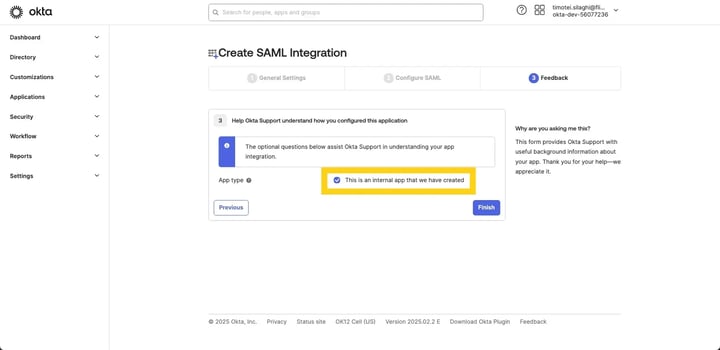
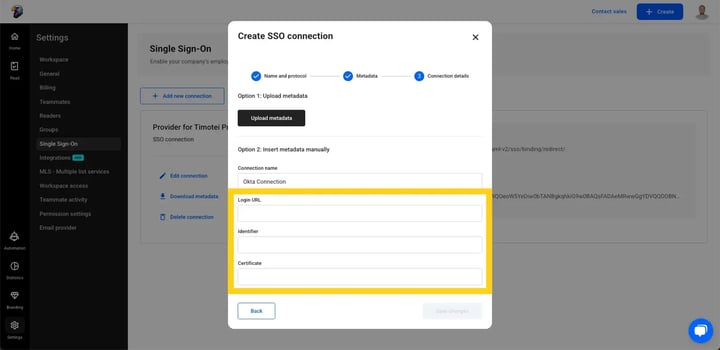
9. For your application to be ready, you must complete the setup instructions. Click on View SAML Setup Instructions and copy the information to configure SAML in Flipsnack.
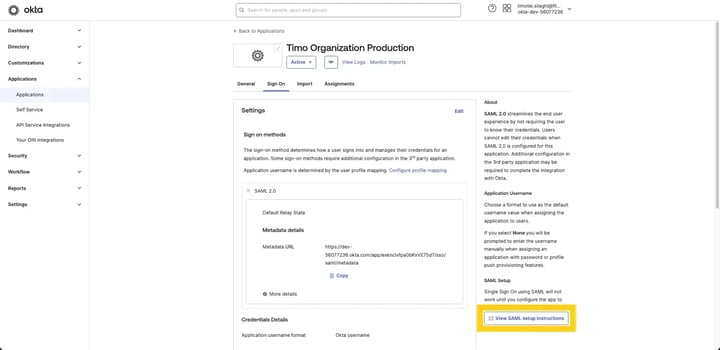
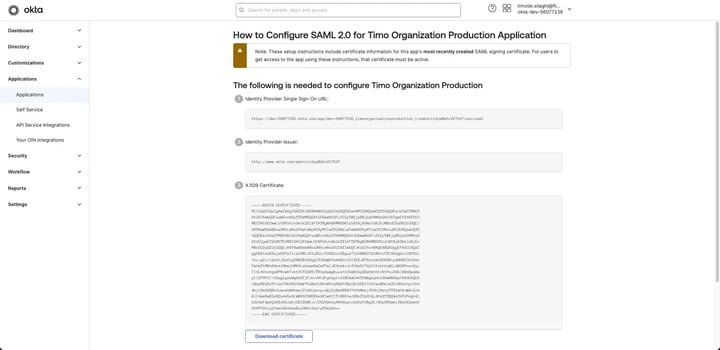
- Login URL -> Identity Provider Single Sign-On URL
- Identifier -> Identity Provider Issuer
- Certificate -> X.509 Certificate
Verifying the connection:
1. While on the SSO page.
2. Copy the Sign-in URL information.
3. Open the browser in incognito mode and paste the link.
4. Log in to your Okta account to verify the connection.
Next steps
Need expert support?
Our team is here to help. Connect with our team experts or message us via the live chat for personalized assistance.