
Overview
A bookshelf groups several flipbooks into one collection that readers open from a single link or embed. To create one, click Create, then Bookshelf, tick the flipbooks you want and click Add to bookshelf. The new bookshelf opens on its Organize tab, where you set the order. Click Share to publish it.
- One link for a whole collection: share or embed every catalog, report or issue at once.
- Your order, your look: arrange the flipbooks and brand the shelf with your logo and colors.
- Stats in one place: see how the bookshelf and each flipbook in it perform.
Bookshelves suit any team that publishes more than one flipbook for the same audience.
👥 Where bookshelves are helpful- Sales teams: one shelf per region or customer, with the catalogs that apply to it.
- Marketing teams: a campaign library of brochures, lookbooks and case studies.
- Publishers: an archive of magazine issues, newest first.
Requirements
- Plan: Pro or higher for bookshelves and their statistics; Business or higher for your own logo and fully branded emails.
- Flipbooks: only flipbooks published as Public or Unlisted can be added.
Create a bookshelf
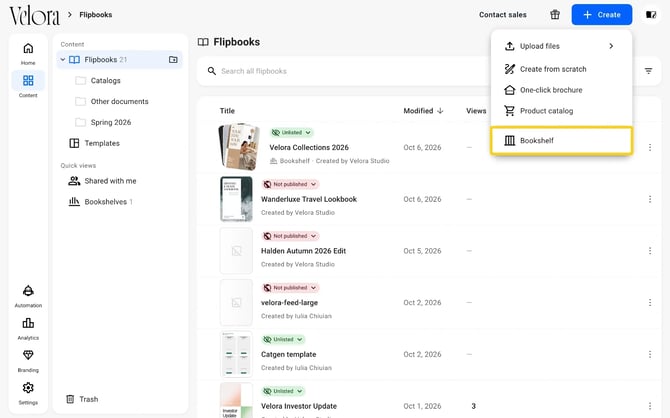
- Go to Content, click Create and choose Bookshelf.
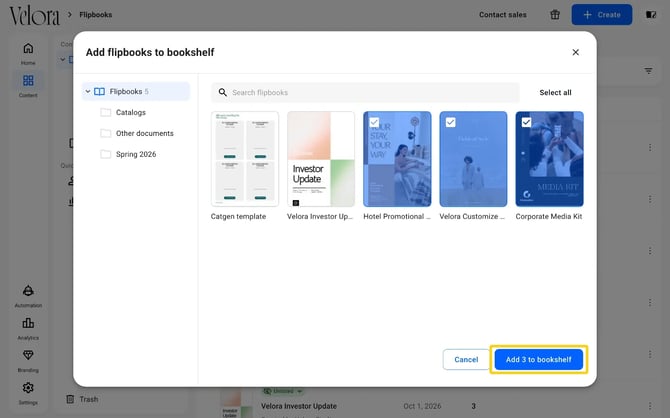
- In Add flipbooks to bookshelf, tick each flipbook you want. Use the folders on the left or Search flipbooks to find them, or Select all.
- Click Add to bookshelf. The button shows how many flipbooks you picked.
The whole flow, from picking the flipbooks to setting their order:
Organize the flipbooks
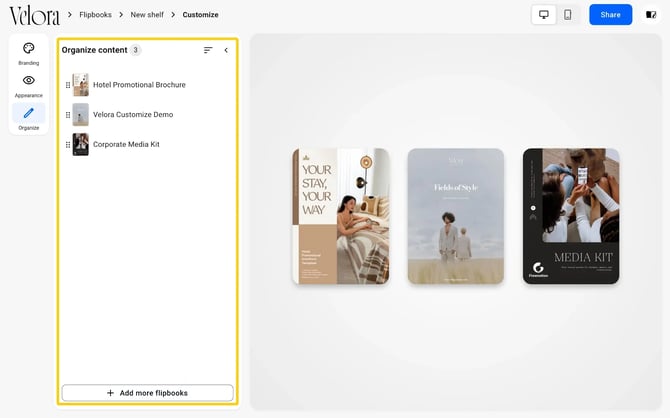
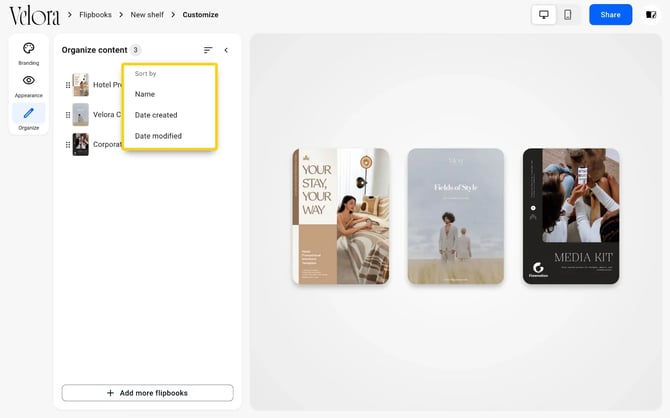
The new bookshelf opens on its Organize tab, with the flipbooks listed on the left and a live preview on the right.
- Drag a flipbook by its handle to change the order.
- To order them automatically, click the sort icon and choose Name, Date created or Date modified.
- Click Add more flipbooks to add others later.
Publish your bookshelf
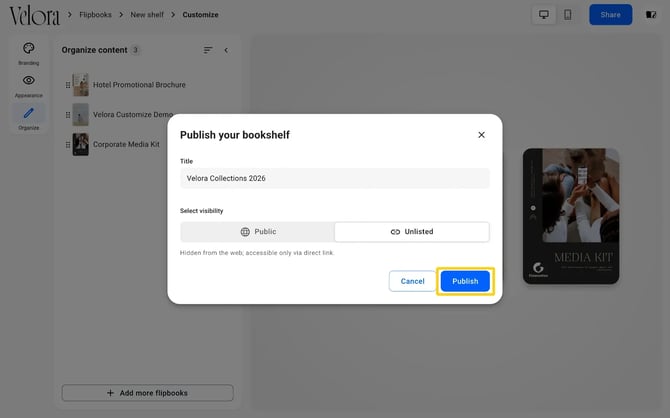
- Click Share in the top-right corner.
- In Publish your bookshelf, enter a Title and choose Public or Unlisted.
- Click Publish.
Here is what an embedded bookshelf looks like:
The bookshelf overview page
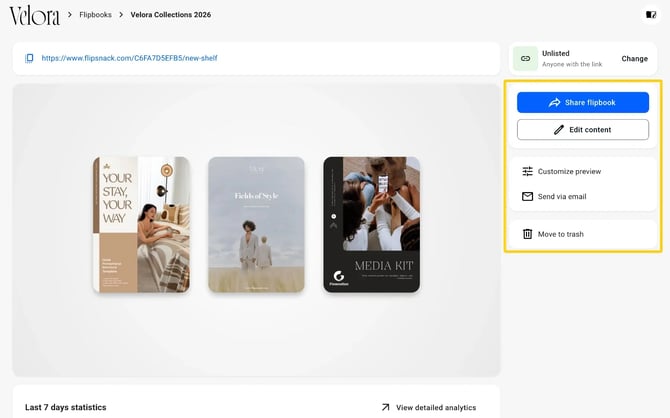
After you publish, the bookshelf opens on its overview page. From here you can copy its link, change its visibility, and use Share flipbook, Edit content, Customize preview, Send via email or Move to trash.
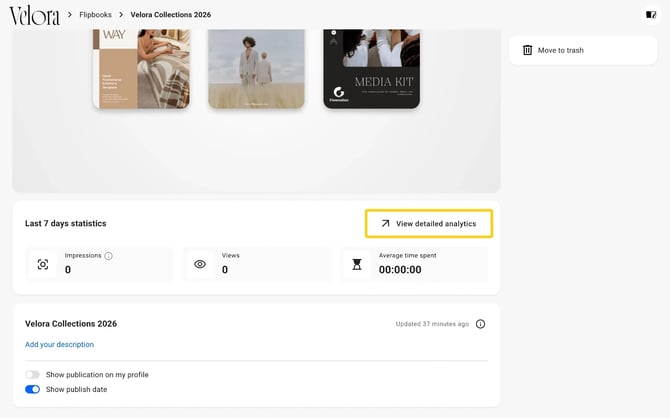
Below the preview, Last 7 days statistics shows impressions, views and average time spent. Next to it you can Add your description, and turn on Show publication on my profile and Show publish date.
Share, embed or send your bookshelf
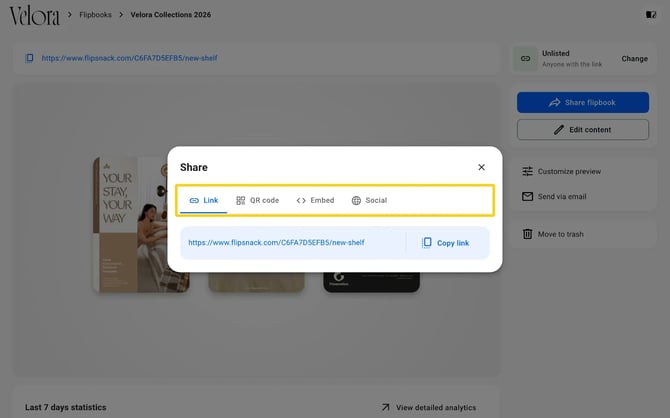
Click Share flipbook on the overview page. The Share window has four tabs:
- Link: copy the bookshelf's link.
- QR code: under Brand QR code, click Add logo to put your logo on it, choose JPG, PNG or SVG and click Download QR code.
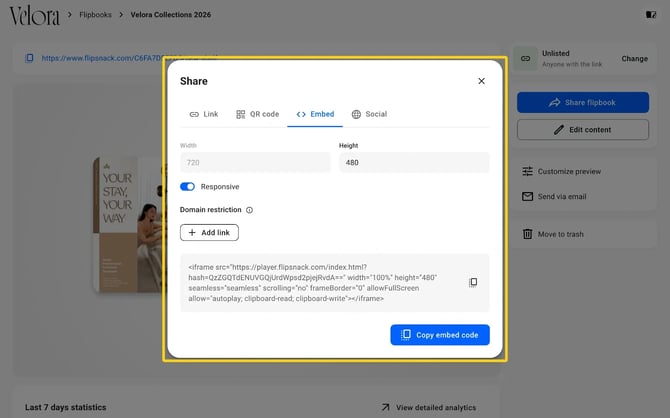
- Embed: set the size and copy the embed code for your website.
- Social: post the bookshelf to social networks.
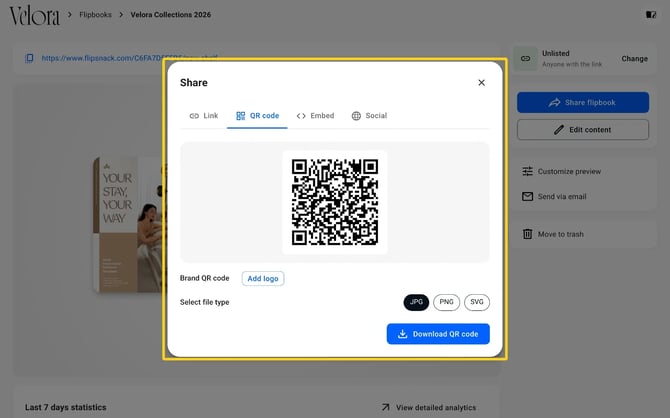
On the Embed tab you can:
- Set the Width and Height, or turn on Responsive.
- Limit the websites that can show the bookshelf: under Domain restriction, click Add link.
- Click Copy embed code.
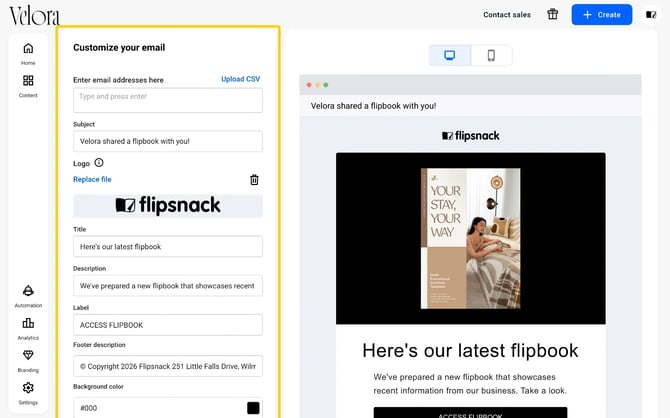
To email the bookshelf:
- Click Send via email on the overview page. A new page opens.
- Add the recipients, or click Upload CSV.
- Edit the subject, logo, title, description, button label, footer and colors.
- Click Send email.
To use your own email tool instead, copy the snippet under Send it using your email client.
Customize the look
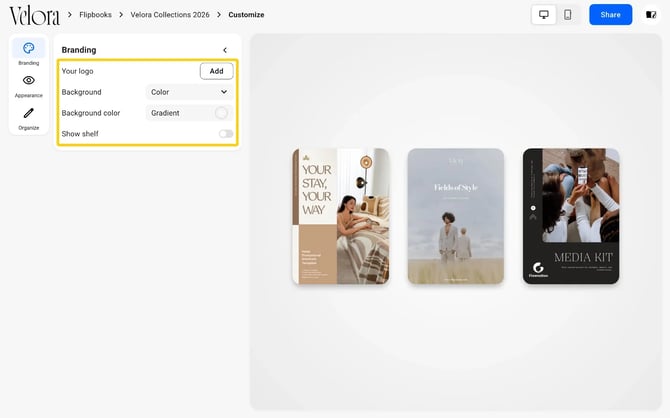
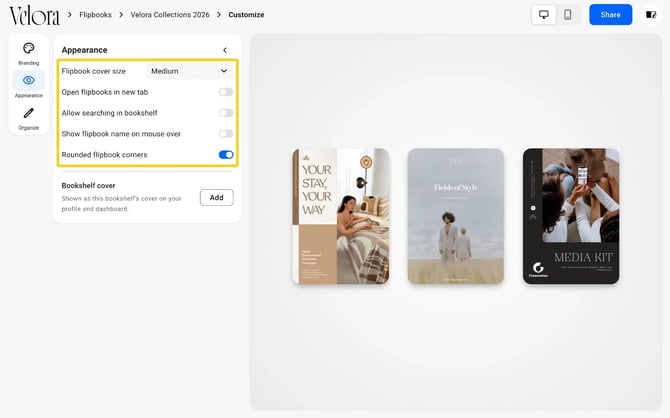
Click Customize preview on the overview page. The Customize page has three tabs on the left: Branding, Appearance and Organize.
Branding sets your logo, the background and whether the shelf itself shows:
- Your logo: click Add to upload it. Business plan or higher.
- Background and Background color: choose the type and the color behind the flipbooks.
- Show shelf: turn the shelf under the covers on or off.
Appearance controls how the flipbooks are laid out and opened:
- Flipbook cover size: Small, Medium or Large, which sets how many covers fit on a row.
- Open flipbooks in new tab.
- Allow searching in bookshelf: adds a search bar to the bookshelf.
- Show flipbook name on mouse over.
- Rounded flipbook corners.
- Bookshelf cover: shown as this bookshelf's cover on your profile and dashboard.
Click Share when you are done to publish the changes.
View analytics
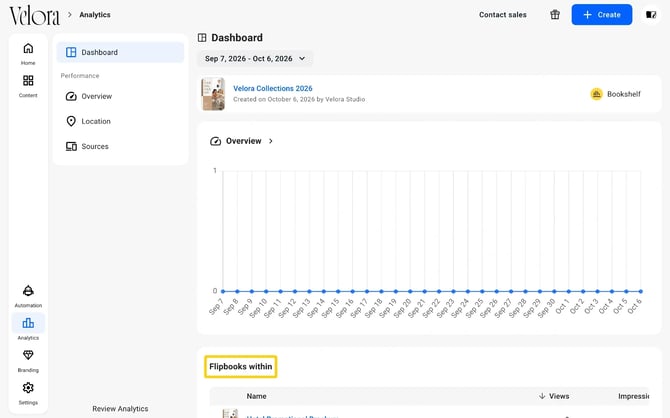
- On the overview page, click View detailed analytics.
The Analytics page shows the bookshelf's Overview, with views, impressions and average time spent, and under Flipbooks within, how each flipbook in it performs. Location and Sources on the left break the numbers down further.
Open and navigate a bookshelf
Readers scroll down a bookshelf to see every flipbook in it. Bookshelves also work with the keyboard and screen readers: press Tab to move between flipbooks and Enter to open one.
Delete a bookshelf
Deleting a bookshelf does not delete the flipbooks in it.
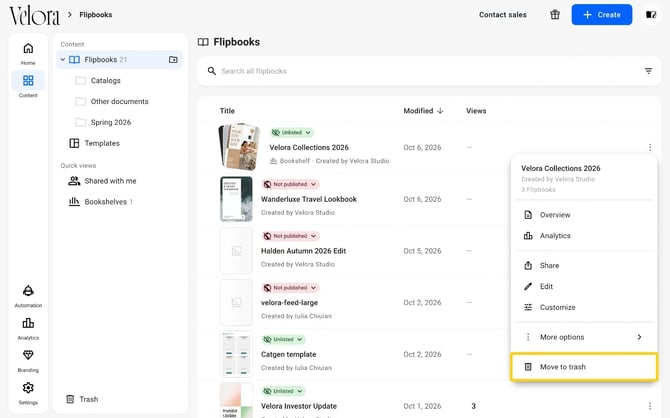
- In Content, open the bookshelf's More options menu and click Move to trash. You can also click Move to trash on its overview page.
Troubleshooting
- A flipbook is missing from Add flipbooks to bookshelf: only flipbooks published as Public or Unlisted are listed. Publish it first.
- Customize options do not work on an older bookshelf: republish it. Click Customize preview, then Share, then Publish.
- A flipbook on the shelf is visible to the wrong people: check that flipbook's own visibility, or remove it from the bookshelf on the Organize tab.
- The embedded bookshelf does not show: check Domain restriction on the Embed tab.
Next steps
- How to brand your bookshelf: logo, colors, and layout
- Add your bookshelves under your custom domain
- Add teammates to create bookshelves together
- How to generate a QR code for your flipbook
Need expert support?
Our team is here to help. Connect with our team experts or message us via the live chat for personalized assistance.