
Overview
A master layer is one element that shows on every page of your flipbook. Put anything on it once, a logo, your address, page numbers or a watermark, and it appears in the same spot all the way through. It stays a single layer, so editing it on any page updates every page at the same time, and deleting it clears it everywhere.
💡 Key benefits
- One edit, every page: change the text, font, size or position once, and every page follows.
- Length stops mattering: a 10-page brochure takes the same effort as a 5,000-page catalog.
- Your call, page by page: leave a master layer off any page it does not suit, like your cover.
- In front or behind: keep master layers on top of your design, or tuck them behind it as a watermark.
- Nothing left behind: delete a master layer once and it is gone from every page.
Master layers suit anything that repeats: a logo, a running header or footer, page numbers, a watermark, or a confidentiality line. If you would otherwise copy it onto every page by hand, it belongs on a master layer. They pay off most when a flipbook runs long enough that copying gets tedious, and when the repeated element is likely to change later.
👥 Where it helps
- Catalog and brochure publishers: keep a header and page numbers running through hundreds of pages.
- Brand and marketing teams: put your logo in the same corner of every page, and update it in one place.
- Sales and internal comms teams: add a confidentiality line or a document title to every page.
Requirements
- Plan: Starter, Pro, Business or Enterprise: check your plan
- Enterprise: Your Customer Success Manager or account manager activates master layers. If the Add on all pages icon is missing, ask them to turn the feature on.
Add an element to every page
Start with the element you want to repeat. It can be a text box, an image, a shape, or a group of elements treated as one.
- Add it to any page and select it.
- In the Layers panel footer, click the Add on all pages icon.
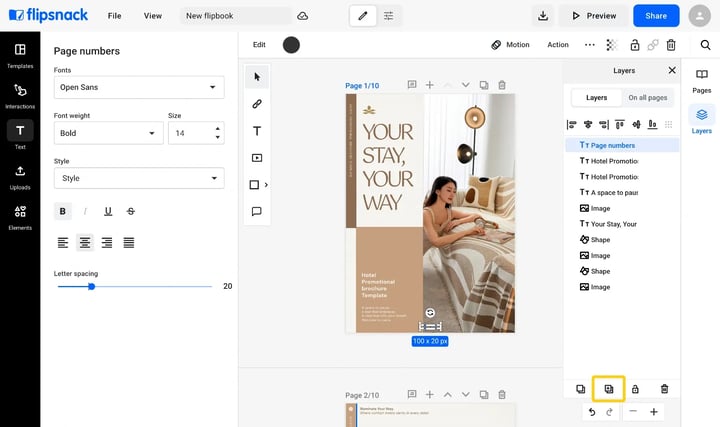
The page content dims and a green bar appears across the top: On all pages · page content is dimmed so you can work on elements that show on all pages. That dimming is how you know you are editing your master layers and not a single page. Click Done to come back out.

That is it. The element is on every page. Repeat for anything else you want to carry through the flipbook.
How to spot a master layer
Select an element and look at the outline around it. Green means a master layer, on every page. Blue means a normal layer, on this page only. It is worth checking before you edit, because the two can look identical on the page.
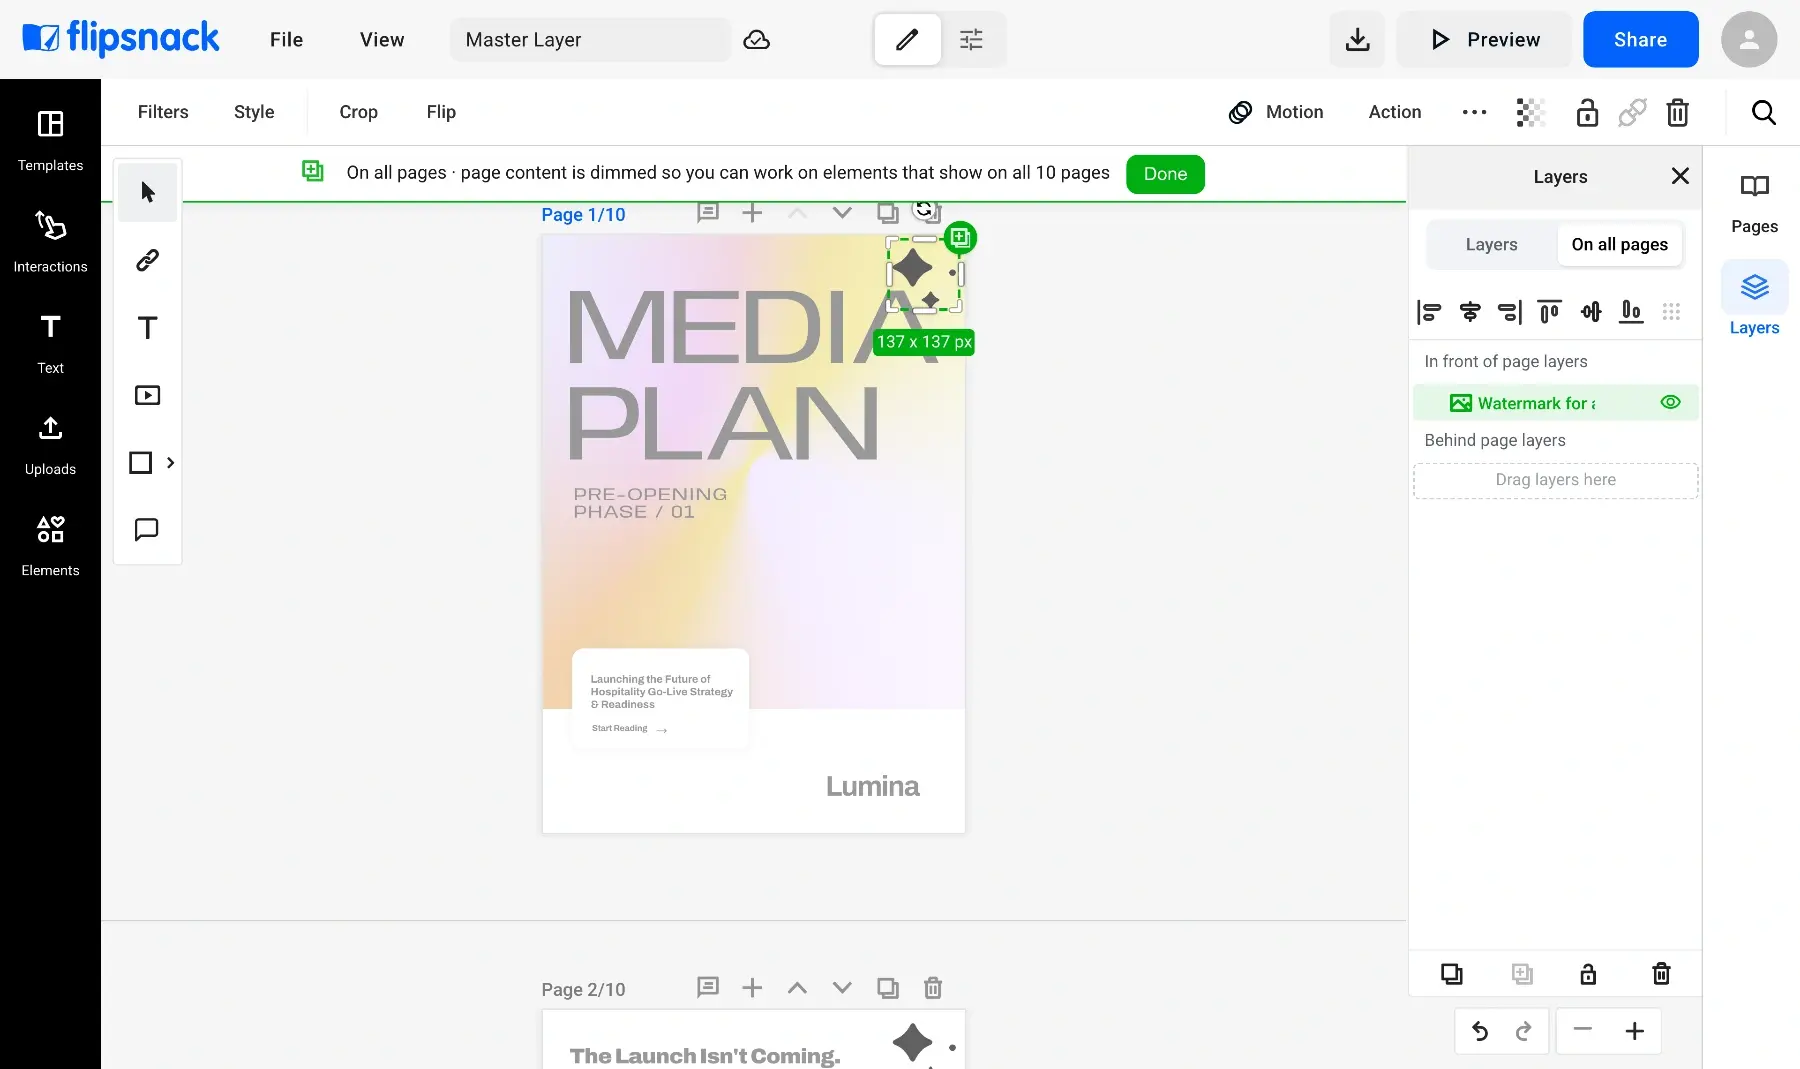
The Layers panel carries the same split across two tabs. Layers lists what is on the page you are looking at; On all pages lists your master layers. Open the second tab whenever you want to work on them as a set.

Edit a master layer
Go to any page, select the master layer, and edit it like any other element: the font, the size, the color, or where it sits. Your change reaches every page as you make it, so there is no page-by-page pass to do afterwards.

Hide a master layer on one page
Covers usually look better without a header or a page number on them, so you can leave a master layer out of any page you like. Right-click it, go to Visibility, and choose Hide on this page.

To put it away everywhere without losing it, choose Hide on all pages instead. Either way the layer stays in the On all pages tab with a crossed-out eye next to it, so you can always see where it is switched off and switch it back on.
Put a master layer behind your page content
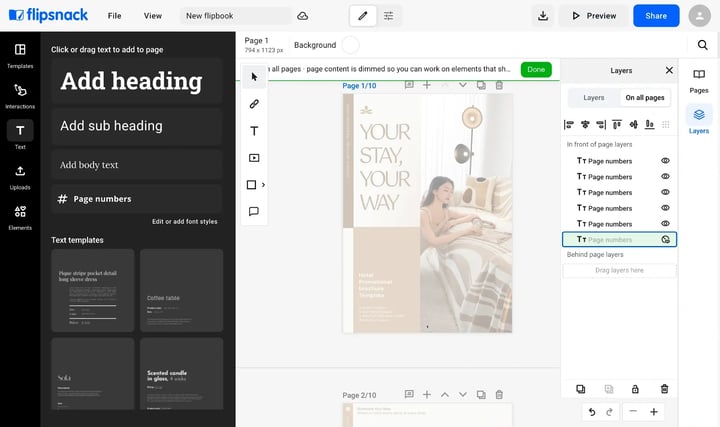
Master layers sit on top of everything else by default, which is right for a header and wrong for a watermark. Open the On all pages tab and you will see two groups: In front of page layers and Behind page layers. Drag your master layer into Behind page layers and your page content sits on top of it from then on, including anything you add later.

Remove a master layer
Right-click the master layer and choose Delete from all pages. It goes from every page at once, so there is nothing left to tidy up afterwards. If you only want it gone from one page, hide it there instead.

Troubleshooting
- Your element shows up on one page only: it is still a normal layer. Select it and click the Add on all pages icon in the Layers panel footer.
- Your master layer is missing from a page: it is hidden on that one. Open the On all pages tab and click the crossed-out eye next to it.
- A master layer is covering your design: drag it into Behind page layers in the On all pages tab.
- Your edit did not reach the other pages: the outline was blue, so you edited a normal layer that happens to look the same. Check for a green outline before editing.
- Only part of your header repeats: the pieces were not grouped. Group them first, then add the group to all pages.
Additional tips / FAQs
- Can I put a master layer on the odd or even pages only? Not yet. A master layer goes on every page, in double page mode too. Hide it on the pages you want to skip.
- Can I change a master layer on just one page? Not yet. An edit reaches every page.
- Does this work with page numbers? Yes, a page number is a master layer like any other. How to automatically number the pages of your flipbooks walks you through it.
- Can I turn several elements into one master layer? Yes. Group them first, then add the group to all pages.
- What happened to the old copy-to-every-page option? It copied your element onto each page separately, so a header in a 300-page catalog had to be fixed 300 times. The Add on all pages icon replaces it and creates a single master layer instead.
Next steps
- How to automatically number the pages of your flipbooks
- Page headers and footers across a whole flipbook catalog
- Arranging elements on a page in Flipsnack's Design Studio
- How to rename layers in the Flipsnack Design Studio
Need expert support?
Our team is here to help. Connect with our team experts or message us via the live chat for personalized assistance.