
Overview
When several teams share one Flipsnack subscription, the Organization page is where you keep them in order. If you own an active Organization plan, you can add and remove teammates, set their roles across workspaces, and switch between those workspaces without leaving the page. It also shows how many workspaces, users and reader-type users your organization has in total.
The Organization plan is recommended for organizations that need multiple teams working on Flipsnack separately.
This article will walk you through managing your teams if you are the owner of an Organization plan. It will show you an easy way to access your Organization page, where you can see all workspaces or add workspaces within the limit you set with your account manager. And how to manage your teams: add, remove, and set roles for each teammate by switching from one workspace to another.
How to access the Organization page
Important: In order to access the Organization page, you need to have an active Organization plan on your account. You also need to be the owner of the workspace to have access to everything.
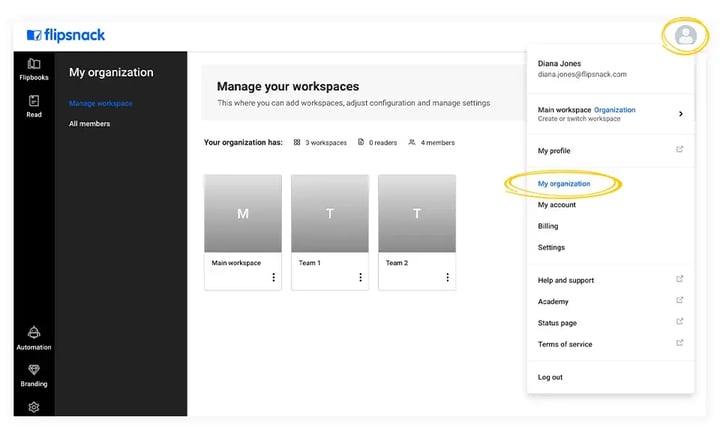
If you meet the criteria, you’ll see this page listed as My organization in the main menu on the left, and you can access this menu by clicking on your profile image.
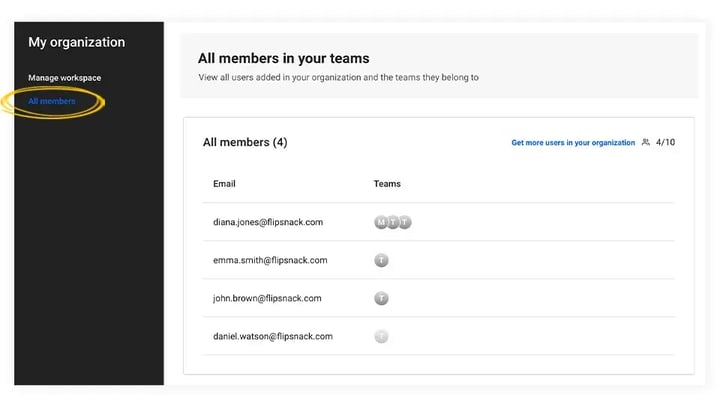
The page lives at /my-organization/manage-workspaces. It is not listed in the Settings navigation, so going through Settings will not find it. Its own left rail reads My organization, with Manage workspace and All members under it.
How to manage teams
On the Organization page, you have two distinct areas:
- Manage workspace
- All members
Manage workspace: set up your workspaces and teams
At the top, you can see a summary of your organization: Number of workspaces, number of users, and also how many reader-type users have been added.
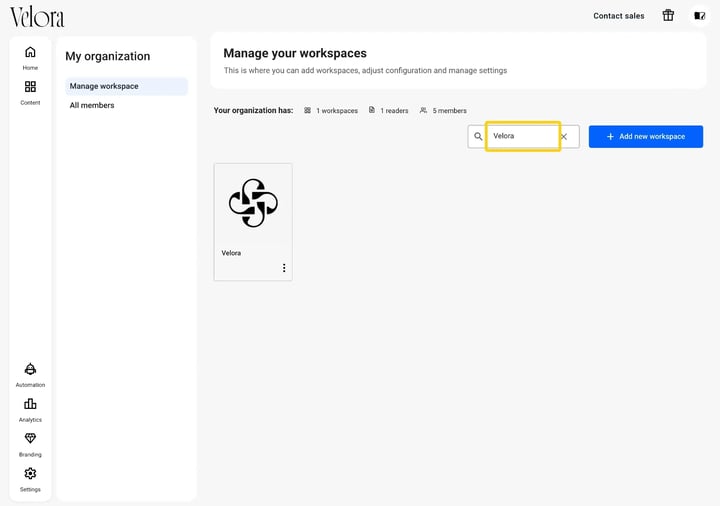
Under the heading Manage your workspaces, a search field sits to the left of Add new workspace. Its placeholder reads Search workspaces. Type a workspace name there to reach it without scrolling the list.
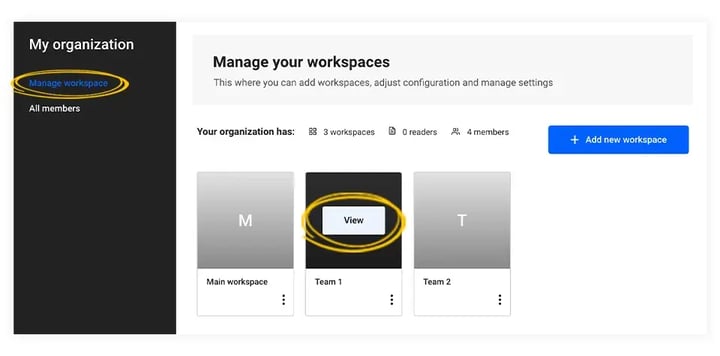
If you want to see the teammates that belong to one team or edit, remove, or update their roles, just click on the listing.
Now just click on the Add new member button, type in the email address of the person you want to add in that specific workspace, assign them a role, then click Send invite.
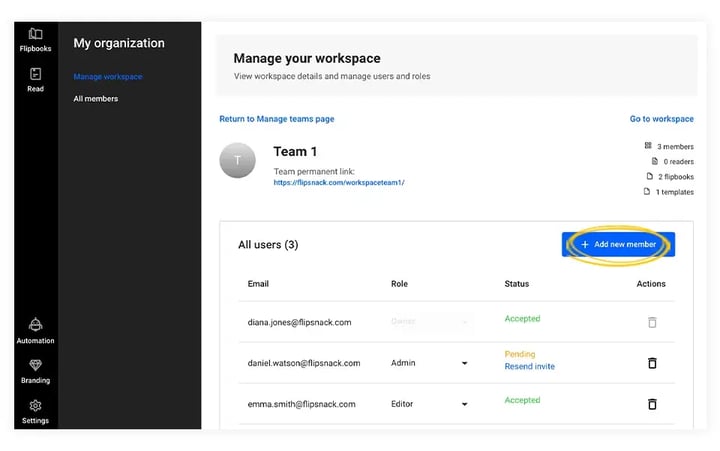
After the person accepts your invitation, the status will change from Pending to Accepted.
Important: You can only add as many members as you agreed upon with your account manager. Once you reach that limit, instead of the Add new member button, you'll see the message: "Get more users in your organization".
If you want to remove a teammate or update their role, you can do all that here.
You can see the total number of teammates on the main My organization page, and you will see the total number of users added to each workspace as soon as you click on the workspace listing. The number that you see on the My organization page will not count users twice if they are added to 2 or more workspaces.
If a user downgrades to a plan that does not support teammates, all teammates will be deactivated. In this case, the user can decide how to proceed: upgrade to a plan that supports teammates or delete the deactivated teammates. Check out our deactivate teammates instructions.
In any case, when we deactivate teammates, we notify users via email.
View all teammates from the entire organization
If you want to see an overview of all of your teammates and the team(s) they belong to, go to All members.
If you want to restrict the access of your team to some features, you should check the feature management article.
We hope you find the article useful. If you have any questions about the Organization plan and team management, don’t hesitate to contact our support team, as they are always here to help.
Next steps
- Organization plan: a getting started guide for admins
- Your guide to the Flipsnack Organization plan for teams
- How to add teammates to your Flipsnack workspace
Need expert support?
Our team is here to help. Connect with our team experts or message us via the live chat for personalized assistance.