Table of contents
Overview
In a professional B2B environment, brand consistency is key to building trust, especially when sharing sensitive or internal documents. Previously, custom domains (CName) were primarily associated with public profiles and publications.
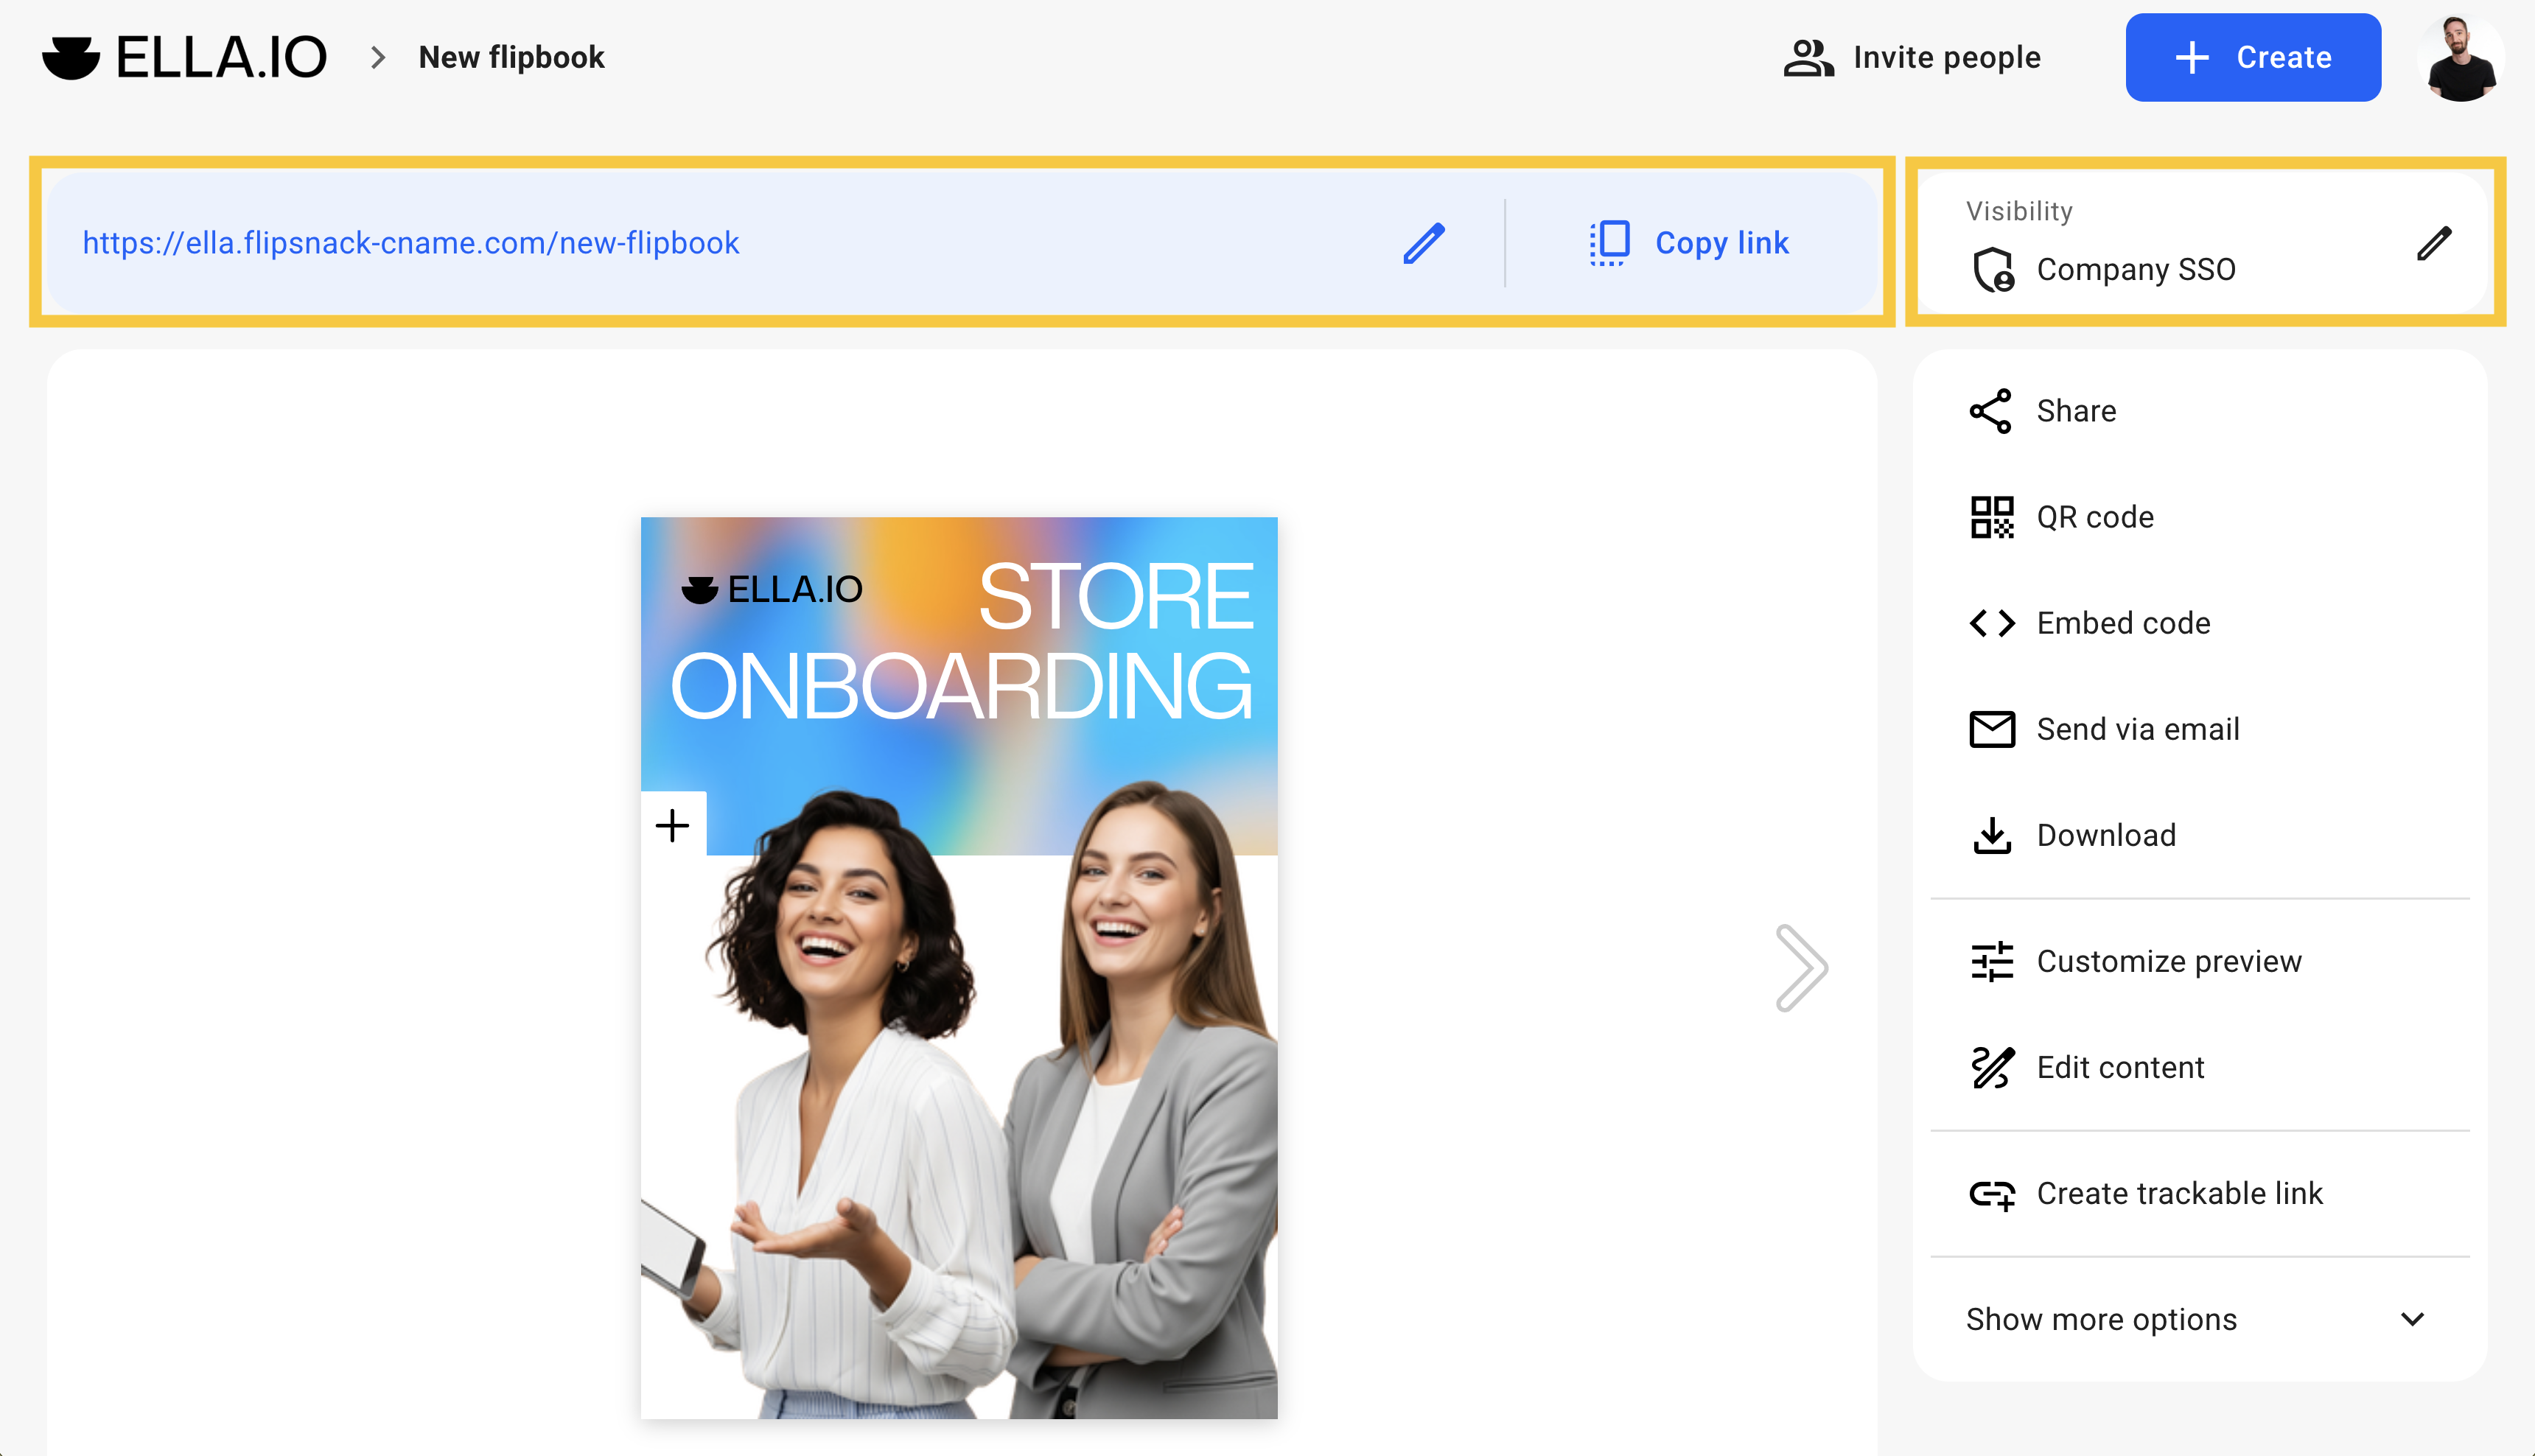
With this update, your custom domain is now automatically applied to flipbooks shared via Single Sign-On (SSO) or One-Time Passcode (OTP). This ensures that even your most secure, private content is hosted under your own URL, reinforcing your company's identity and providing a seamless transition for employees and partners.
Requirements
Plan: Business and Enterprise with SSO/CName features
To use this feature, you must have:
-
A custom domain or subdomain already configured in your Flipsnack workspace.
-
The Single Sign-On (SSO) or OTP visibility settings enabled for your flipbooks.
Use Cases
-
Internal Communications: Share an employee handbook via SSO where the URL remains
internal.yourbrand.cominstead of a generic Flipsnack link. -
Sales Materials: Send private, passcode-protected proposals to clients that stay entirely within your branded ecosystem.
Instructions
Once your custom domain is set up, the application to private flipbooks is automatic. However, here is how to ensure your flipbook is set up to utilize it:
Step 1: Verify your Custom Domain status
-
From the Homepage, click on Branding in the Side panel.
-
Navigate to the Settings tab.
-
Ensure your Custom domain is verified and active.
Step 2: Set Flipbook Visibility
-
Go to your Flipbooks list and select the publication you wish to share.
-
Click Publish or Edit to reach the Customize page.
-
In the Visibility section, select Private.
-
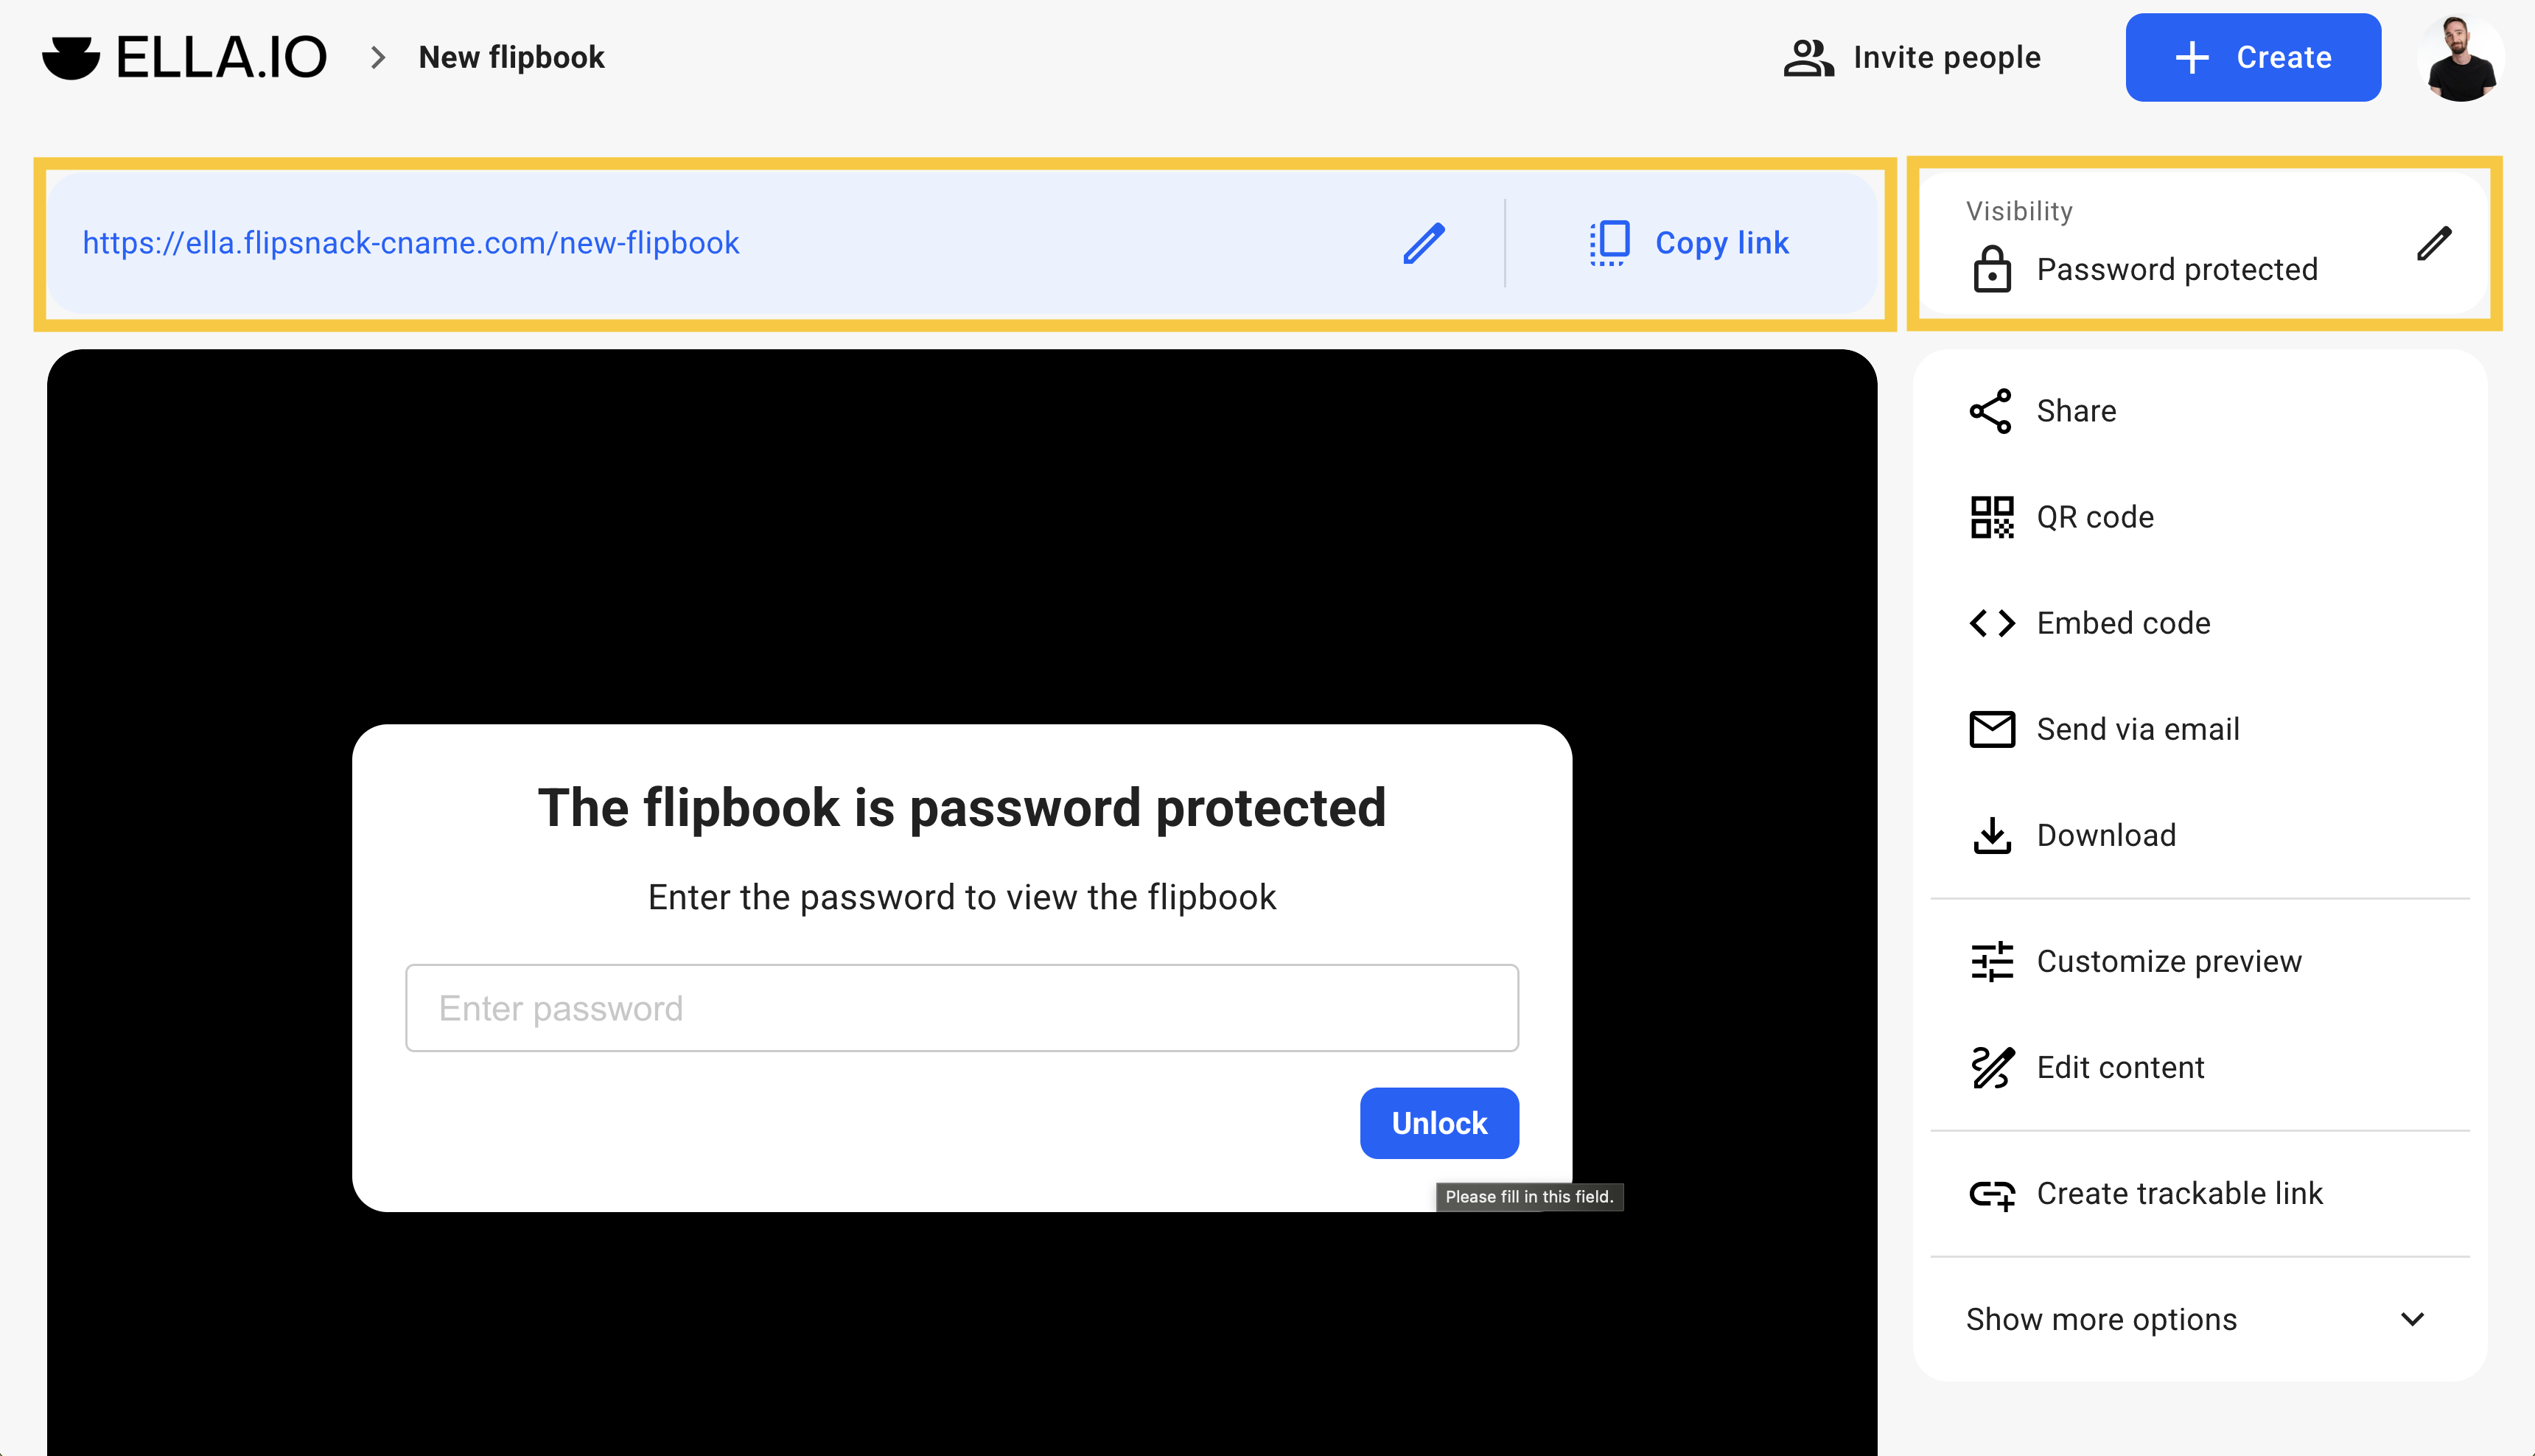
Choose either Single Sign-On (SSO) or Passcode (OTP).
-
Click Publish or Update.
Step 3: Share the Branded Link
-
Copy the direct link provided in the share modal.
-
Notice that the URL now uses your custom domain (e.g.,
catalog.yourbrand.com/v/unique-id) instead of the default Flipsnack domain.
Additional Tips
-
Consistency: This update applies to both the viewer interface and the login screens associated with SSO/OTP, ensuring the user never feels like they have left your corporate environment.
-
Favicon: Ensure you have uploaded a custom favicon in the Branding section so the browser tab also reflects your brand when viewers open private links.
Troubleshooting
What to do if the link still shows flipsnack.com:
-
Check Propagation: If you just set up your CName, it may take up to 48 hours for DNS changes to propagate globally.
-
Re-publish: Try toggling the visibility back to Draft and then re-publishing as Private to refresh the link generation.
-
Workspace Check: Ensure the flipbook is located in the specific workspace where the custom domain was configured.
Frequently Asked Questions
Does this work for password-protected flipbooks? Currently, this specific update focuses on SSO and OTP sharing methods to provide enterprise-grade branding for authenticated viewers.
Do I need a separate SSL certificate? Flipsnack provides a standard SSL for your custom domain, but Enterprise users can also upload their own self-managed certificates for full security control.
Next steps
Need help setting up your Custom Domain or SSO?
Our team is here to help. Connect with our team experts via the in-app chat for personalized assistance!