
Overview
Integrating HubSpot with your Flipsnack account allows you to track the performance of your digital catalogs, improve lead capture, and track page views and user interaction. This guide will walk you through the process of installing the HubSpot tracking code in Flipsnack using Google Tag Manager (GTM).
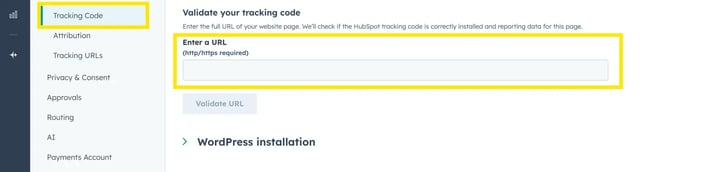
Warning: After installing the HubSpot tracking code, there may be a short delay before it becomes visible and active on your profile and flipbooks. To verify the installation enter the flipbook URL under the Validate your tracking code section.
💡 Benefits of integrating HubSpot with your account
- Track user interactions and engagement in Flipsnack using HubSpot Analytics.
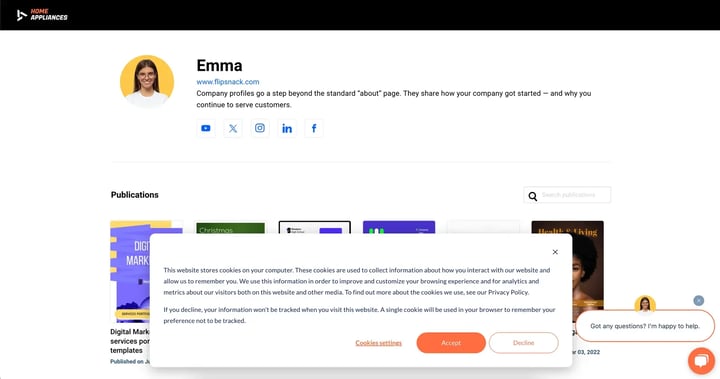
- Enable HubSpot chat widgets for real-time customer engagement.
- Add a HubSpot-powered cookie banner to meet compliance requirements.
- Automate lead tracking and marketing workflows.
Key HubSpot Analytics metrics
Once integrated, HubSpot Analytics allows you to track and analyze various metrics to understand user behavior and improve engagement. Some key metrics include:
- Sessions: Measure the number of visits to your Flipsnack catalogs.
- Page Views: Track how many times a catalog page has been viewed.
- New vs. Returning Visitors: Identify how many users are first-time viewers vs. repeat visitors.
- Bounce Rate: See the percentage of visitors who leave without interacting further.
- Traffic Sources: Understand where your visitors are coming from (organic search, social media, direct, etc.).
- Time on Page: Measure how long users spend on each catalog.
- Engagement Rate: Analyze how users interact with different elements of your flipbooks.
- Conversion Tracking: Monitor form submissions and lead captures linked to your catalogs.
These insights help optimize your content, improve user engagement, and enhance marketing strategies.
Requirements
- Plan: Enterprise
- HubSpot: Marketing Hub (Starter, Pro or Enterprise)
- Access to Google Tag Manager (GTM)
With this integration, you can:
- Track the performance of your catalogs through HubSpot Analytics.
- Add chat widgets to your Flipsnack catalogs.
- Add a HubSpot cookie banner inside your Flipsnack catalog links.
Before using any of HubSpot’s features, you need to connect HubSpot and Flipsnack using the tracking code provided by HubSpot. This will be done by integrating Google Tag Manager (GTM).
Note: This integration applies to the Flipsnack profile (Flipsnack / custom domain) and not inside the flipbook player. To add Hubspot to your flipbooks, you need to integrate Google Tag Manager on the customize page.
Get your HubSpot tracking code
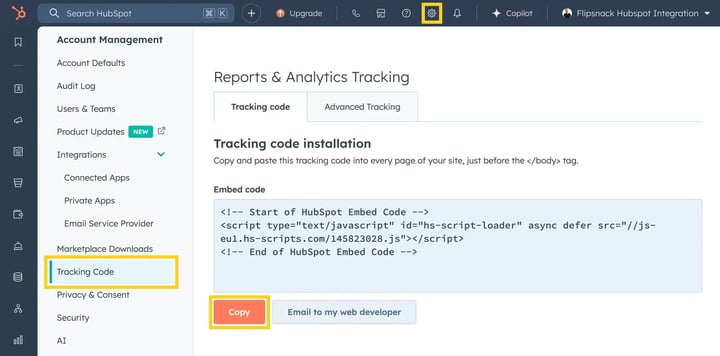
- Log in to your HubSpot account and click the settings icon in the main navigation bar.
-
Navigate to Tracking & Analytics settings:
-
If you have Marketing Starter or HubSpot’s free tools, go to Tracking Code in the left sidebar.
- For all other subscriptions, go to Tracking & Analytics > Tracking code in the left sidebar.
-
- In the Embed code section, click Copy to copy your tracking code.
Now that you have the tracking code, you can add it to Google Tag Manager as a Custom HTML tag.
Add the tracking code in Google Tag Manager
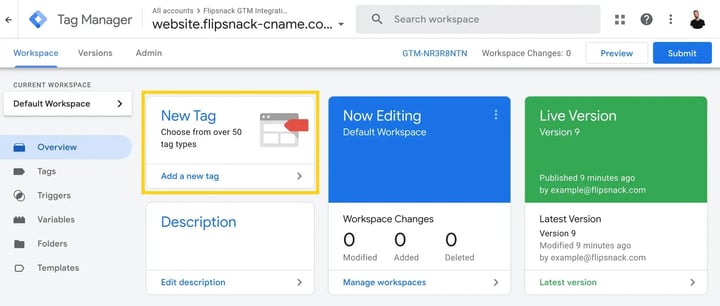
- Log in to Google Tag Manager and select the container associated with your Flipsnack account.
- In the left sidebar menu, navigate to Overview, then click New Tag.
- Click Tag Configuration.
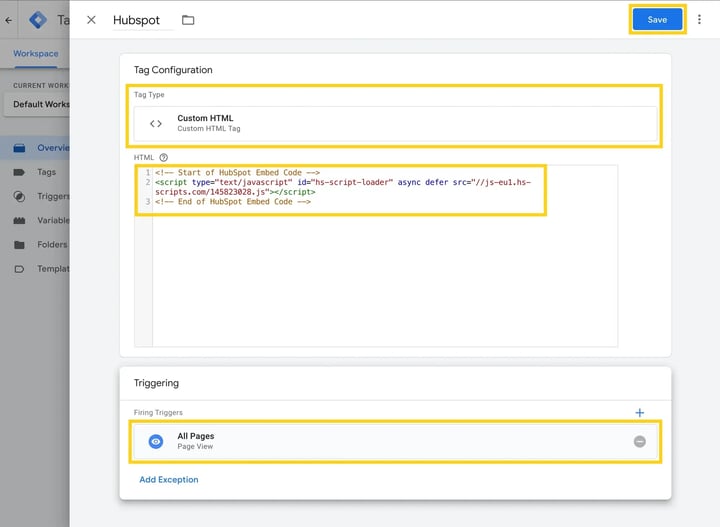
- Select Custom HTML Tag, then give your tag a descriptive name.
- Paste the tracking code into the HTML field.
- Click Triggering and set the rule to All Pages so that the tag fires on all page where the Google Tag Manager code is present.
- Click Save, then in the upper-right corner, click Publish.
Final configuration in HubSpot
-jpg.jpeg?width=720&height=444&name=Screenshot%202025-02-18%20at%2014-48-10-mh%20(1)-jpg.jpeg)
- Return to your HubSpot account and navigate to Tracking & Analytics settings.
- Click Advanced Tracking.
- Under Additional site domains, click + Add domain, then enter your Flipsnack custom domain. If you don't have a custom domain add flipsnack.com and player.flipsnack.com.
-
Adjust the settings based on your setup:
-
Enable Limit cookies to subdomains if you use a subdomain for your account. This will show the subdomain you are using as a source in the analytics tools.
- Enable Automatic cross-domain linking if you use multiple domains or don’t have a custom domain set up.
-
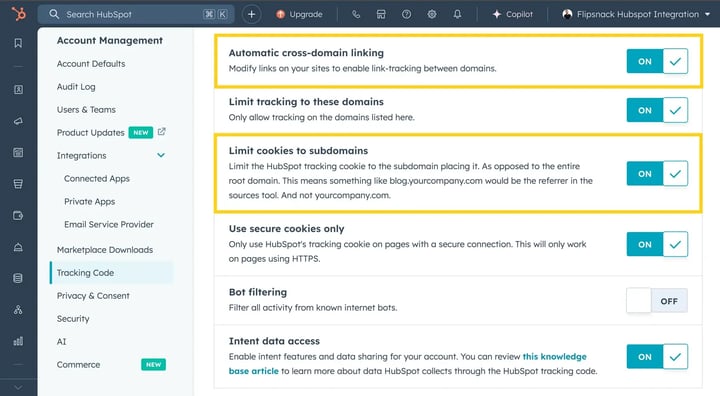
Once configured, HubSpot will begin collecting visitor data from your Flipsnack catalogs. This data can be used for lead generation, automation workflows, and analytics.
Next steps
- Embedding Flipsnack flipbooks in HubSpot landing pages for a seamless content experience.
- Adding a HubSpot chat widget to engage visitors directly on your catalogs.
- Creating a HubSpot cookie banner to enhance compliance.
Need expert support?
Our team is here to help. Connect with our team experts or message us via the live chat for personalized assistance.