How to integrate HubSpot with Flipsnack lead forms
Learn how to integrate HubSpot with Flipsnack lead forms to sync new leads into your CRM. Step-by-step setup guide for Enterprise users.
Table of contents
Overview
Capture high-intent leads right where they engage most, inside your flipbooks. By integrating HubSpot with Flipsnack lead forms, you can seamlessly collect contact info and send it directly to your CRM without extra tools or landing pages.
Perfect for marketing, sales, and operations teams using HubSpot, this integration helps you shorten the path from interest to action.
Common use-cases
-
Gated product content: Lock brochures or spec sheets behind a lead form
-
Event follow-ups: Use flipbooks as interactive takeaways from trade shows
-
Lead magnets: Offer valuable content in exchange for contact info
-
Outbound campaign tracking: Measure engagement from sales content
Key benefits
-
Lead capture in context: Collect leads while they engage with your content
-
Automatic sync: Every form submission becomes a new HubSpot contact
-
Property mapping: Align form fields with your CRM structure
-
Better attribution: Use "Flipsnack integration" as a reliable workflow trigger
Requirements
Plan: Available for all plans including free accounts, until 1st ofJuly 2026
Integration: HubSpot account
Step-by-step guide
Add a lead form to your flipbook
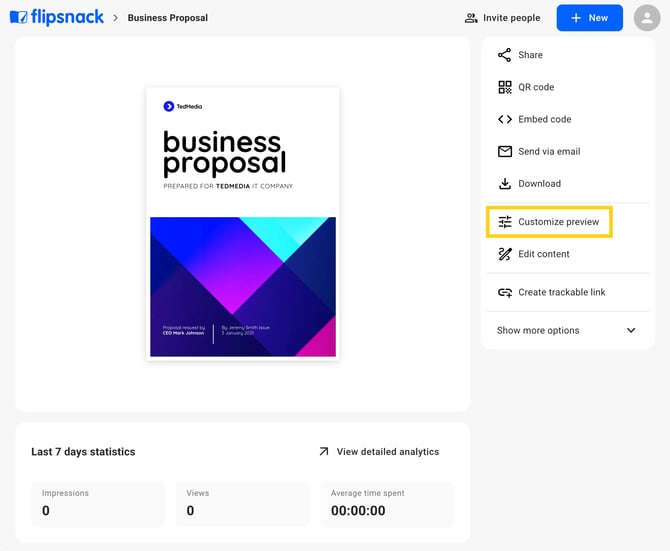
1. Open your flipbook and go to the Customize page

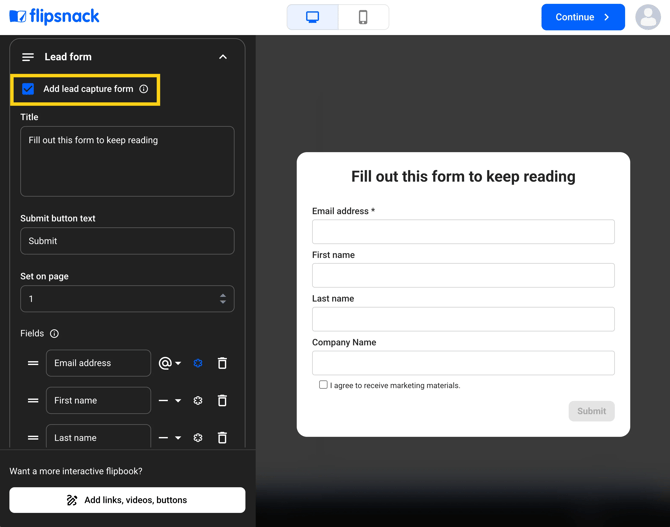
2. Scroll to the Lead form section in the left panel
3. Enable the form and configure the title, fields, and button text. Add a privacy policy link and enable GDPR consent if you need to.
4. Choose the exact page where the form should show up and add your fields.

Connect your HubSpot account
1. In the same Lead form panel, click on the HubSpot switch.
.png?width=670&height=551&name=Screenshot%202025-11-17%20at%2011.05.32-mh%20(1).png)
2. You'll be taken to HubSpot to choose your account and approve permissions.
.png?width=670&height=359&name=Screenshot%202025-11-17%20at%2011-55-12-mh%20(1).png)
3. After confirming, you'll be redirected back to Flipsnack.

Note: You can also connect HubSpot via Settings > Integrations > HubSpot
Map form fields to HubSpot properties
1. In the mapping panel, match Flipsnack form fields to HubSpot Contact properties.
.png?width=670&height=551&name=Screenshot%202025-11-17%20at%2011.05.32-mh%20(2).png)
2. Use the search bar to find your fields.
3. Click Save changes.

Note: As of now only Contact Properties are supported.
Test your integration
1. Preview your flipbook, and fill out the form with a test email.

2. Submit the form and check HubSpot > Contacts.

3. New entries will show up with the Record Source as "Flipsnack integration"
Additional tips / FAQs
-
Place the form a few pages in to filter for higher intent
-
Use descriptive field labels for better CRM filtering later
-
Make sure your HubSpot role includes integration permissions
Next steps
Useful resources
Dive deeper into setup, publishing, and customization
Need expert support?
Our team is here to help. Connect with our team experts or message us via the live chat for personalized assistance.