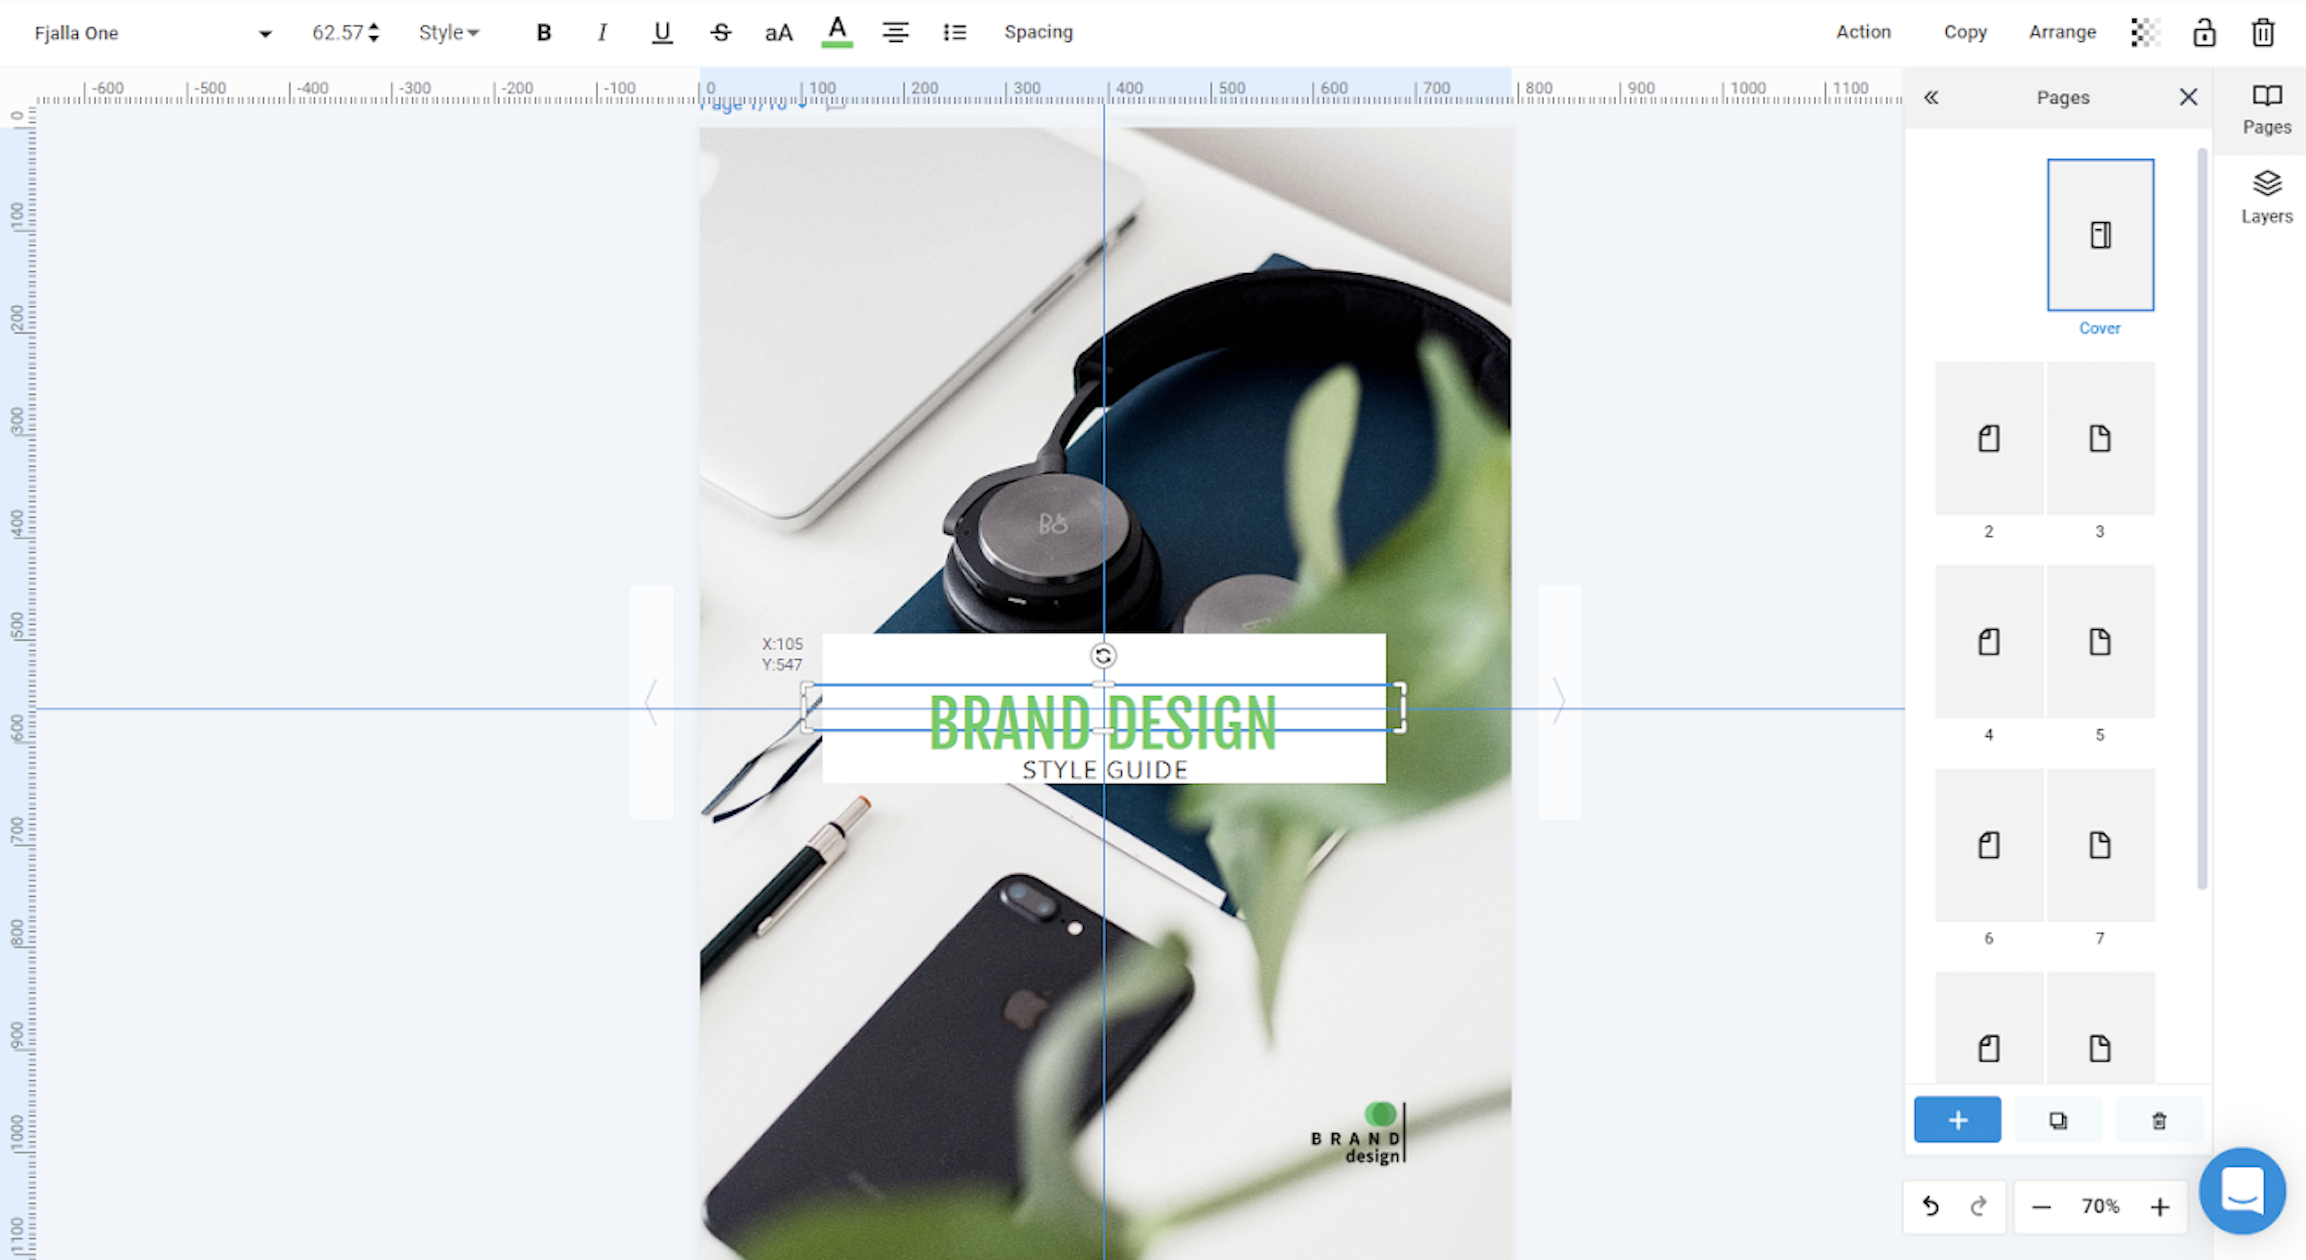
Smart guides in the design tool
How to utilize the smart guides aligning feature
Built within our Design Studio is a simple tool that will allow you to line up any element easily. It’s been around for a while, but we wanted to make sure that you know about it and how to use it.
Of course, we’re talking about smart guides. Maybe some of you already know about this feature and utilize it, but we wanted to give it an official name and a simple tutorial.
Keep in mind that this is a completely separate feature from the rulers that outline the design tool.
Smart guides
When you start editing a flipbook, you will definitely want to add some elements. The position of text, shapes, and images can be perfected both vertically and horizontally by using smart guides.

If you take a look, you’ll notice that when the image becomes centered, a blue line will appear, showing you the exact center.
As you add more layers of elements, the lines will also help you center, align, and match the positions of the other elements around.
You can lock the guide’s position so that when you edit other elements on a page, it doesn’t re-adjust by mistake. Go to the top menu -> View, then click on Lock guide option. Once locked, you can easily add new rulers and once you release them on the page, they automatically lock in that specific spot. Improve design precision and maintain a cohesive layout without accidental changes.
Important: These lines will only appear when you move an element and hold down the mouse button.
That pretty much summarizes this feature. It’s nothing complex, but it certainly helps you nail the look that you’re going for with ease.
If you have any other questions, don’t hesitate to contact us via live chat. One of our amazing representatives will be happy to answer any questions you may have.