Clipping masks for images
Learn how to use clipping masks - cut out images in a particular form or shape
Overview
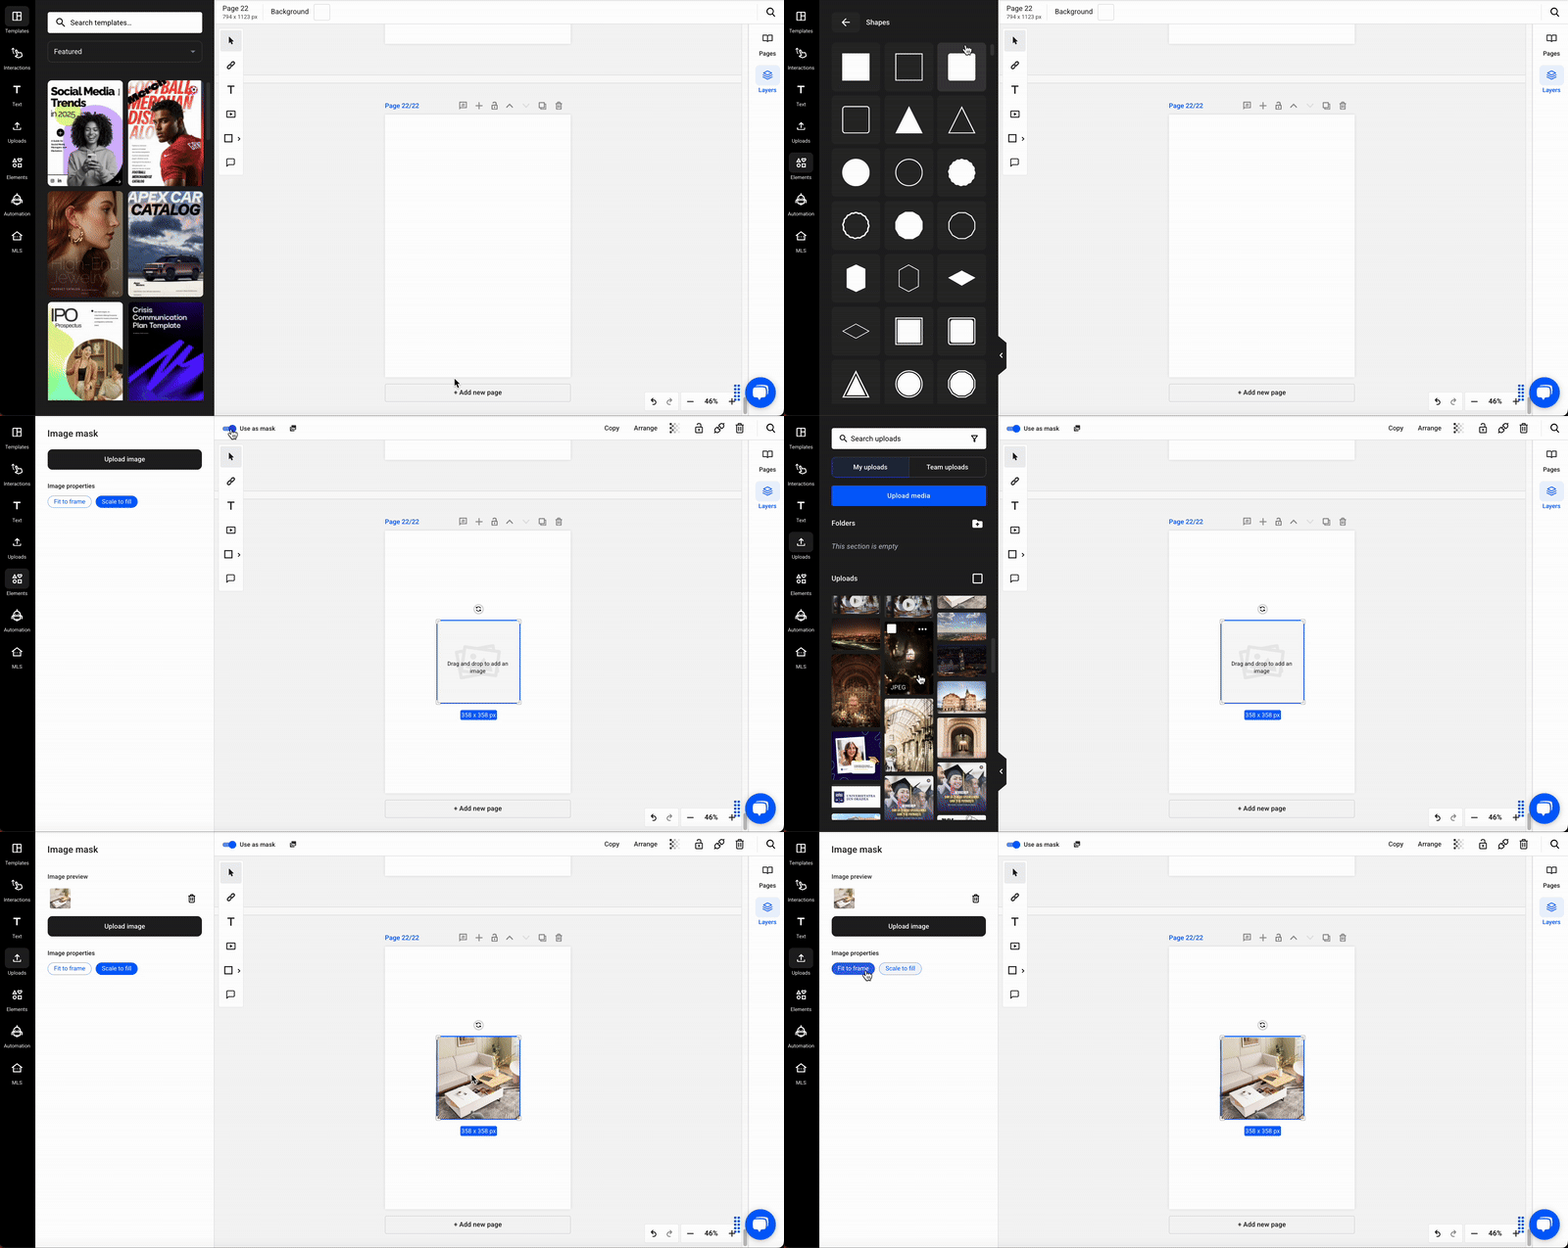
Clipping masks allow you to crop images to a specific shape in your Flipsnack design, adding a creative and professional touch to your flipbooks. You can insert images inside shapes like circles, stars, or rectangles with just a few clicks. You can also control how the image fits inside the shape by choosing between the Fit or Fill options.
Step-by-step guide
1. Select a shape
- Open the Design Studio in Flipsnack
- Go to the Shapes tab in the left panel
- Choose a shape (e.g., circle, star, polygon) and drag it onto your canvas
2. Use the shape as a mask
- Position the shape on your page
- Select the shape, then click Use as mask from the top bar
3. Add your image
- Open the Upload tab
- Drag and drop any image from your uploads or image library (Unsplash, Pexels, Pixabay) onto the masked shape
Note: You can also upload an image directly from your computer by clicking the Upload image button in the Image mask panel.

4. Choose Fit or Fill
- After placing the image, click on the shape, and you will see two options: Click on Fit or Fill.
- Fit: Displays the entire image inside the shape (may add padding)
- Fill: Crops the image to fill the shape area
For any questions, don’t hesitate to contact us via live chat, and we’ll be more than happy to help.