Learn step by step how to set up Okta SAML SSO with Flipsnack
In this tutorial, we’re going to show you how to integrate Flipsnack with Okta SAML SSO.
Table of contents:
If this solution doesn't require your needs, we have other SSO integrations, such as:
That being said, here are some of the many benefits of integrating Flipsnack with Okta SAML:
-
You can control who has access to Flipsnack in Okta.
-
You can enable your users to automatically sign in to Flipsnack (Single Sign-On) with your organization accounts.
-
You can manage your accounts in one central location.
Prerequisites
To configure Okta SAML integration with Flipsnack, you’ll first need:
-
An Okta subscription. If you don't have an Okta subscription, you can get a free trial here.
-
Flipsnack subscription with the single sign-on option enabled.
Create a SAML application
To be able to integrate Flipsnack with Okta, you need to configure a SAML application in Okta.
To set up the application, perform the following steps:
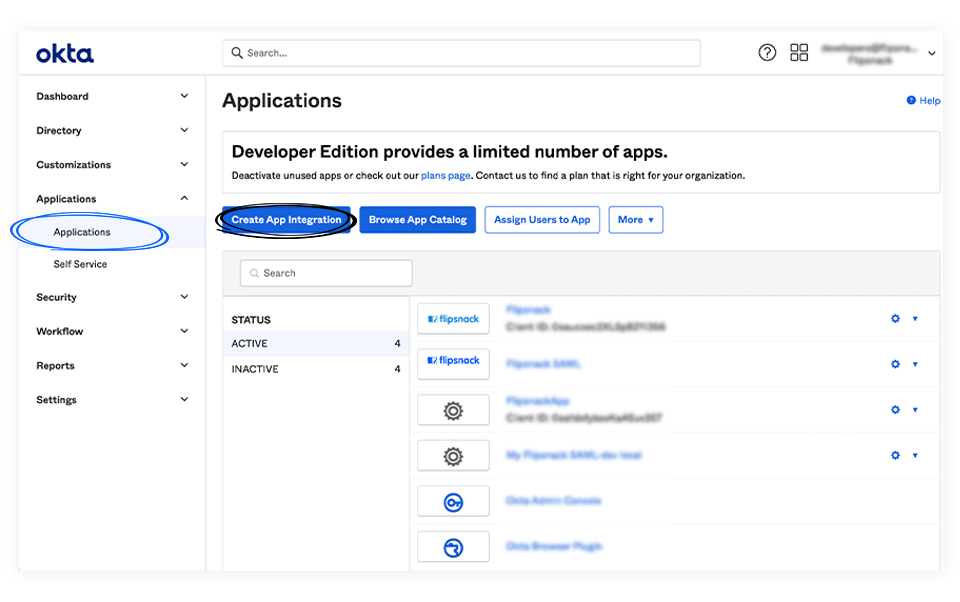
1. Log in to Okta and on the left navigation panel, click on Applications, then on Create App Integration.
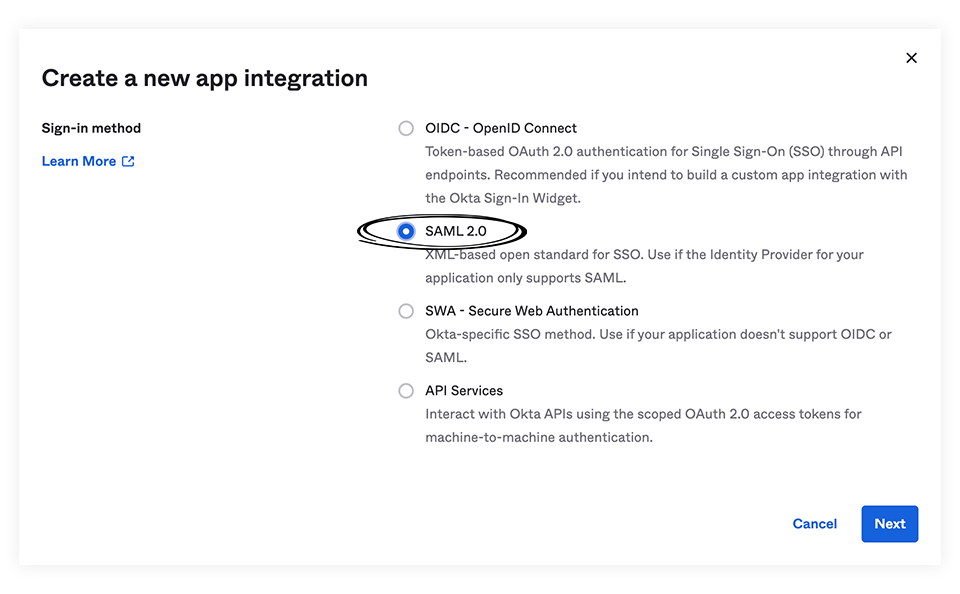
2. In the newly opened pop-up, select SAML 2.0, then click on Next.
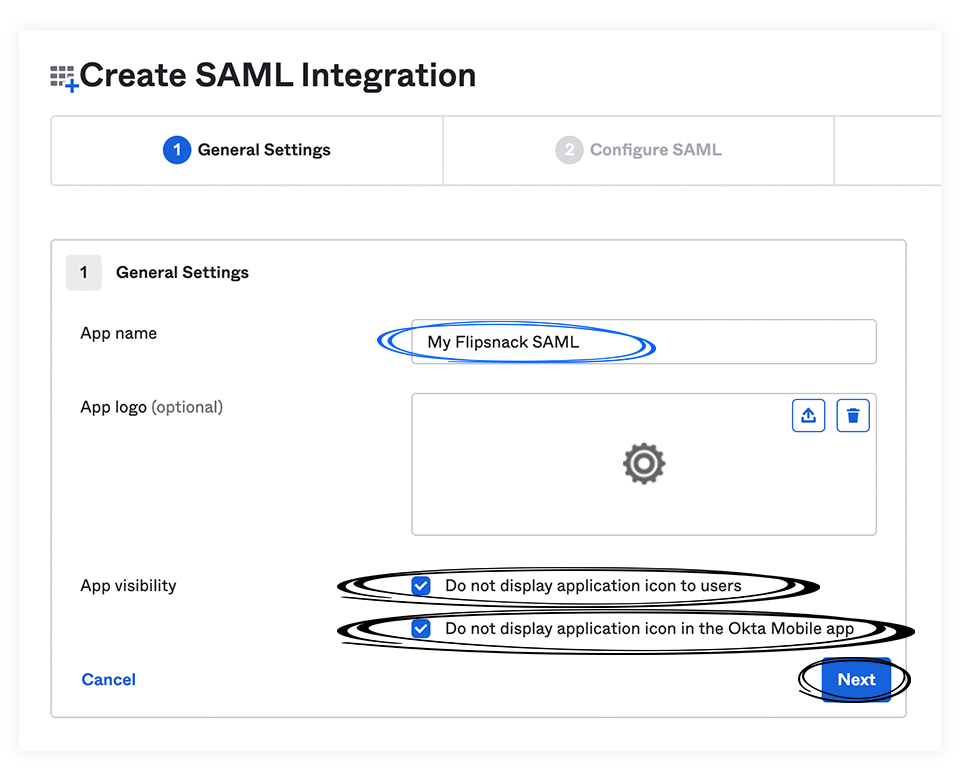
3. You are now ready to complete your SAML integration. At General Settings you need to fill in your application name. Check the “Do not display application icon to users" and “Do not display application icon in the Okta Mobile app" boxes and select Next.
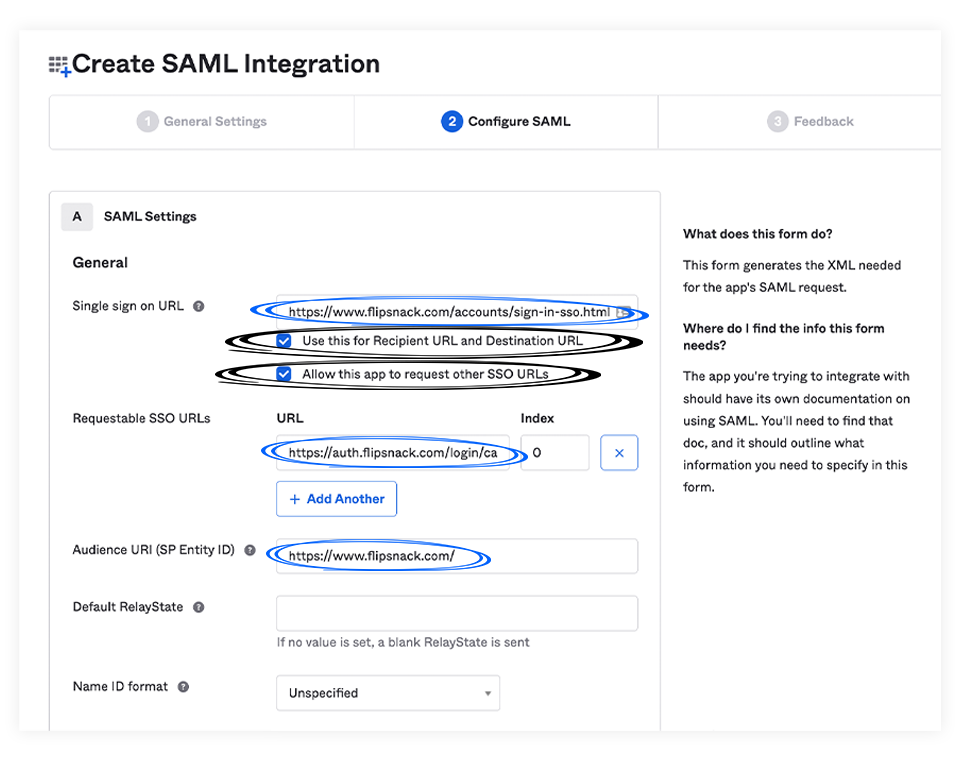
4. At Configure SAML, fill in the following information and select Next:
-
Single sign-on URL:https://www.flipsnack.com/accounts/sign-in-sso.html
-
Audience URI (SP Entity ID): https://www.flipsnack.com
Important: Check the “Use this for Recipient URL and “Destination URL" box.
We have introduced the SSO for viewers option, which allows you to privately share the publications only with the users from your SSO system. (They will not be required to create a Flipsnack account.) In order to do this, check the Allow this app to request other SSO URLs checkbox. Once checked, enter the following link under the Requestable SSO URL field: https://auth.flipsnack.com/login/callback
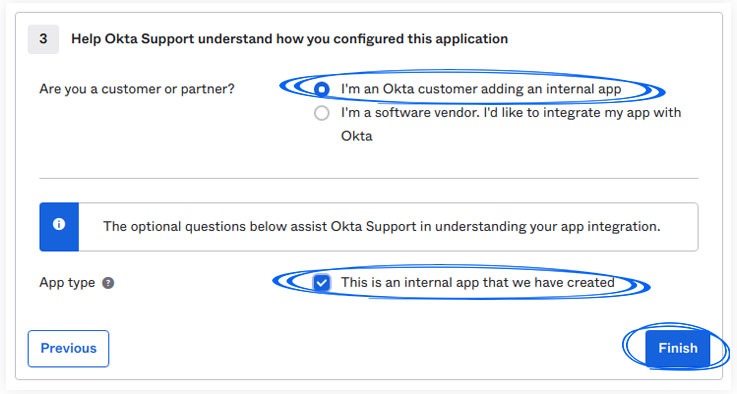
5. In the Feedback section, select “I’m an Okta customer adding an internal app" and “This is an internal app that we have created", then click Finish.
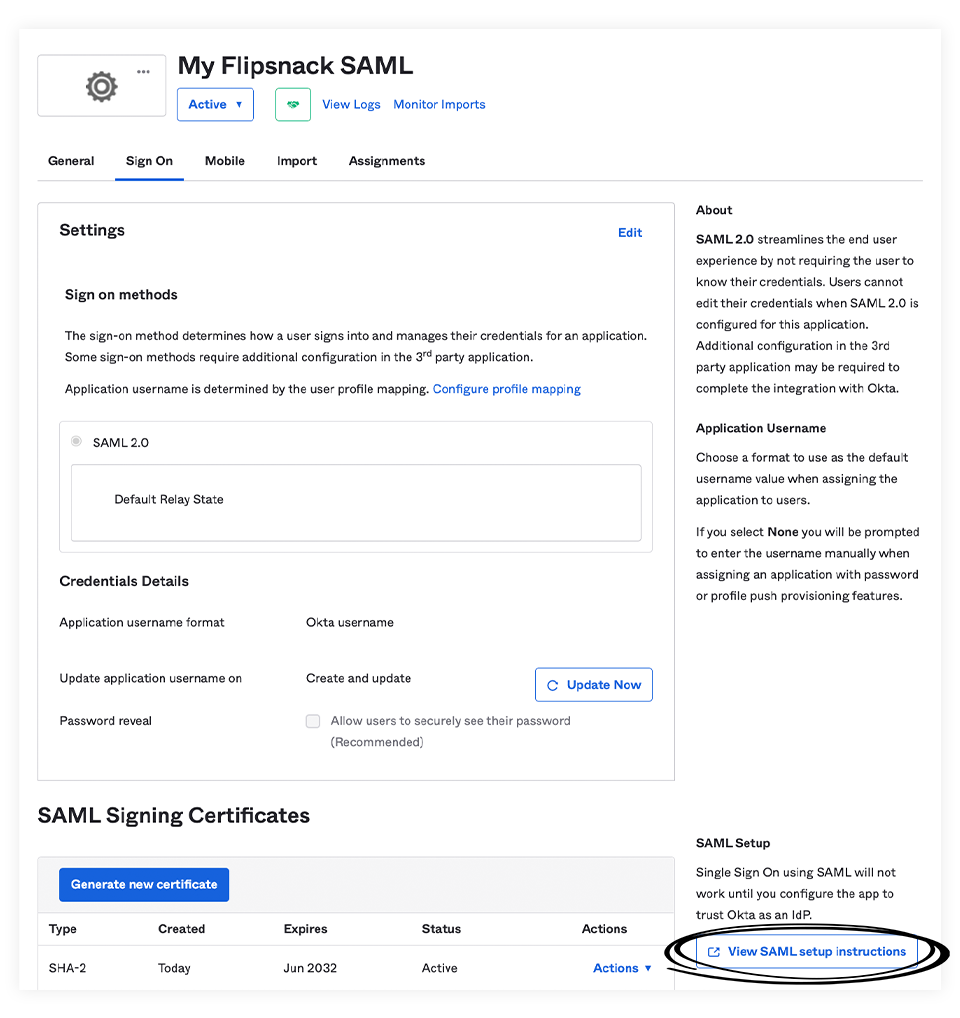
6. For your application to be ready, you must complete the setup instructions. Click on View SAML Setup Instructions and copy the information to configure SAML in Flipsnack.
Configure SAML in Flipsnack
1. Go to Flipsnack SSO settings.
2. Enable SSO, and choose the SAML protocol. The Login URL and Identifier must be copied from Okta.
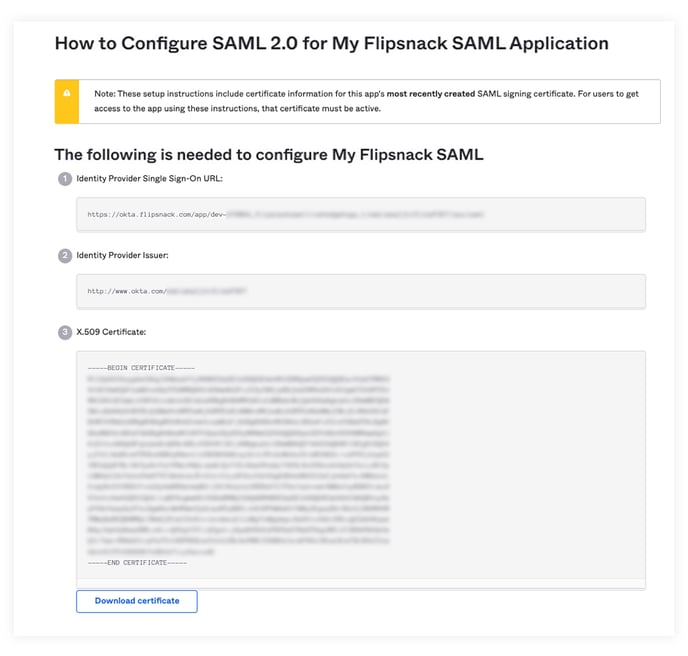
3. Copy/paste the following:
Login URL -> Identity Provider Single Sign-On URL
Identifier -> Identity Provider Issuer.
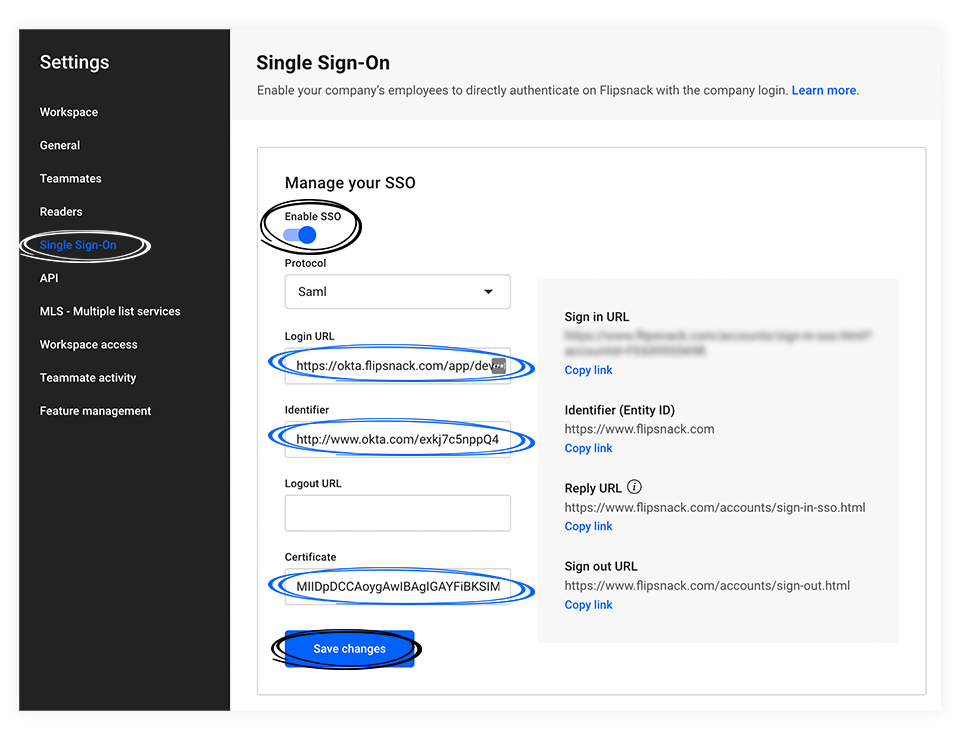
4. Copy/paste the certificate as text in the Certificate field.
5. Click Save Changes. Now your integration between Flipsnack and Okta SAML SSO is completed.
Please contact our support team via live chat if you need help setting up Okta SAML SSO with Flipsnack.